How to Install a Whole House Reverse Osmosis System
Written by: Gene Fitzgerald // Last Updated: Jan 31, 2023
This page may contain affiliate links. If you buy a product or service through such a link we earn a commission at no extra cost to you. Learn more.
Installing a whole house reverse osmosis system is not very simple, but it’s definitely not beyond the capabilities of a crafty person with the right tools.
It’s recommended to work with a professional if you can afford it, but if that’s not an option, here is a rundown of the process and what you can expect at each step of the way.
Contents
show
Key Takeaways
- It’s recommended to work with a professional for the installation of a whole house reverse osmosis system, although it’s also possible to do it yourself if you’ve got the skills and equipment (see steps below).
- Professional installation can cost around $500 – $1,000+.
- DIY installation may affect your warranty.
How to Install a Whole House Reverse Osmosis System
So, how to install a whole house reverse osmosis system?
First, if you don’t have any prior experience with plumbing or general maintenance work, it’s highly recommended to work with an experienced contractor who knows what they’re doing. Sometimes this will also have implications on your warranty, so it’s important to check with your manufacturer to ensure that you’re not compromising anything by installing the system yourself.
With that out of the way, manufacturers usually provide detailed step-by-step installation instructions including images, plus knowledgeable support. So this would make a DIY installation a lot easier.
Where Should You Install a Whole House Reverse Osmosis System?
You will need a room with a lot of space to install a whole house reverse osmosis system, especially if you’re also planning to use additional pre and post-treatment solutions, which you most likely do.
The system must be hooked to your main water supply. Most people install their whole home RO systems in their basements or utility rooms, although this is entirely up to you. You may have a more suitable room in your house.
Tools You’ll Need
Here are most of the tools you’ll need for the installation. Your individual case may call for additional equipment, so check the instructions carefully before starting.
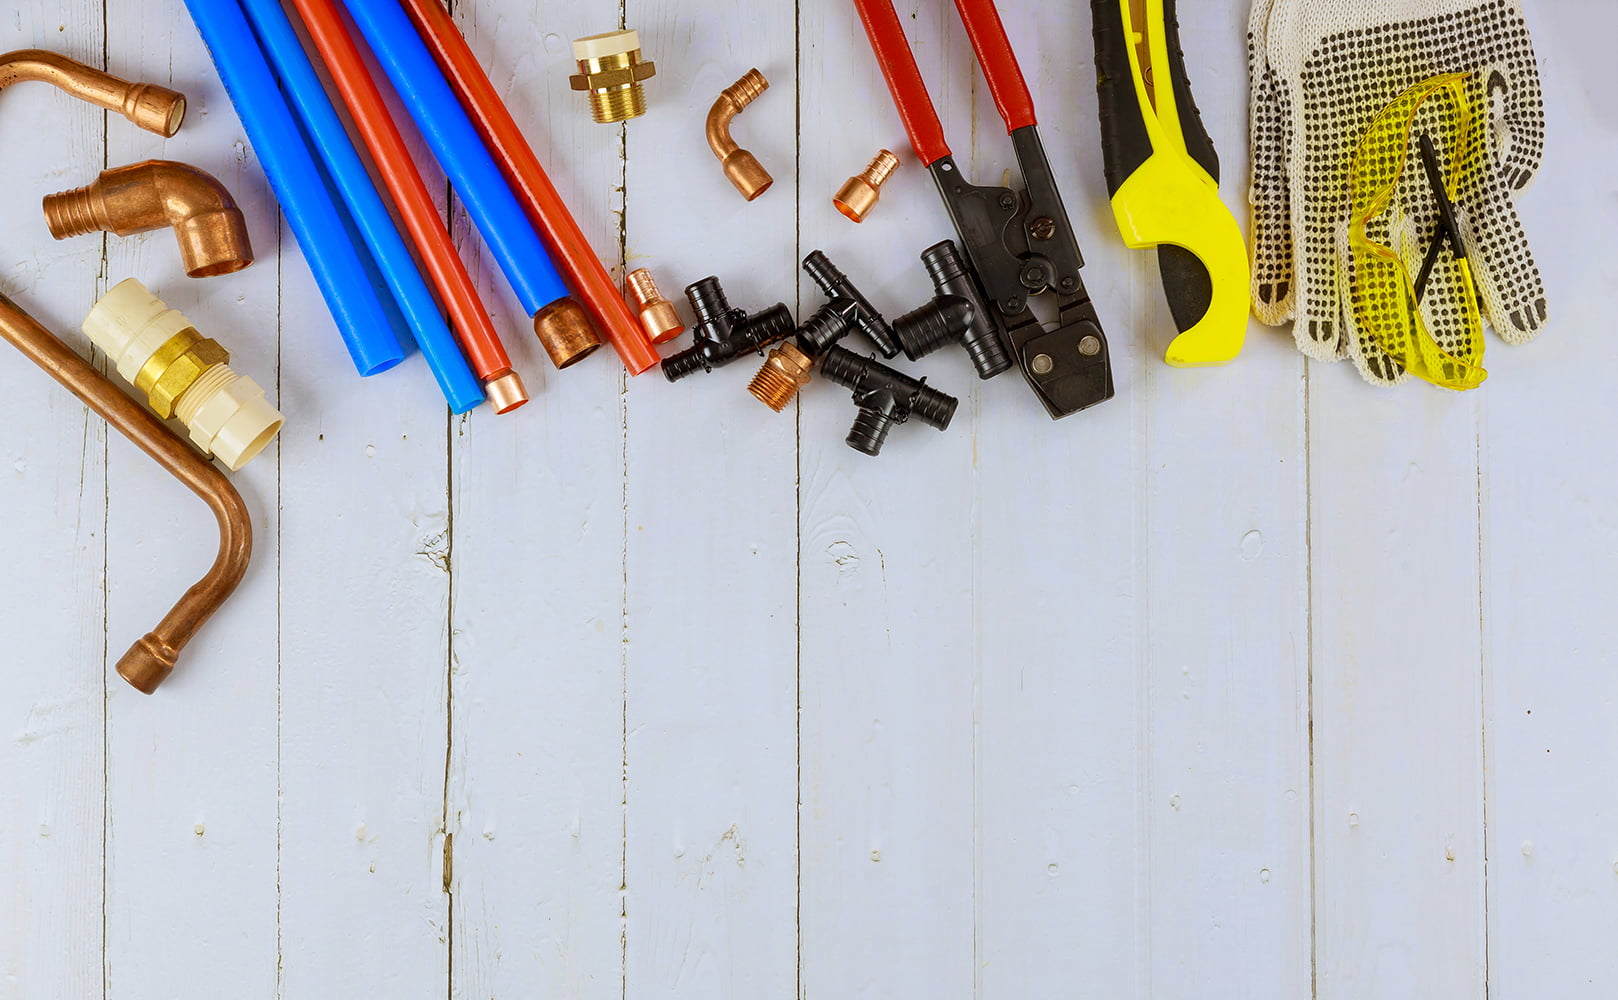
- Adjustable pliers
- Teflon tape
- Pipe cutter
- Screwdriver
- Solder supplies
- Mounting brackets
- Valves
- Connectors
- Push fittings
- Elbows
- Tees
Step By Step Installation Instructions
Below you’ll find a step-by-step guide on installing a typical whole house RO water filter. Note that the exact steps may differ in your own model.
Hook Up the Water Connections
You should start by hooking up the water connections. This should always be done before any electrical work.
Feed water
The feed water connection has a special inlet for it, with a matching one on the system housing. The most important consideration here is to ensure that the feed line is at least 3/4″.
Permeate
You should have dedicated tubing for the permeate connection – it may be labeled. Attach it to the water storage tank. It’s very important to ensure that water can flow without any obstructions or back pressure, otherwise you risk damaging your RO system. Do not use any soft metals for this connection as they can leave deposits in the water.
Wastewater
In a similar fashion, find the tubing for your wastewater connection and hook it up to a drain. If you’re planning on using any recycling solutions, you should attach it to those instead.
Repressurization Pump
Before installing the repressurization pump, you might have to apply Teflon tape to the connector. The same goes for the ball valve. You may need two separate wrenches to tighten the connection.
Plumbing Distribution
Finally, hook up the unit to the plumbing distribution system with the dedicated connector.
Hook Up the Electrical Connections
Now that the plumbing is done, it’s safe to start working on the electrical parts of the system. Carefully check the system for leaks before starting to avoid any unpleasant surprises.
Power Supply
Connecting the main power supply should be pretty straightforward in most models – you just plug it into an appropriate outlet. Make sure you have an adequate power supply according to the manufacturer’s specifications!
Repressurization Pump
You will usually need a dedicated 110V outlet for the repressurization pump. Pay attention to the voltage requirements of your model.
UV Purifier
The same applies for any UV purifier if you’re using one. It requires a constant 110V power supply. Ideally, all main components of the system should be connected to separate circuits to avoid overloading your electrical installation.
Connect Your Pre-filters
Every whole house RO system requires a set of pre-filters for optimal operation. What those filters are exactly depends on your individual case. Most commonly, you’d want to at least treat your water for sediment and dirt.
In any case, make sure that all of those filters are connected before the RO membrane in the overall filtration chain. Leave enough room for their installation at the start of the job.
Connect Your Post-treatment Systems
Now it’s time to connect the post-treatment systems. Again, these will vary from one household to another. You’ll often use at least a UV water purifier for disinfection, but your household may require additional treatment methods on top of that.
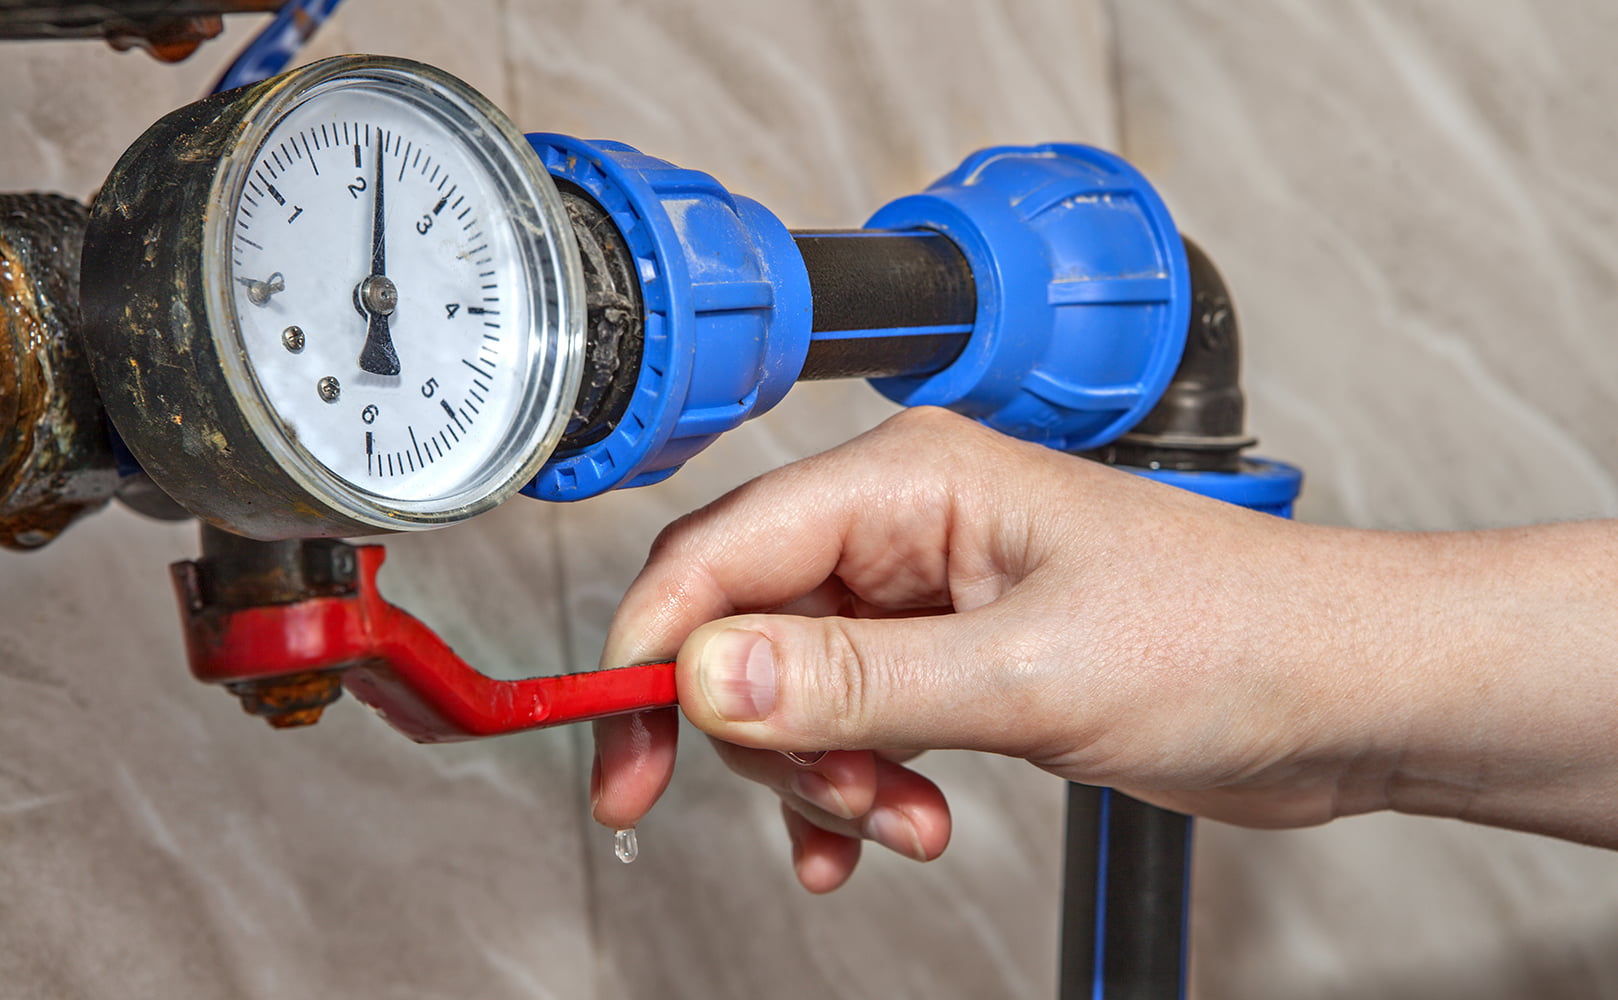
Configure the Flow Rates
You’ll want to configure your flow rates before using the whole house RO. Before doing that, the system must be flushed. Try to clear out the pre-filters if that’s an option in your case. In addition, ensure that you have at least 30 psi of pressure in the system at all times. You should not allow the pressure to drop below this level during the configuration phase or the subsequent operation.
Start by opening the wastewater valve. After that, turn on the RO system and let it run for about 10 minutes to let out all the air. At this point, you should have a pressure of around 50 psi at the inlet – as we mentioned above, it must not go below 30 in any case. Then, carefully configure the system to the flow rate you want to use, maintaining the pressure level below 150 psi at all times.
How Much Does Whole House Reverse Osmosis Installation Cost?
You should set aside at least $500 for the professional installation of a whole house RO system. This price can go up if you need additional modification of your plumbing. $500 is generally a lower estimate so you should expect to pay around $1,000 in most scenarios.
DIY Installation
Installing the system yourself can allow you to save money, although you will have to invest your own time. For some people, the cost of paying a professional makes the process worth it.
Further Reading:
Calling a Professional: Who Installs Whole House RO Systems?
If you want to work with a professional, you’ll need to find a good plumber or contractor. Try to find someone with specific experience in water treatment systems, especially if they’ve already worked on RO system installation jobs before.
Considerations Before Installing Whole House Reverse Osmosis
Before installing your system, you should consider a few points to ensure that you’re getting the best value for your money.
Sizing
You should invest in a system with adequate parameters for your household’s needs. If you have a larger household with multiple people using water every day, you’ll need a system that supports higher daily filtration capacities and pressure levels.
Pre and Post-Treatment
You will pretty much always benefit from a pre-filtration step. This is necessary to remove various contaminants from your water before it reaches the reverse osmosis stage, improving its efficiency and preventing it from getting clogged.
Post-treatment is also important in most cases, for example when you have a high level of biological contaminants. In this case, you should look into at least hooking up a UV purifier.
Wastewater
Whole house reverse osmosis filtration generates a lot of wastewater in its operation. Some people choose to ignore that factor and live with the costs, but it’s possible to recycle the water to improve the efficiency of the filter.
Space Requirements
Make sure you have enough space available to support the full system. Don’t underestimate the sizing requirements of some more comprehensive units, especially if you’re planning to add lots of additional filtration steps.
Costs
And of course, pay attention to the price. Reverse osmosis systems can be expensive in general, but it’s often possible to save some money by being careful about the exact parameters of the system.
If you have any questions about whole house reverse osmosis system installation please don’t hesitate to leave a comment below!
About the Author Gene Fitzgerald
![]()
![]()
![]()
![]()
![]()
![]()
![]()

Information provided on BOS is for educational purposes only. The products and services we review may not be right for your individual circumstances.
We adhere to strict editorial guidelines. Rest assured, the opinions expressed have not been provided, reviewed, or otherwise endorsed by our partners – they are unbiased, independent, and the author’s alone. Our licensed experts fact-check all content for accuracy. It is accurate as of the date posted and to the best of our knowledge.