How to Make a DIY Gravity Water Filter | Step by Step Instructions
Written by: Alexandra Uta // Last Updated: Mar 25, 2023
This page may contain affiliate links. If you buy a product or service through such a link we earn a commission at no extra cost to you. Learn more.
A gravity water filter is a great way to provide yourself with a constant supply of fresh, clean water – as long as you remember to refill it, that is.
There are multiple options on the consumer market, each with its advantages and disadvantages.
One of the great things about gravity water filters is that you don’t have to limit yourself to the market though – you can also build one yourself. How? Find out below!
Contents
show
Key Takeaways
Here is how to make a DIY gravity water filter:
- You need 2 buckets. Drill a hole into the top (lid) of bucket A, and a hole in the bottom of bucket B.
- Drill a hole into the side of bucket A, towards the bottom, and install a spigot in that hole.
- Stack bucket B on top of bucket A aligning the holes.
- Secure a ceramic water filter candle using said holes. Tighten from underneath.
- Fill bucket B with water, check for leaks, and wait for purified water collecting in bucket A.
What Is a Gravity Water Filter Using Ceramic Filter Candles?
A gravity water filter is a device which uses gravity to transfer water from one tank into another, passing through one or a series of filters in between. Along the way, the water is freed from all kinds of water contaminants and impurities.
The process requires no electricity and no external pressure source, working entirely with the help of gravity.
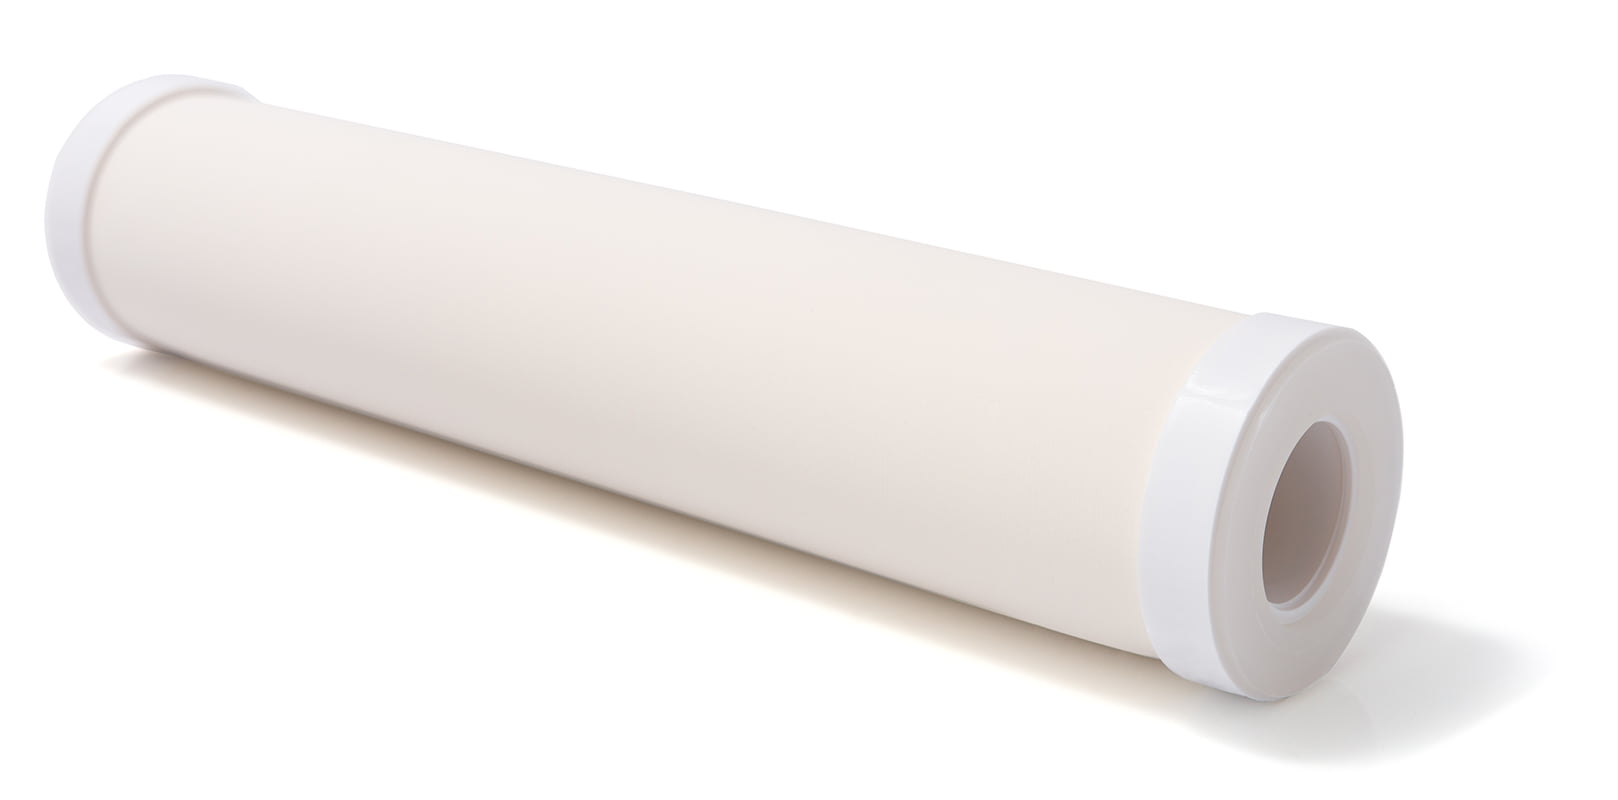
Ceramic filter candles are filtration elements that are commonly used in gravity water filters. They are also sold separately, allowing you to construct your own filter if you have the right tools and know what you’re doing.
How Does Our Homemade Gravity Water Filter Work?
The idea behind our homemade gravity water filter is really simple. We’ll take two large plastic buckets, combine them with some drilling, and install a ceramic filter cartridge between them. After the device is constructed, all you have to do is pour water into the top bucket and wait for it to run through the filter into the bottom one.
It’s technically possible to use other types of filter elements, but those are more complicated to install and have various other disadvantages. For most purposes, a ceramic filter candle should do the job just fine. Of course, you should investigate the quality of your water supply to verify that you’re using all necessary filters to purify it thoroughly.
How to Make a DIY Gravity Water Filter – Step by Step Instructions
With the basics out of the way, let’s have a look at making your own DIY gravity water filter. You won’t need any specialized equipment other than the ceramic filter candle. Pretty much everything else can be procured at your local hardware store. There’s a good chance that you can buy the candles there as well.
Gear and Components You’ll Need
You’ll need the following components and tools for the job:
- Two large plastic buckets
- A spigot
- A drill with several drill bits of different sizes – ideally, at least a 1/2″ and a 3/8” bit
- A ceramic filter cartridge
Setup
Once you’ve gathered all necessary items, you can proceed with the setup. The whole thing shouldn’t take you more than 15 minutes to complete, even if you’re doing it for the first time. Make sure you’re comfortable working with a drill, of course.
Step 1: Drill Holes in the Buckets
You need to drill one hole in each bucket. One bucket (bucket A) should be drilled through the top (the lid), the other one (bucket B) through the bottom. Do your best to align the two holes. You can use a source of light to help you see through the plastic a little better.
Step 2: Install the Spigot
Drill another hole into bucket A (the one which you drilled through the top in the previous step) on its side and close to the bottom. Use that hole to install the spigot.
Step 3: Insert the Ceramic Filter Candle and Connect the Two Buckets
Stack bucket B on top of bucket A. Make sure to align the two as best as you can.
Install the ceramic filter candle. It should fit snugly into the holes you’ve created for it.
Step 4: Secure the Ceramic Filter Candle
Use nuts to secure the ceramic filter candle in place. This may not always be necessary, depending on the design of the candle and the exact size of the holes you’ve drilled. In some cases, the candle should fit into the holes in the buckets without the need for additional fastening.
Step 5: Check for Leaks
Now that the setup is complete, run a quick test to verify there are no leaks. Pay special attention to the holes around the ceramic candle and the spigot. Water leaking around the candle will compromise the performance of your filtration system and allow contaminants to make their way into the filtered water.
How to Filter Water Using Your New DIY Gravity-Fed Water Filter
To use your new homemade gravity water filter, simply fill the top bucket with water and wait. After some time, water will flow through the candle and will fill up the bottom bucket. This can take a while, so be patient.
Using larger buckets can provide you with more storage, but it can also lead to a stale taste in your water if it’s been sitting in the bottom bucket for too long.

Pros & Cons
Pros
- Always have a supply of fresh drinking water available
- No need to be dependent on electricity and other utilities for your filtration to work
- Cheap and easy to construct
- Uses commonly available household items
- Little maintenance compared to other filtration methods
Cons
- Takes a long time to filter water
- Must be refilled manually – using the bottom bucket as a storage tank can work, but you shouldn’t leave water sitting in it for too long
- Plastic buckets may eventually crack, especially if you move them around too much
Further Reading:
System Cost
Overall, the total cost of this system is really low. Here’s a summary of your anticipated expenses:
- Ceramic filter candle – around $20-40
- Large plastic bucket – around $10 each, 2x
- Spigot – around $15
As you can see, it will cost you a little over $50-70 to craft this, without accounting for the cost of the drill and its bits. While you can find some cheaper models on the market, constructing your own water filter has the advantage of providing you with more flexibility in its configuration, including the tank size.
If you have any questions about our homemade gravity water filter please don’t hesitate to leave a comment below!
About the Author Alexandra Uta
![]()
![]()
![]()

Information provided on BOS is for educational purposes only. The products and services we review may not be right for your individual circumstances.
We adhere to strict editorial guidelines. Rest assured, the opinions expressed have not been provided, reviewed, or otherwise endorsed by our partners – they are unbiased, independent, and the author’s alone. Our licensed experts fact-check all content for accuracy. It is accurate as of the date posted and to the best of our knowledge.