How to Make a DIY Reverse Osmosis Membrane at Home
Written by: Gene Fitzgerald // Last Updated: Mar 9, 2023
This page may contain affiliate links. If you buy a product or service through such a link we earn a commission at no extra cost to you. Learn more.
With the popularity of reverse osmosis water purification is continuing to rise among domestic users, some people have started to explore the DIY opportunities on that front.
And while there’s certainly some room for tinkering with your RO system, some parts are well beyond the reach of the average user. Doe this include the RO membrane?
Let’s find out!
Contents
show
Key Takeaways
- Making a DIY RO membrane from scratch at home is not feasible. The construction of such a membrane is simply way too complicated.
- What you can do is buy all the components required for a reverse osmosis system and put them together yourself.
How to Make a DIY Reverse Osmosis Membrane at Home
If you’re hoping to make your own reverse osmosis membrane from scratch, you will probably be disappointed to find out that this isn’t feasible. The construction process is very complicated and requires advanced materials and equipment.
That’s why reverse osmosis membranes are exclusively produced by specialized facilities. Even if you could procure all necessary materials easily, putting them together with household tools is just not possible.
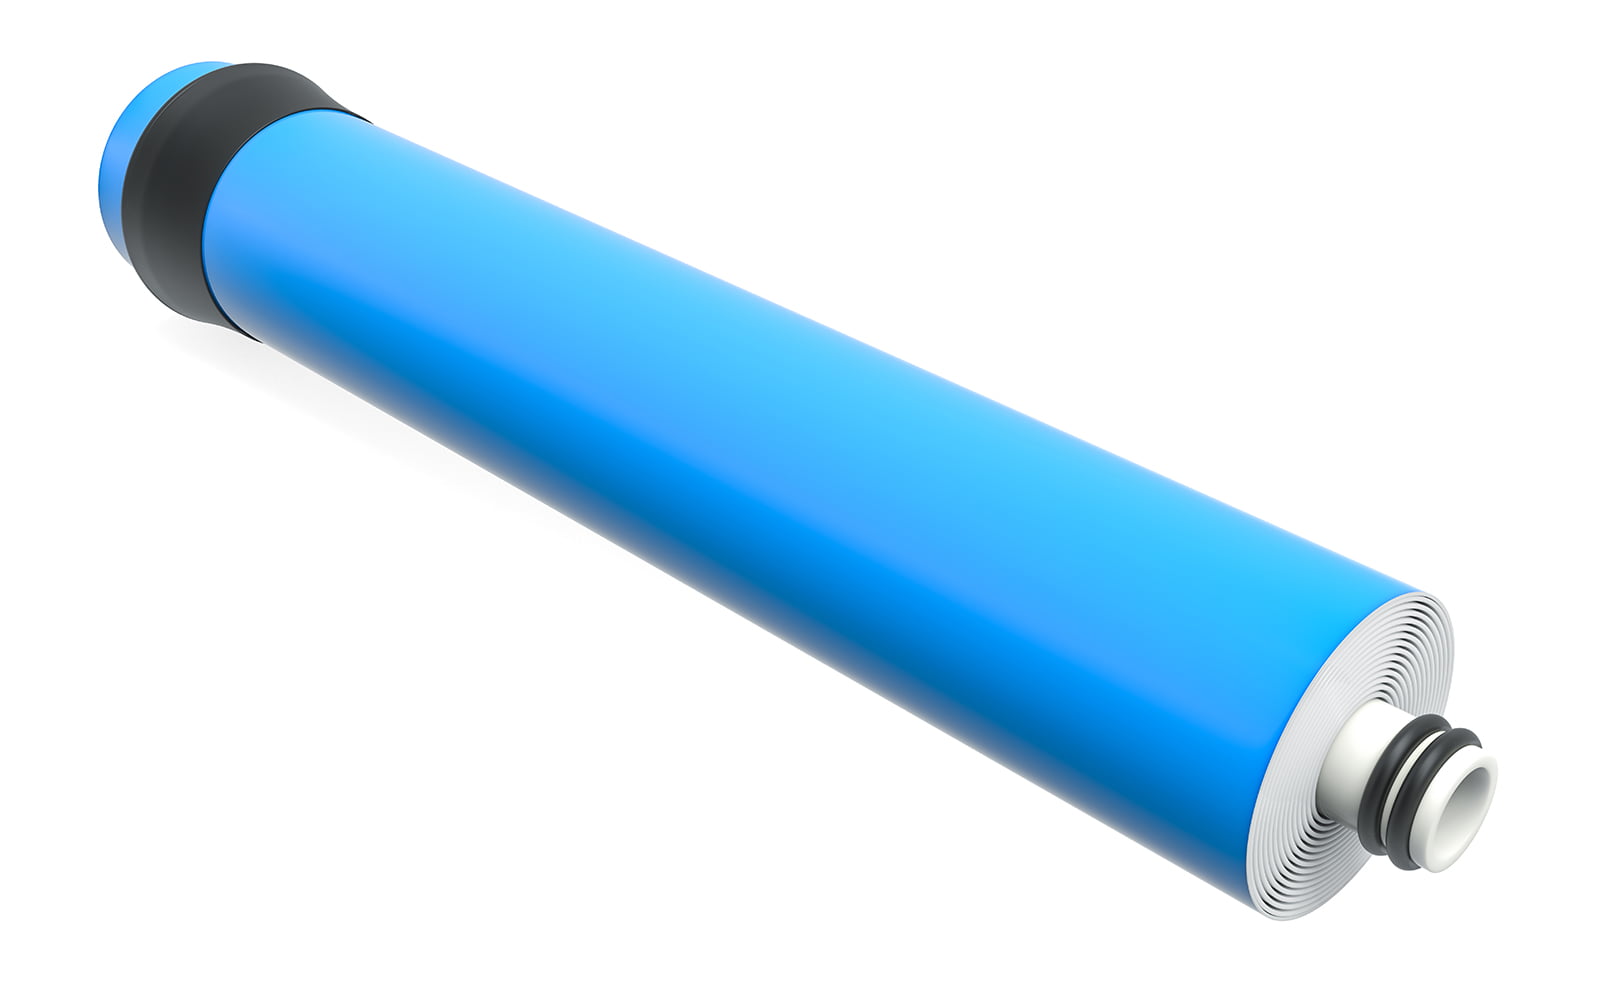
RO Membrane Construction Is Complicated
A reverse osmosis membrane consists of several specialized materials wound into a spiral, and inserted into a tube. Most of these materials are too difficult and/or expensive to acquire for the average person. The tools required to process them and create the complete membrane setup are also not something you will find in your garage.
Buy an RO Membrane and Connect It Yourself
The closest you can get to a DIY RO membrane in this regard is to buy one, plus all the other components that make up a reverse osmosis system, and put everything together yourself. That’s not a very complicated process, but it should at least satisfy your craving for a do-it-yourself project to some extent.
Tools and Supplies
You don’t need many tools and supplies for this job. You should be fine with some basics like:
- Utility knife
- Wrench
- Plumber’s tape
- RO system components (see below)
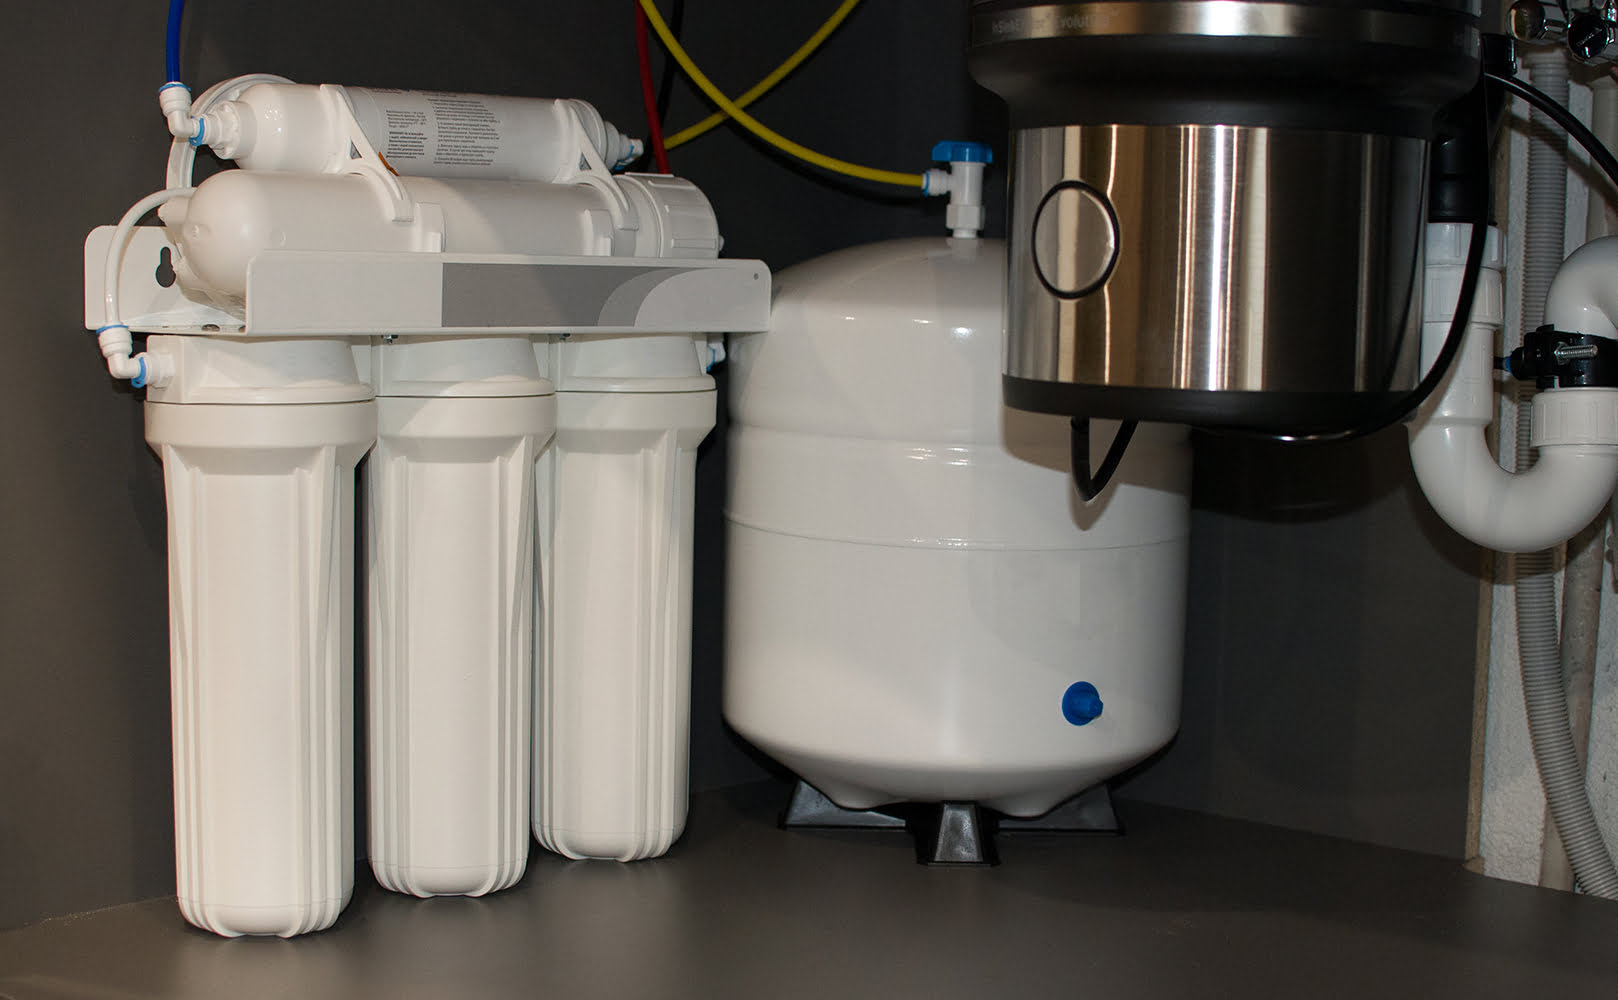
Reverse Osmosis System Components
Here are the main components of a reverse osmosis system. You should familiarize yourself with each one if you’re planning to do any DIY work.
Feed Water Adapter
The feed water adapter is used to connect your RO system to the household water supply. All unfiltered water passes through the valve first.
Pre-Filters
A reverse osmosis system requires some pre-filtration stages to operate optimally and to prevent damage to the RO membrane in the long term. These can vary according to the contaminants you’re specifically dealing with. Most important are sediment and carbon pre-filters.
Reverse Osmosis Membrane
The reverse osmosis membrane is where the actual RO process takes place. Water is pushed through the membrane at high pressure, and only water molecules pass through the membrane.
Storage Tank
A storage tank helps provide immediate access to filtered water without having to wait. This can be particularly useful in a large household with lots of people who drink water.
Post-Filtration
Water dispensed from the storage tank should usually also pass through some final post-filtration stages to further purify it and improve its taste and/or smell.
ASO Valve
The Automatic Shut Off valve ensures that the system can turn itself off when the storage tank is full, preventing wastage.
Check Valve
The check valve prevents water from flowing back into the membrane from the storage tank. This is a crucial component of an RO system, as allowing backflow can result in permanent damage to the membrane.
Flow Restrictor
With the help of a flow restrictor, you can maintain adequate pressure in your system to ensure optimal operation.
Tees and Elbows
These are required for connecting the various components.
Further Reading:
Installation
Here’s a brief rundown of the installation process for a reverse osmosis system:
- Use plumber’s tape on all fittings to ensure a tight fit.
- Install fittings on the membrane housing, following the manufacturer’s guidelines for the connection directions.
- Install the membrane in its housing, taking extra care to avoid touching the membrane as much as possible.
- Install the pre-filters and ASO.
- Hook up the ASO outlet to the membrane inlet.
- Hook up the check valve to the ASO.
- Attach the ASO to the T-fitting.
- Hook up the T-fitting to the post-filter.
- Attach the mounting clips to the membrane.
- Hook up the drain line.
Benefits of Reverse Osmosis Water Purification
Reverse osmosis purification has many benefits compared to other water filtration methods. Here are some points to consider:
- Your water will smell and taste better, especially if it was heavily contaminated before
- Fresh, clean drinking water that’s healthier for the whole family
- Always have purified water available thanks to the storage tank
- Relatively cheap and low-maintenance
If you have any questions about diy RO membranes please don’t hesitate to leave a comment below!
About the Author Gene Fitzgerald
![]()
![]()
![]()
![]()
![]()
![]()
![]()

Information provided on BOS is for educational purposes only. The products and services we review may not be right for your individual circumstances.
We adhere to strict editorial guidelines. Rest assured, the opinions expressed have not been provided, reviewed, or otherwise endorsed by our partners – they are unbiased, independent, and the author’s alone. Our licensed experts fact-check all content for accuracy. It is accurate as of the date posted and to the best of our knowledge.