How to Install an Under Sink Water Filter System?
Written by: Gene Fitzgerald // Last Updated: Jan 4, 2023
This page may contain affiliate links. If you buy a product or service through such a link we earn a commission at no extra cost to you. Learn more.
Are you tired of spending up to hundreds of dollars every month on bottled water? Or have no more energy left to lug around hefty 5-gallon water jugs? Chances are, you’ve heard about under sink water filters and want to know what the hype is about.
An under sink water filter provides you with the utmost convenience and that too at a fraction of the cost of bottled water. What’s best is they do an equally good job at providing your family with pure, clean, and contaminant-free water right to your kitchen sink.
What about installation, you may ask? It’s simple, quick, and requires little plumbing knowledge. In this short guide, we give you step-by-step instructions for DIY under sink water filter installation. With that said, if you’re not sure you can pull it off yourself, hiring a plumber will cost you around $200.
Contents
show
Key Takeaways
These are the steps on how to install an under sink water filter:
- Close the cold water supply beneath your sink.
- Remove the cold water tubing.
- Install the adapter/feed valve and reconnect the tubing.
- Drill a hole in your sink (only if filter comes with separate dispenser) and install the new faucet.
- Mount the under sink water filter and establish all the connections.
- Turn the water back on, flush the system, and check for leaks.
Under Sink Water Filter Installation: Tools and Supplies You Need
If you have ever attempted any plumbing job around the house, chances are, you already have all the supplies you need. Nevertheless, the installation process requires only a handful of tools readily available at:
- Any hardware store (Lowe’s, Home Depot, Menard’s),
- Or online (e.g. Amazon)
Here is a checklist:
- Under sink water filter (with cartridges)
- Plastic tubing cutters
- Adjustable wrench
- Teflon tape
- Wrench
- Screwdriver
How to Install an Under Sink Water Filter Step by Step
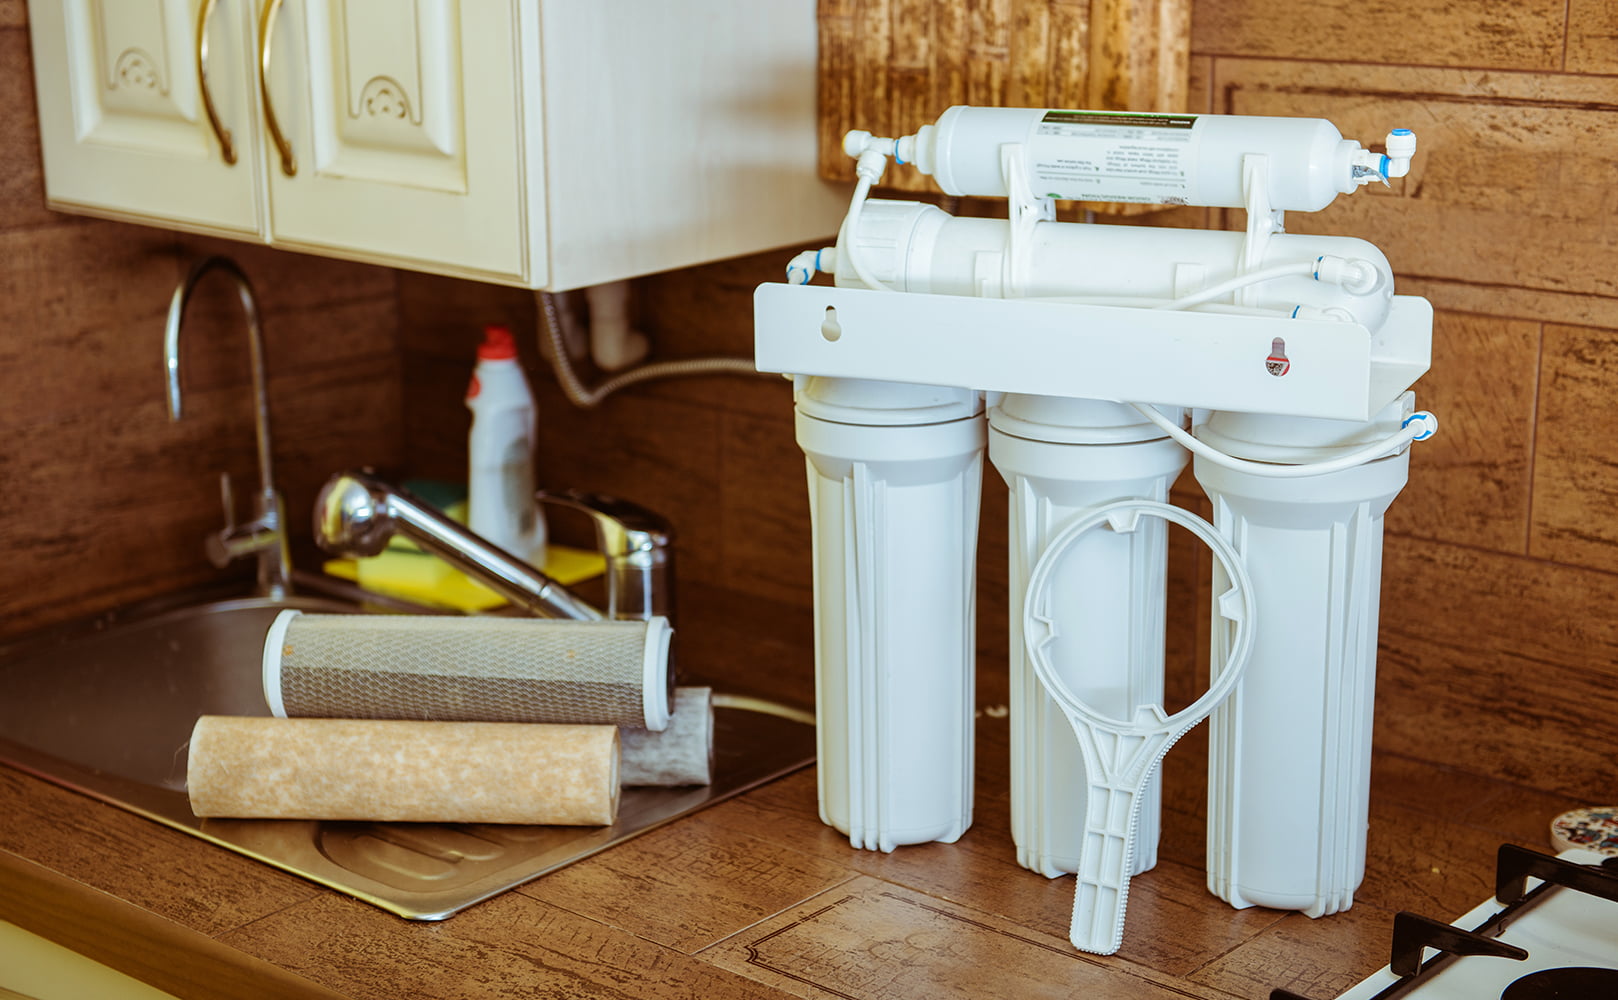
The under sink water filter is mounted inside the cabinet under the sink and plumbed into the cold water line. If you have an RO system, you will need to set up the extra water storage tank inside the cabinet. Some under sink filters come with a dedicated faucet for filtered water that requires an additional step.
Here is how to install an under sink water filer:
1. Close the Cold Water Supply Valve
When you open the kitchen sink cabinet, you will see a drainpipe and two incoming water lines. You need to close the supply valve on the cold water line since the filter is installed only for the cold water supply.
Bonus Tip: Don’t know which pipe is for cold water? Open the hot water tap on the sink. Then, touch the lines to feel which one is hot. Leave that one alone and work on the other.
2. Remove the Cold Water Tubing
You need to break the connection supplying cold water to the kitchen faucet. Use a wrench to loosen the nut and remove the tubing from the water line.
3. Install the Adapter/Feed Valve
Next, you need to install an adapter to the feed water line. Use a copper T-adapter with a branch to establish the ¼-inch tubing connection.
- Wrap Teflon tape around all threads to ensure a proper seal.
- Then carefully thread the T to the cold water line.
- Use two pairs of wrenches to ensure you get a tight fit. Remember, don’t over-tighten.
Now you need to connect the tubing of the under sink water filter to the copper T.
- Attach the shut-off valve to the plastic tubing. This small valve makes cartridge replacements very easy.
- Slide in the nut that is part of the T-fitting.
- Push the copper insert inside the piping to help it stay firm.
- Connect the tubing with the copper T, tightening the fitting.
4. Drill a Hole in Your Sink
If your under sink filter system comes with an extra faucet (dispenser) for filtered water, you need to drill a hole in the countertop. You can also use the pre-drilled hole for soap dispensers. With that said, the standard size for faucet holes is 35 mm or 1⅜ inch.
If you have a granite countertop, you will need a grinder to do the needful. Remember, it’s tricky, messy, and can damage the granite if you don’t know how to do it properly. Here is a helpful video we found online that explains the process clearly:
5. Install the New Faucet
Once you’ve managed to drill a hole in your countertop, it’s time to fit in the extra faucet. You might need a friend or partner to hold the tap on the top while tightening the fitting from inside the cabinet.
If you are using a pre-drilled hole, it might be bigger than you need. Therefore, to make sure no water goes down, stick some putty underneath the faucet’s gasket.
Use a set of washers, nuts, and brass insert for the tubing inside the cupboard and connect the faucet to the filter tubing. Tighten the fittings.
6. Mount the Filter System
Hold the under sink water filtration system against the back or the side of the cupboard and mark where you need the holes. Then, drill the holes using a drill machine.
Always remember to leave enough space under the unit so you can remove the housings easily. Also, make sure you secure the system to the cupboard since it has to bear quite a lot of weight.
7. Make the Plumbing Connections
Move on to connecting the filter stages with the connections you’ve made. Locate the ports on either side of the unit. One of them is for water inflow and the other for outflow.
The cold feed water line should be connected to the inside adapter on the filter head. Similarly, the tubing from the faucet should be pushed into the outside adapter.
Further Reading:
8. Turn the Water Back On
Turn on the valve that you had initially turned off. Next, open the shut-off valve of the filter system by sliding it vertically to the tubing.
It is crucial to open the valve slowly, or you may damage the unit due to sudden high pressure. Press the pressure release button on the top to release any trapped air.
9. Check for Leaks
Carefully inspect all connections for leaks or drips. Fix them right away.
10. Allow the System to Flush
Turn on the cold water faucet and let the water run for a few minutes. It is vital to flush new filter cartridges and remove any contaminants from the line. No need to waste the water – use it for dishes or to water your plants.
Finally, you can enjoy a litany of benefits, thanks to your newly installed under water sink filter.
If you have any questions about under sink water filter system installation please don’t hesitate to leave a comment below!
About the Author Gene Fitzgerald
![]()
![]()
![]()
![]()
![]()
![]()
![]()

Information provided on BOS is for educational purposes only. The products and services we review may not be right for your individual circumstances.
We adhere to strict editorial guidelines. Rest assured, the opinions expressed have not been provided, reviewed, or otherwise endorsed by our partners – they are unbiased, independent, and the author’s alone. Our licensed experts fact-check all content for accuracy. It is accurate as of the date posted and to the best of our knowledge.