Life Expectancy: How Long Does a Reverse Osmosis System Last?
Written by: Alexandra Uta // Last Updated: Mar 27, 2023
This page may contain affiliate links. If you buy a product or service through such a link we earn a commission at no extra cost to you. Learn more.
Today, RO systems protect millions of people from drinking contaminated water.
But have you ever wondered how long reverse osmosis systems last?
This article explains the average life expectancy of such a water filter and shows you how you can maintain yours and get it to last longer!
Contents
show
Key Takeaways
- A reverse osmosis system can last 10 to 15 years if properly maintained.
- Other factors affecting life expectancy of an RO system include water quality and usage.
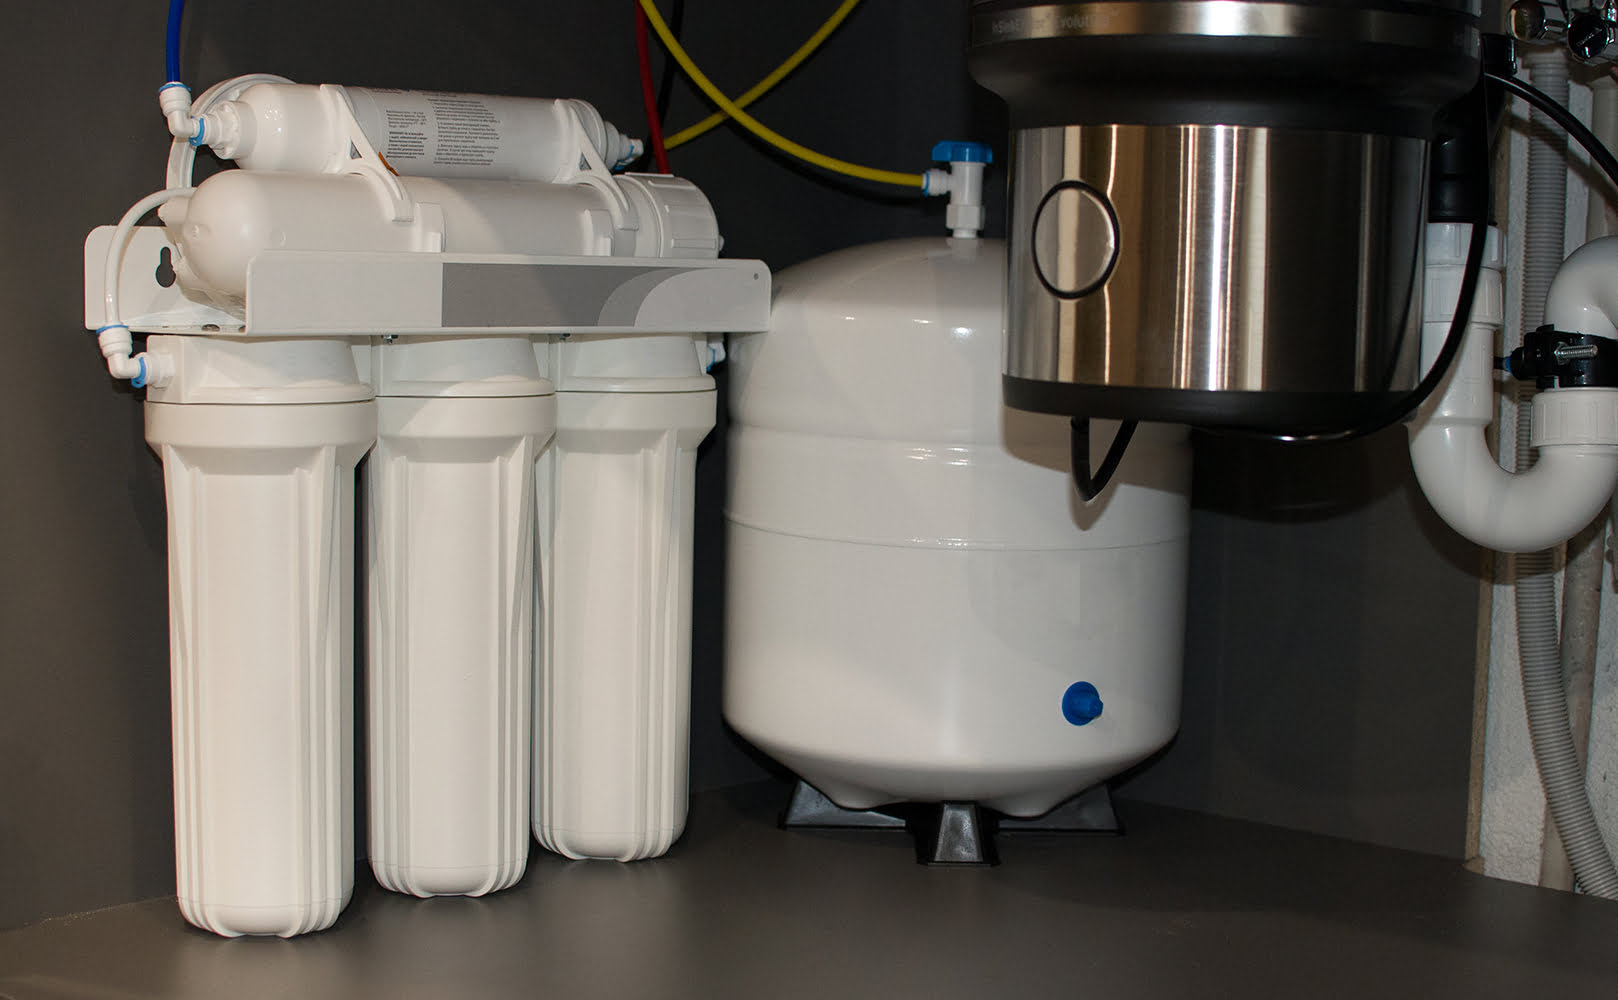
How Long Does a Reverse Osmosis System Last?
So, how long do RO systems last?
On average, a well-serviced and maintained reverse osmosis system will last 10 to 15 years.
However, it’s important to remember that RO systems have specific parts you must change regularly if you want them to keep running smoothly. These parts include the filters and the RO membrane; we’ll discuss more on that below.
Besides, reverse osmosis system life expectancy also depends on feed water conditions and how much water you use on a daily basis. Simply put, if a system has to process high amounts of well water day in and day out, that’s a much higher burden than purifying the occasional gallon of pre-treated tap water.
How to Maintain a Reverse Osmosis System to Increase Its Life Expectancy
Maintaining your RO system is necessary to keep it in good condition, and it’s even more important when you want it to last long.
In this section, we’ve provided a breakdown of how to maintain your RO system to increase its life expectancy. Things to consider include: Replacing the pre-filters and post-filters, replacing the RO membrane, and sanitizing the system.
Further Reading:
Replacing Pre-Filters
Pre-filters come before the main filter stage in any RO system, and their purpose is to remove sediments and other contaminants that can overwhelm or damage the reverse osmosis membrane.
As a rule, sediment and carbon pre-filters should be replaced every 6-12 months.
Here’s a quick rundown on how to change these filters:
- Wash your hands.
- Turn off the water supply and the RO tank valve.
- Depressurize the system by opening the reverse osmosis faucet and then drain any remaining water. Close the faucet once the water is fully drained.
- Set a bowl below the system to catch any water that spills.
- Remove the pre-filter sumps by turning clockwise (it’s best to use a strap wrench or filter wrench here). Also, have a bucket on standby to keep the old filter cartridges.
- Clean the empty housings with warm dishwater and rinse thoroughly.
- Install the new pre-filters.
Important: Before fixing the housings back on, check that the black O-rings are fitted in place and in good shape – this will help to prevent leaks. You can tighten the housings with a wrench, but don’t overtighten it.
- Turn the water supply back on and open the RO tank valve.
- Open the RO faucet and allow the system to flush itself for a few minutes.
- Do a final leak check.
Remember to write down today’s date – this will help you remember when you last replaced your filters.
Replacing the RO Membrane
RO membranes typically last 3-5 years. Sometimes, you need a change every 1 or 2 years. The safest way to know if it’s time to change your membrane is by using a TDS meter, which measures total dissolved solids in water. Replace your membrane if the rejection of output water TDS goes lower than 80%.
Here’s how to replace your RO membrane:
- Wash your hands.
- Turn off the water supply and close the storage tank valve.
- Depressurize the system by opening the RO faucet and then drain any remaining water. Close the faucet once the dripping stops.
- Locate the RO membrane housing. Next, push in the collet on the cap and hold it down against the quick connect fitting, then pull out the tubing (you might need to remove a plastic clip as well).
- Detach the cap by turning it clockwise (a strap wrench or filter wrench can help here). Remember to have a towel on standby in case of a spill.
- Take out the old membrane. If you find it difficult to remove, use needle-nose pliers.
- Wash the membrane housing with dishwater. Alternatively, disinfect it with unscented household bleach or any other suitable sanitizer. Once you’re done with that, rinse thoroughly.
- Fit the new membrane into its housing. Remember to push it all the way in to get it seated tight (while fixing it, ensure the end with the 2 black O-rings goes in first). Also, avoid touching the new membrane with your skin — you want to avoid contaminating it.
- Confirm that the black rubber O-ring is firmly fixed and in good condition before reattaching the housing cap. You can tighten the housing cap with a wrench but don’t make it too tight.
- Push the tubing back into the cap fitting to reconnect the membrane, then pull back on the tubing to make sure its connection is secure.
- Turn the water supply back on and open the valve of the reverse osmosis storage tank.
- Allow the system to flush for a few minutes by opening the faucet.
- Check for leaks. If there are none, close the faucet and allow the tank fill.
Note: Before using water from the system, discard 1 or 2 full tanks of water. Doing so flushes preservatives from inside the membrane. If the water still tastes weird after you’ve flushed twice, flush again.
Remember to write down today’s date – this will help you remember when you last replaced your RO membrane.
Replacing Post-Filters
Carbon post-filters are mainly used to eliminate weird tastes and smell that leach into the water while in the storage tank. You should change your carbon post-filter once a year.
Here’s how to do it:
- Wash your hands.
- Turn off the water supply and close the storage tank valve.
- Depressurize the system by opening the RO faucet.
- Set a bowl underneath the system to catch any water that spills.
- Push the collet down against the quick-connect fitting on the inline post-filter and pull out the tubing. Replicate on the other end.
- Detach the cartridge and fix in the replacement (use the arrow for flow direction).
- Push the tubing back into the fitting on each side to reconnect the filter. Remember to ensure you have a secure connection by pulling back on the tubing.
- Turn the water supply back on and open the RO tank valve.
- Open the filtered water dispenser and allow the system to flush for a few minutes.
- Check for leaks. If there are none, close the faucet and allow the tank fill up.
- After changing the post-filter, discard 1 or 2 tanks of water before using any of the water. It’s normal for discolored water to come out of the faucet at first, but it’s not a big issue. It’s simply carbon fines getting flushed out, which will clear out after a few flushes.
Remember to write down today’s date – this will help you remember when you last replaced your post-filter.

System Sanitizing and Cleaning
Cleaning your system is a no-brainer if you want to keep your water supply clean. You should sanitize your RO system once a year.
Here’s how to do it:
- Turn off the water supply and depressurize the system.
- Remove all pre-filters and the reverse osmosis membrane, and wash the inside of the housings with warm dishwater and rinse thoroughly.
- To sanitize, add unscented household bleach into the housing of filter stage one. You could also use any other suited sanitizer.
- Fix all empty housings back on and turn on the water supply.
- Open the RO faucet to let water out, then shut it and check for leaks.
- Let the storage tank fill and let the bleach remain in the system for at least 30 minutes and, at most, a couple of hours.
- Flush out all the water, fill up the tank, and flush it again.
- Turn off the water supply and depressurize the system.
- Fix back the filters and the RO membrane. You may also need to replace your carbon post-filter in case it was exposed to any bleach.
- Turn the water on and check for leaks.
- Close the faucet and fill up the tank.
- Discard 1 or 2 tanks of water before use (this isn’t always necessary, but it depends on your system).
Remember to write down today’s date – this will help you remember when you last cleaned your system.
If you have any thoughts about the question, how long do RO systems last, please don’t hesitate to leave a comment below!
About the Author Alexandra Uta
![]()
![]()
![]()

Information provided on BOS is for educational purposes only. The products and services we review may not be right for your individual circumstances.
We adhere to strict editorial guidelines. Rest assured, the opinions expressed have not been provided, reviewed, or otherwise endorsed by our partners – they are unbiased, independent, and the author’s alone. We fact-check all content for accuracy. It is accurate as of the date posted and to the best of our knowledge.