Reverse Osmosis for Ice Maker – What to Consider
Written by: Alexandra Uta // Last Updated: Jul 14, 2023
This page may contain affiliate links. If you buy a product or service through such a link we earn a commission at no extra cost to you. Learn more.
One of the benefits of using reverse osmosis filtered water is that it can improve the quality of your ice cubes.
However, there are also some considerations to make if you’re planning to use one for this purpose.
This is especially true if you’re planning to connect a reverse osmosis filter to an ice maker…
Contents
show
Key Takeaways
You can use a reverse osmosis system with an ice maker. There are several technical considerations to keep in mind, though. There are also some practical concerns, including potential health issues:
- RO water can corrode copper piping which is often used in ice makers/refrigerators.
- Your ice maker or refrigerator might not be compatible with RO systems due to require a certain level of input water pressure.
- Don’t make the line connect the 2 appliances too long in order to avoid losing even more pressure.
- Your RO water ice cubes may be smaller during times of higher water consumption.
- A second storage tank can help!
- Consider remineralizing the water before sending it off to the ice maker.
- An ice maker installation kit is the easiest way of connecting.
Reverse Osmosis for Ice Maker – What to Consider
Several things are important to consider when using reverse osmosis for your ice maker, both in technical as well as practical terms.
The Technical Side of Things: Can an RO Water Even Be Used for an Ice Maker?
Whether you should connect a reverse osmosis system to your ice maker depends primarily on the type of piping the ice maker uses internally. If your ice maker uses copper piping at any point, then you should avoid using a reverse osmosis system with it at all costs.
That’s because reverse osmosis water, being highly corrosive, can leach copper out of the piping – and ultimately, it ends up in your body. This can lead to various issues with your health, including gastrointestinal disturbances.
And not only that, the corrosion will eventually lead to leaking and may damage your ice maker or refrigerator beyond repair.

Compatibility
It could also be the case that your refrigerator is not mechanically compatible with a reverse osmosis filter. That’s primarily due to differences in the pressure. Your refrigerator might need to run at a higher pressure than what your reverse osmosis system can provide. You should always consult your manual – as well as the manufacturer if that’s an option – to ensure that this is a good idea.
Further Reading:
Water Pressure
I wanted to mention this one more time: A reverse osmosis system will cause a drop in water pressure, which can be as much as 1/3 of the original pressure from the main water line.
So if your refrigerator or ice maker requires a certain level of pressure in order to function correctly, a reverse osmosis system might not be able to provide that.
Length of Water Line
Longer connection lines can further exacerbate issues with the pressure. If the line between your reverse osmosis system and the ice maker is too long, you’re going to lose some pressure along the way.
This can be alleviated by some careful planning and repositioning of furniture and appliances so that your reverse osmosis unit can be as close as possible to the ice maker.
Water Volume and Ice Cube Size
People using reverse osmosis water for ice cubes have reported that their cubes occasionally come out smaller than normal. This is usually caused by higher-than-usual water usage at the reverse osmosis faucet, which leads to storage tanks emptying faster than expected and therefore preventing the delivery of sufficient water to the ice maker.
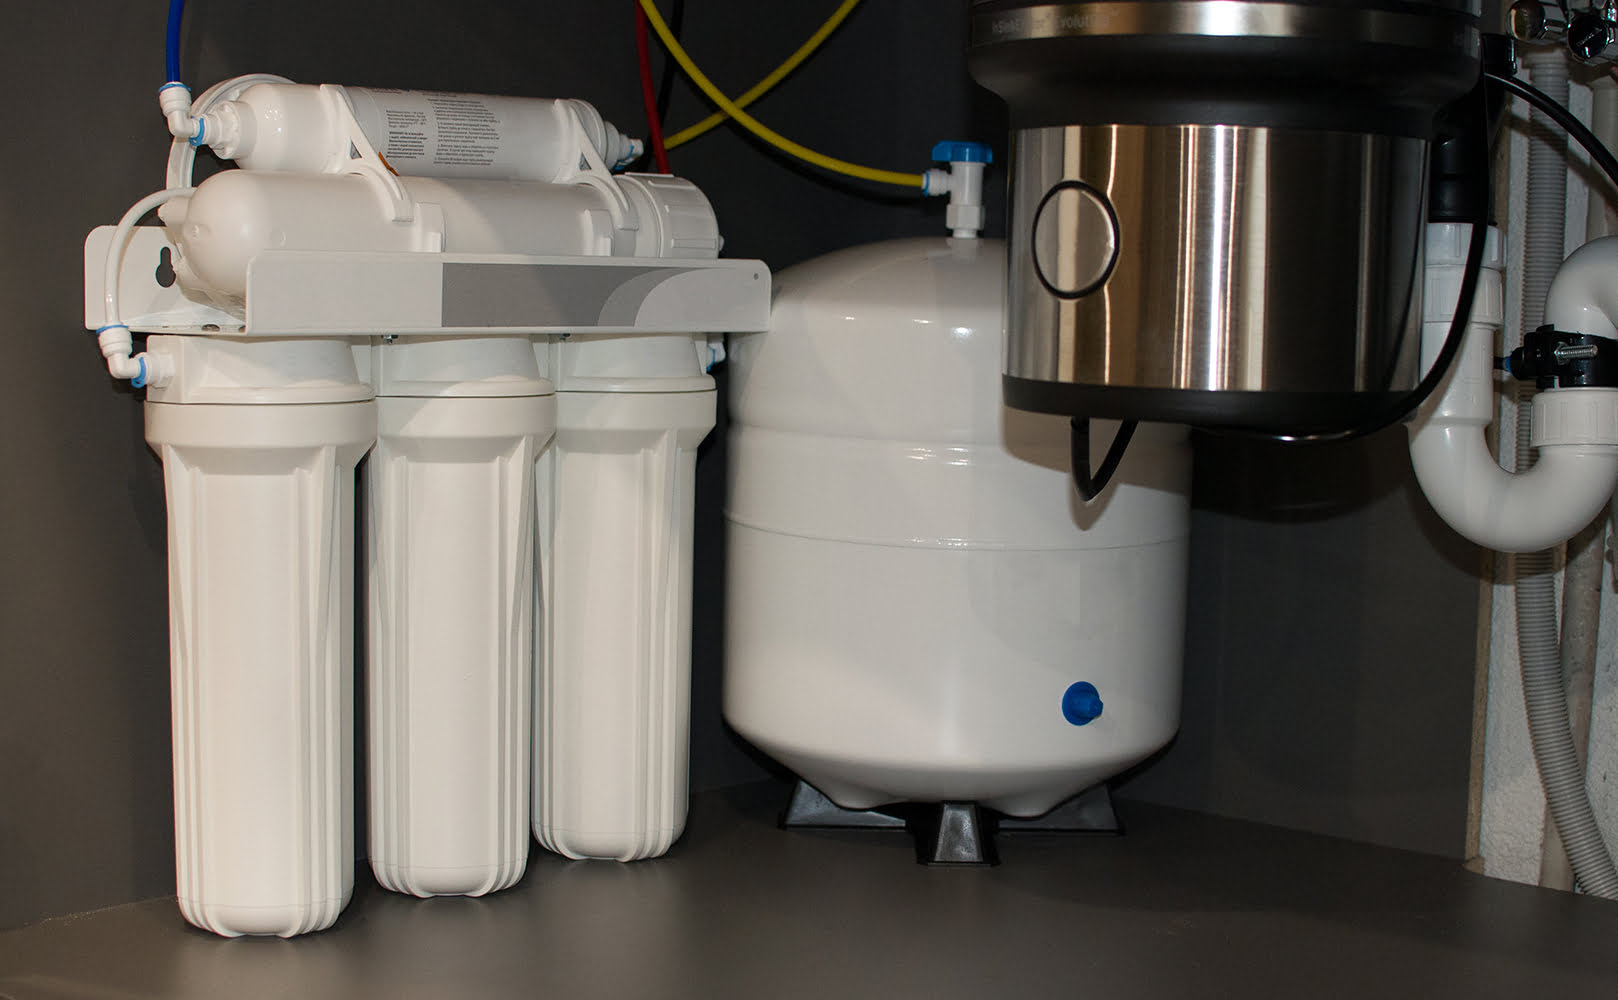
Second Storage Tank
Reverse osmosis systems typically incorporate a storage tank as a buffer. This is necessary due to their slow operation. When you’re using a reverse osmosis system for an ice maker, it’s recommended to add a second storage tank as well. This will help prevent issues with insufficient water or sudden pressure drops.
Health Considerations
Reverse osmosis is the best method for purifying water in a domestic environment. However, it might be considered a little too good in some cases. That’s because it strips minerals that are naturally present in the water, and which are healthy to have in your diet in certain amounts.
If you switch to drinking reverse osmosis water or using it for your ice, you might have to supplement your diet additionally.
Ice Maker Installation Kit
The easiest way to connect your RO system to the ice maker/fridge is using an installation kit.
When getting an ice maker installation kit, you should pay attention to the size of your tubing and align your purchase with that. In most cases, this will be 3/8” or 1/4”. These kits are made to be pretty much universal, so they should work with any standard reverse osmosis system. The kit doesn’t require any additional maintenance other than what you would have to do for the reverse osmosis system itself.
The contents of the typical ice maker installation kit include:
- Compression Tee – 1/4″ (all sides)
- Quick Connect Ball Valve – 1/4″
- Tubing – 1/4″, 20ft
Instructions for Connecting Your RO System to the Ice Maker/Refrigerator
- Turn off the water supply.
- Close the storge tank valve.
- Place a bucket underneath the tube connecting the reverse osmosis system to the water faucet.
- Cut the tubing 10-15 inches away from the output port, and let it drain into the bucket.
- Connect a tee fitting to the reverse osmosis filter tubing – push it in as hard as you can until it won’t go any farther.
- Connect the other end of the tee fitting to the other end of the tubing you cut earlier.
- Prepare a 10” piece of 1/4″ tubing.
- Connect that piece to the tee line.
- Hook up the other end of the tubing to an inline shutoff ball valve
- Hook up one end of the remaining pieces of 1/4″ tubing to the opposite side of the shutoff ball valve.
- Make sure the valve stays closed for now.
- Connect the reverse osmosis system to the refrigerator using 1/4″ tubing. Try to keep the length of the connection below 30 ft for the best results.
- Check your water pressure.
- Turn the water back on. Open all valves.
If you have any questions about using an RO system for your ice maker please don’t hesitate to leave a comment below!
About the Author Alexandra Uta
![]()
![]()
![]()

Information provided on BOS is for educational purposes only. The products and services we review may not be right for your individual circumstances.
We adhere to strict editorial guidelines. Rest assured, the opinions expressed have not been provided, reviewed, or otherwise endorsed by our partners – they are unbiased, independent, and the author’s alone. We fact-check all content for accuracy. It is accurate as of the date posted and to the best of our knowledge.