Review: SpringWell WS1 & WS4 Whole House Well Water Filter System
Written by: Gene Fitzgerald // Last Updated: Aug 17, 2023
This page may contain affiliate links. If you buy a product or service through such a link we earn a commission at no extra cost to you. Learn more.
SpringWell Water offers 2 whole house well water filters, the WS1 and the WS4. They were designed for “economical and environmentally friendly” private well water treatment.
What do they remove? Primarily iron, hydrogen sulfide, and/or manganese for clean, fresh-tasting water free from rotten egg smell that doesn’t harm your pipes and appliances nor stain toilets, sinks, and laundry.
Sounds interesting?
Contents
show
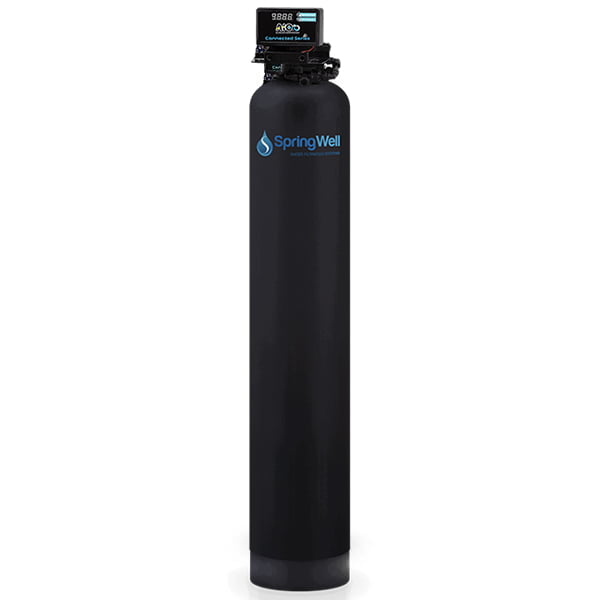
SpringWell WS Whole House Well Water Filter |
|
| Price: | $$$ |
| Filter Process: | Spin-Down Sediment, Air Injection Oxidation + Greensand |
| Filter Capacity: | Up to 10+ Years |
| Water Flow Rate: | 12-20 Gallons Per Minute |
| Annual Cost: | $0 |
|
Overall Rating: 5.0/5.0
Get 5% Off! Use Code: |
|
SpringWell WS1 and WS4 Whole House Well Water Filter System – All Specs
- Model: WS1, WS4
- Last Price: $2,128.95-$2,861.93
- Annual Maintenance Cost: $0
- Filter Media/Process: Spin-Down Sediment, Air Injection Oxidation + Greensand
- Flow Rate: 12-20 gpm
- Backwash Rate: 5-7 gpm
- Filtering Capacity: Up to 10+ Years
- WxHxD: 10-13″x52-54″x10-13″
- Water Temperature: 36-120 °F
- Water Pressure: 35-80 psi
- Water pH: 6.5-10
- Fitting: 1″
- Warranty: Limited Lifetime
SpringWell – Discount Code
You can use our code “BOS5OFF“ to get a 5% discount on any purchase you make on springwellwater.com.
SpringWell WS – Key Features
The SpringWell WS Whole House Well Water Filter System comes in 2 sizes: The WS1 and the WS4.
There’s no difference between the 2 systems in terms of contaminant removal. Where they differ is size and consequently how much filtered water they can provide per minute. The smaller WS1 whole house well water filter has a 12 gpm (gallons per minute) service flow rate enough for 1-4 bathrooms, whereas the WS4 delivers up to 20 gpm for even larger homes.
Regardless of which version you choose, this is what the water filtration process looks like:
- First comes a spin down sediment pre-filter. It’s designed for use on well water with lots of sediment. With its 100 mesh screen, the filter removes large particles only (~150 microns).
- Water then enters the main system flowing through a pocket of compressed air in the top of the tank (air injection system). The air acts as a catalyst to oxidize iron, manganese, and sulfur.
- The water mixes with greensand filter media. Any iron, manganese, or sulfur that hasn’t oxidized at this point will do so and get trapped in the media bed. The filtered water is now ready at your disposal.
- Air pocket reset: The air pocket resets daily to make sure there’s always enough oxygen available.
- Backwashing: About once a week, depending on how severe the contamination, the system backwashes to flush all contaminants that have accumulated inside the tank down the drain (safe for septic and sewer system).
In a nutshell, the combination of air injection and greensand filter media is what makes SpringWell’s whole house well water filters so effective. Many other systems rely on air injection OR greensand alone.
What are the maximum contaminant levels the WS1 and WS4 can handle? According to SpringWell,
- for red-water (ferric) and clear-water (ferrous) iron, it’s up to 7 ppm.
- for hydrogen sulfide (sulfur), it’s up to 8 ppm.
- for manganese, the maximum contaminant level is 1 ppm.
- (Greensand can also help with arsenic and radium reduction.)
Please note: This is the maximum combined.
That said, your water must have a pH range of 6.5 to 10 for the filtration process to be effective. What’s more, you shouldn’t be using the WS1 or WS4 with water that is microbiologically unsafe without further treatment – think UV water purification.
Last but not least, the SpringWell WS is often paired with the SpringWell CF whole house water filter for the removal of chemicals, organics, and a bunch of water-soluble heavy metals.
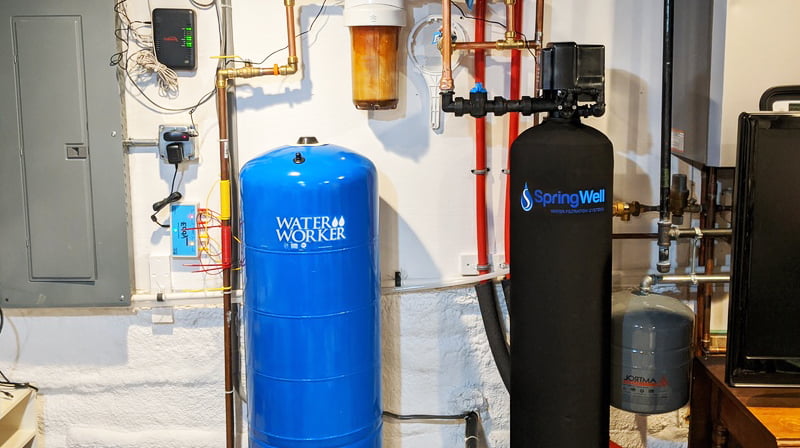
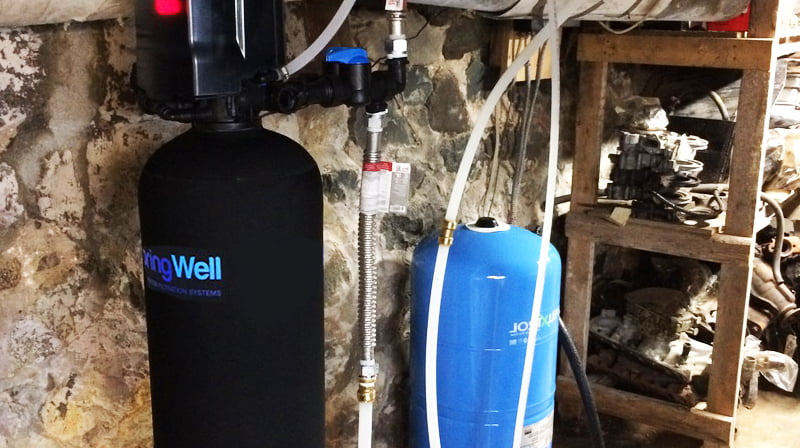
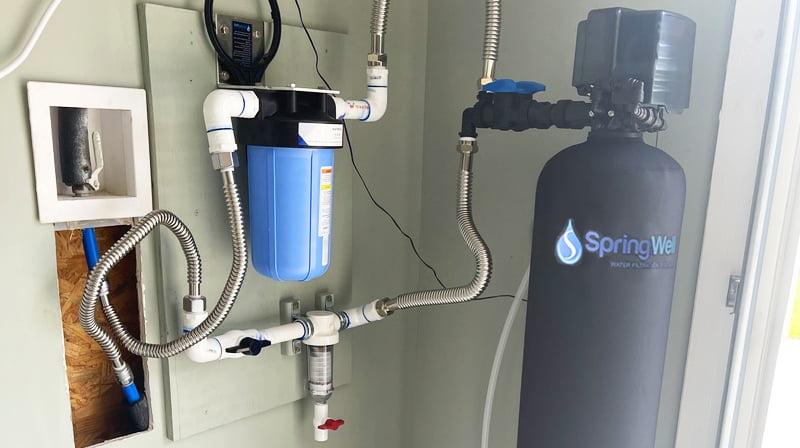
Gallery
SpringWell Whole House Well Water Filter Pros
The automatic backwashing feature and the air pocket reset are controlled by an electronic head. So after the initial programming you can completely forget about the system. There’s no media to replace and no filter to change. Everything is virtually maintenance-free.
Speaking of programming, the Bluetooth function allows you to program, view, and adjust all settings via smartphone or tablet. You can even start a manual backwash cycle if need be – it’s all in the free Legacy View app.
As far as installation goes, it’s like hooking up any other whole house water filter, only that a drain connection is required. So if you’re handy around the house you can probably set everything up yourself.
Did we mention the 6-month risk-free satisfaction guarantee and the limited lifetime warranty on tanks, valves, fittings, and filter media? If anything goes wrong SpringWell Water is there to help.
What Contaminants Are Being Removed?
The SpringWell WS filter is designed to remove up to 7 ppm ferric and ferrous iron, 8 ppm manganese, and 1 ppm hydrogen sulfide from water.
It can further reduce arsenic and radium.
The SpringWell WS – learn more on Springwellwater.com
Installation
Like we said, DIY installation shouldn’t be a problem if you can follow instructions. You don’t have to worry about installing an extra bypass by the way. A bypass valve is part of the package together with an illustrated installation guide.
Please consider these instructions as a general guideline. Always make sure to check and follow your user manual before getting started.
Tools and Supplies Needed for Installation
- 2x 1” corrugated water connectors
- 1“ threaded connectors
- 3“ long PVC nipple
- Plumbers tape
- 1“ PVC shut off valve
- Zip ties
- Wrench
- 50” drain line
- Hose clamp
- 9v battery
Installing the Filter Head
- First, remove the cap on top of the filter tank. Then take out the blue cap on the pipe inside the filter tank (discard both caps).
- Find the opening at the bottom of the filter’s electronic head. Then align the opening with the pipe inside the filter tank.
- Press the electronic head down onto the pipe to secure the connection and make the threads catch, and then turn the head clockwise till it’s tightened.
- Next install the bypass valve onto the connections provided on the electronic head. Press the rubber connections on the valve into the openings on the head.
- Tighten the fasteners on the valve connections to keep the bypass valve in place.
- Attach MNPT fittings on the free ends of the bypass valve and tighten.
- Apply plumbing tape to the threaded portion on the free ends of the MNPT fittings.
Installing the Tank
- Turn off your main water supply and get the pre-plumbs ready. Attach a 1-inch threaded adapter to both pre-plumb connections.
- Use plumbing tape on all connections to prevent leaks.
- Install a shut off valve on the pre-plumb for the incoming water supply.
- Apply plumbing tape to the threaded end of the PVC nipple before joining it to the free end of the shutoff valve. Tighten the connection.
- Place the filter tank close to the pre-plumb for the incoming water supply, with its connections facing backward.
- Get a corrugated water connector and connect it to the PVC nipple.
- Connect the free end of the water connector to the incoming side (input) of the water filter tank.
- Get another water connector and insert it into the pre-plumb for water going into the home.
- Connect the free end of the water connector to the outgoing end (output) of the filter tank.
- Ensure all connections are well tightened.
Installing the Drain Line
- Find the drain valve on the left side of the electronic head (this is a compression connection).
- Take off the blue lock tab holding the drain valve in place.
- Pull out the drain valve.
- Fit a hose clamp over one end of the provided drain line.
- Fit the barbed connector on the drain valve on to the end of the drain line (ensure it’s fully sealed).
- Slide the hose clamp to rest over the connection between the drain line and drain valve, then fully tighten it.
- Insert the drain valve back in its place in the electronic head. Ensure the drain line isn’t pinched.
- Replace the blue lock tab you removed from the drain valve to lock it in position.
- Insert the drain line into your drain pipe.
- If the drain line is loose, it may slip out of the drain pipe on some occasions. In that case, drill some holes into the drain pipe and insert a pair of zip ties to create a loop in the drain pipe.
- Insert the drain line into the loop created by the zip ties and secure it in place. Trim off any excess zip tie protruding outside the drain pipe.
- Ensure the drain line is not pimped or kinked at any point as this will disrupt the flow of water.
Powering the Tank
- Connect the power cord to the port provided on the far left, under the tank head.
- Plug the power adapter into a socket that isn’t controlled with a switch.
- Lift the cover of the tank head and locate the battery port (beneath the display). Connect the 9v battery to this port and store it in the tray.
- Put the cover of the tank head back in place.
Testing the System
- Open any cold bathtub faucet in your home all the way (note that the water supply is still turned off at this point).
- Turn on the water supply in your home. Ensure the shut off valve to the system is in off position before you do this. The valves on the filter tank should be set to bypass.
- After turning the water on, check the shut off valve for leaks.
- If there are no leaks, open the shut off valve, allowing water to pass through the filters bypass.
- If you don’t notice any leaks from the bypass valve, turn it off, allowing water to enter the water filter.
- Allow water to run through the system for about 10 minutes before turning it off. You may notice a little sediment in the water leaving the filter, for the first few minutes, but it’s normal.
Video
The Package (Parts)
- Well water filter tank
- Electronic control head
- 50′ drain line
- Bypass valve
- Hose clamp
- Well water filter tank
- MNPT fittings
- Power supply
Maintenance
Under the right conditions, greensand filter media can last 10+ years. No maintenance required!
The spin down sediment filter is easy to clean and thus can be reused.
Manual
Here is a link to the official manual:
NSF and Other Certifications
The manufacturers say the SpringWell WS1 and WS4 components are NSF-certified, however they don’t provide any further details.
Earlier Product Versions
As far as we know, there are no earlier versions of this product.
SpringWell Well Water System Cons
The fittings included are plastic so there’s a chance of cross-threading if you’re not careful.
Besides, some users complained that the specifications and dimensions for other materials not included in the package (like adapters and water connectors) were a bit misleading. Others said it was difficult getting standard extra parts at hardware stores and mentioned that an installation kit would have saved them the stress.
So you might want to wait for the product to arrive before purchasing any materials. That way you can figure out the dimensions yourself and make adjustments without wasting money.
Asides that, a few other customers complained about missing and damaged parts in the package (thankfully, SpringWell’s customer service fixed this issue quickly.)
SpringWell WS Review: Our Verdict + Best for
Neither the SpringWell WS1 nor the WS4 whole house well water filters come in cheap. But they are absolutely worth the price tag. People are very pleased with their results: No more rotten egg smell, no more iron/manganese staining, and improved water taste.
All things considered, the SpringWell WS is our go-to choice and best for well water treatment. Bottom line: 5 stars!
Our Rating in Detail:
- Filtration Performance: 5.0/5.0
- Filter Capacity (Life): 5.0/5.0
- Purchase Price: 4.0/5.0
- Annual Cost: 5.0/5.0
- Overall: 5.0/5.0
Get 5% Off! Use Code: BOS5OFF
Comparison to Other Whole House Well Water Filters
We’ll be comparing the SpringWell WS to the US Water Systems Matrixx inFusion Iron and Sulfur Removal System, and the Home Master HMF3SdgFeC.

USWS Matrixx inFusion |
|
| Price: | $$$ |
| Filter Process: | H2O2 Oxidation + Carbon |
| Filter Capacity: | 3 to 5 Years |
| Flow Rate: | 10-25 gpm |
| Annual Cost: | $200-400 |
|
Overall Rating: 5.0/5.0
Get 5% Off! Use Code: |
|

Home Master HMF3SdgFeC |
|
| Price: | $ |
| Filter Process: | Sediment Pre, Iron Filter, GAC |
| Filter Capacity: | Up to 100,000 Gallons |
| Flow Rate: | 15 gpm |
| Annual Cost: | $260+ |
|
Overall Rating: 4.5/5.0
|
|
|
SpringWell WS |
|
| Price: | $$$ |
| Filter Process: | Spin-Down Sediment, Air Injection Oxidation + Greensand |
| Filter Capacity: | Up to 10+ Years |
| Flow Rate: | 12-20 gpm |
| Annual Cost: | $0 |
|
Overall Rating: 5.0/5.0
Get 5% Off! Use Code: |
|
Firstly, the US Matrixx inFusion removes the same impurities as the SpringWell WS: Iron, manganese, and sulfur. However it uses a combination of hydrogen peroxide and catalytic activated carbon media. As a result, it’s capable of removing higher levels of iron, sulfur, and manganese, as well as iron and sulfur bacteria. Also, with a 10-25 gpm flow rate (depending on the size), the system is suited for any home size. The filter tank comes with a lifetime warranty, the electronic head has 10 years, while the chemical injection panel has 5 years.
One major downside to the US Matrixx inFusion is it’s considerably more expensive than the SpringWell with even more costs for the peroxide ($200-400 per year).
The second whole house well water filter, the Home Master HMF3SdgFeC, is another attractive alternative. It’s a 3-stage system that uses filter cartridges. In the first stage, the filter features a multi-gradient density sediment filter that removes sediments from 25 microns down to 1 micron. Hence it’s capable of removing not just sand, rust, and silt but also cysts and bacteria from your well water. The next stage; the iron filter removes up to 3 ppm of ferric and ferrous iron from water, as well as hydrogen sulfide and manganese. The last stage is a granular activated carbon filter, which does the polishing by removing pesticides, chlorine, volatile organic compounds (VOCs), and other organics in the water. As such, it makes your water much healthier for consumption and also removes any lingering taste and odors. With a flow rate of 15 gpm, the Home Master can serve homes with up to 5 bathrooms. Maintenance requirements are low. Warranty is 2 years.
In comparison to the SpringWell WS, we’d say the Home Master HMF3SdgFeC is better suited for low budgets – it’s much cheaper upfront. However, cartridge replacements really start to add up over time especially if you have higher iron/manganese/sulfur levels. Also, removing 3 ppm iron at max, the system is only suited for moderate contamination.
More Reviews:
More SpringWell Reviews:
This completes our review of the SpringWell WS1/WS4 whole house well water filter. If you have any questions please don’t hesitate to leave a comment below!
About the Author Gene Fitzgerald
![]()
![]()
![]()
![]()
![]()
![]()
![]()

Information provided on BOS is for educational purposes only. The products and services we review may not be right for your individual circumstances.
We adhere to strict editorial guidelines. Rest assured, the opinions expressed have not been provided, reviewed, or otherwise endorsed by our partners – they are unbiased, independent, and the author’s alone. We fact-check all content for accuracy. It is accurate as of the date posted and to the best of our knowledge.