Whole House Water Filter Leaking from Top or Other Spot? Here’s What to Do!
Written by: Gene Fitzgerald // Last Updated: Oct 11, 2022
This page may contain affiliate links. If you buy a product or service through such a link we earn a commission at no extra cost to you. Learn more.
A whole house water filter can leak due to plenty of reasons. It might be regular wear and tear, a faulty O-ring, or a crack in one of the fittings, amongst other things.
Therefore, the first step towards fixing a leak is to identify what caused it in the first place. The question is: Do you need to dial a plumber right away, or can you fix it yourself?
The good news is most leakages can be fixed by replacing a few components. So we suggest you remove your plumber’s number from speed-dial and bring out your trusty toolbox. We shall also highlight some precautions you can take to prevent further leaks – better safe than sorry!
Contents
show
Key Takeaways
If your whole house water filter is leaking from the top:
- Turn off the water supply and depressurize the system.
- Remove and clean the filter housing with warm soapy water and a soft brush.
- Replace the O-ring and filter cartridge if need be.
- Reinstall the filter housing. Tip: Use plumber’s tape on housing threads unless specified otherwise by manufacturer.
- Turn the water supply back on and check for leaks.
If the leak is from the red pressure-relief button:
- Turn off the water supply, unscrew the filter housing, and remove the O-ring.
- Check the state of the O-ring. Clean or replace if need be.
- Apply silicone grease on the O-ring.
- Reseat the O-ring properly in its groove and screw the housing back on.
If the leak is at a fitting:
- Check and tighten fitting. Tip: Don’t over-tighten to avoid damage.
- Still leaking? Replace affected component(s).
Identifying Why Your Whole House Water Filter Is Leaking
Whole house water filters are exceptional appliances that provide clean and pure water for your household. But that doesn’t mean they will never malfunction.
The first step to stop a leak is to find it. However, when too much water is leaking, it can be tricky to pinpoint the origin. Fortunately, if you know the most common areas that can cause leaks, you save valuable time and energy.
So, keep calm, and we will guide you on how to troubleshoot any leaks from your unit.
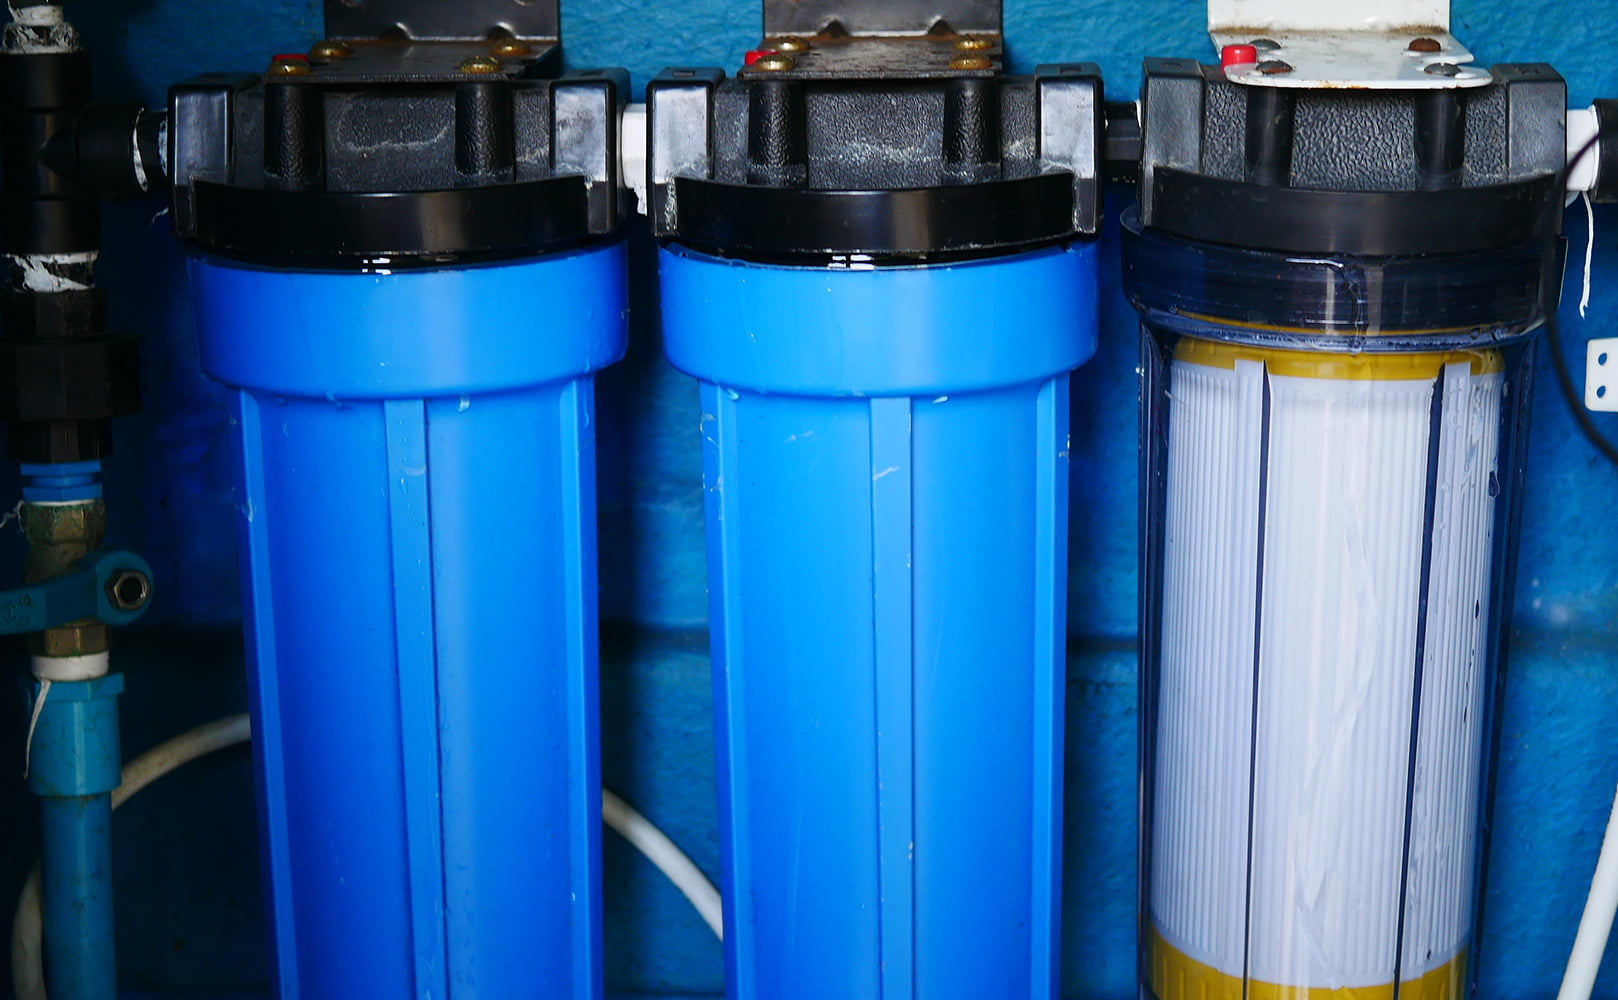
Remove Filter Housing
Unmistakably, most whole house water filter leaks originate from inside the canister/housing. Now, unless you want to flood your basement or garage, do not remove the filter housing right away. Here are the steps to follow:
- Turn off the main water supply.
- Some cartridge-based filtration systems have a small pressure release button on the top. Press that button to release pressure from inside the housing.
- Next, drain existing water in your pipes by opening multiple cold water faucets around the house.
- If there is a shutoff or bypass valve for the filtration unit, turn it on to avoid accidents and water damages.
- If you have a big blue canister-style whole house water system, you will need a specific wrench to twist the housings. Make sure you only use the prescribed wrench- usually included in the package.
- Grab a big bucket or tub and slide it underneath the housings to avoid a huge mess.
Have you removed the filter housing successfully? Then onto the next step!
Inspect Filter Cartridge
Filter cartridges require periodic replacements depending on the quality of feed water and your household’s daily usage. Sometimes filters clog earlier than usual and become too jammed to let any water pass through.
Under these circumstances, the housing may leak since incoming water has no other place to go. Not only does it pose a serious health risk if left untreated, but it can also lead to cracks in the housing.
Therefore, make sure to replace any filter cartridge that has exceed its service life.
Inspect Rubber O-Ring
Rubber O-rings may seem tiny and dispensable at first glance, but they serve a vital part in any plumbing unit. For whole house water filters, they create a seal at the interface where the housing cap comes in contact with the housing sump.
Most O-rings must be adequately lubricated with FDA food-grade silicone grease to ensure a tight seal. At times, an O-ring can get misplaced, hard, or broken, which compromises the seal.
A dirty O-ring recess could also be causing trouble. A small amount of sand or dust is not a major concern, but pebbles or debris will require cleanup.
Thus, inspect all O-rings and check whether they are properly seated. Replace with new ones if needed, but don’t forget to lubricate. A common mistake that most people make is using petroleum jelly instead of silicone. Using petroleum jelly on the rubber will cause it to swell and eventually risk the seal.
Check Housing Interior, Exterior & Threads
Due to external or internal overpressure, filter housings can crack and lead to a trickle or heavy leakage. Therefore, you should carefully check any hairline cracks on your filter housing’s interior and exterior.
Use torchlight or slowly submerge the housing in a water bucket to check for invisible cracks. Moreover, check the threads for any cuts due to over-tightening or lack of plumber’s tape.
Reinstall and Check for Leaks
Once you have carefully checked the unit and ensured that all parts are in working condition, you can reinstall the filter housing to the head. Ironically, over-tightening and under-tightening can both lead to leakages.
Use a proper housing wrench or a strap wrench to tighten the housing securely. Finally, turn the water supply back and allow the whole house water filter to run. If the unit is still leaking, there might be some other faulty part. In that case, it’s time to get in touch with the customer service department or your dealer.
Further Reading:
What to Do If Your Whole House Water Filter Is Leaking From the Top?
It can be pretty frustrating to see your whole house filtration system leaking from the top. More often than not, it’s because of a faulty O-ring disrupting the seal.
Don’t worry; our step-by-step guide is enough to sort out the issue and stop the leak.
Step 1: Turn Off the Water Supply and Depressurize
Again, before you start working on your filtration system, it’s essential to turn off the feed water. The corresponding valve is usually located 3 to 5 feet from the point where water enters your home.
If you don’t know where the water supply valve is, now is an excellent time to find out.
If you’re lucky, your system comes with a bypass valve that will help you shut down the filters without disrupting the water supply to the house. Bring the valve into bypass mode before removing the housing.
Next, it is best to drain the existing water from the plumbing. Open a few faucets around the house and wait for all the water to flow out. Since removing all the water and air from the plumbing is essential, it’s best to open faucets on the ground floor, not on the top floors.
If you see a small button on the top or side of your whole house water filter, press it to depressurize the housing. Keep a small tub under the unit before removing the filter housing.
Step 2: Remove the Filter Housing
Use a housing wrench to twist the filter housing carefully.
Step 3: Clean the Filter Housing
Use warm water, mild soap, and a soft brush to clean the housing. Let it air dry for a few minutes.
Step 4: Replace the O-Ring
Inspect the O-ring and check whether it’s in working condition. If not, replace it with a new one after lubricating it properly with food-safe silicone grease. Ensure it is seated properly in the channel.
Step 5: Replace the Filter Cartridge
Discard the old whole house water filter cartridge and slide in a new one making sure it sits properly inside. Ensure it doesn’t tilt or is off-center, or it will damage the top of the filter.

Step 6: Use Plumber’s Tape on Filter Housing Threads
Plumber’s tape, or thread seal tape (PTFE tape), is a flexible white tape to seal pipe threads. To ensure a tight seal, only use real plumber’s tape and don’t overdo it either. Six to eight wraps are enough. If you go round more, you might end up cracking the top of the filter’s housing.
Not only does Plumber’s tape provide for proper seating of the threads, it also prevents threads from seizing when unscrewing.
Step 7: Reinstall the Filter Housing
Now it’s time to twist the housing of your whole house water filtration system back onto its head, ensuring the O-ring is in place.
Step 8: Pressurize the System and Check for Leaks
If you turn on the water supply on full pressure directly, you are inviting a big problem for yourself. Releasing water at full force could inadvertently push out the housing, and you could be in a bigger mess than before.
Have someone else open the valve only a quarter way through while you stay near the filters and look for leaks. Don’t try to turn on the water entirely if you see even the slightest drizzle of tiny droplets at any interface.
If everything works fine, go ahead and open the valve halfway and then slowly move to full supply.
Whole House Water Filter Leaking from Red Pressure Relief Button
Water leaking from the red pressure relief button usually happens after replacing the filter cartridge in your whole house water filter. It could be due to a number of reasons, such as the O-ring not being seated properly, or debris stuck in the O-ring.
Improperly Seated O-Ring
If the O-ring on the housing is not seated properly, here’s what to do:
- Turn off the main water supply to the filter, unscrew the housing, and remove the O-ring.
- Apply a generous amount of plumber’s grease on the O-ring and seat it properly in the groove.
- Screw on the housing cap tightly and turn on the water to check for leaks.
Debris Stuck in O-Ring
If there is debris stuck in the O-ring, it might not create a proper seal, causing water to leak from the red pressure relief button. To fix this:
- Turn off the water to the filter and unscrew the housing.
- Remove the O-ring and clean it with a toothpick or other sharp object.
- Clean out the groove where the O-ring sits and apply a generous amount of plumber’s grease on it.
- Seat the ring properly in the groove and screw on the housing tightly.
The best solution, however, is to replace the O-ring with a new one to ensure there is no leak.
Whole House Water Filter Leaking at Fittings
If you notice leaking in the pipes or fittings within your whole house water filter system, it is most likely due to either a loose connection or a cracked pipe. In either case, it is important that you shut off the water to your home immediately and do not use any tap water until the issue is resolved.
If the leak is coming from a loose connection, you will need to:
- Tighten all fittings within the system.
- Make sure that you do not over-tighten any of the connections, as this can cause damage.
- Once all fittings are tight, turn the water back on and check for leaks.
If there are still leaks present, it is likely that one of the pieces is cracked and will need to be replaced.
If you have a cracked pipe, the best course of action is to:
- Shut off the water to your home and cut out the section of pipe that is leaking.
- Install a new pipe section and re-connect all fittings.
- Once everything is properly connected, turn the water back on and check for leaks.
If there are no leaks present, your whole house water filter system should be functioning properly once again.
If issues persist, however, do not delay calling a professional for assistance. Cracked pipes can cause even bigger issues if left untreated.
Preventing Future Leaks
Now that we have identified the main culprits for leakages in a whole house water filter, it’s time to ensure we don’t find ourselves in this situation ever again.
While it’s true that servicing most home filter systems doesn’t require too much time, a little effort goes a long way. You can easily prevent premature failures and costly repairs.
Regular Cleaning
Like all appliances, you can expect increased durability of whole house water filters with a little bit of care. Thankfully, you don’t need fancy equipment, cleaning agents, or an elaborate routine.
A bi-annual cleanup session is more than enough to remove the buildup of dirt, bacteria, and other contaminants or sediment inside the housings.

It’s also important to only use gentle, non-toxic products like household detergents or NSF-certified sanitizers. This is because you don’t want any harmful residues leaching in your filtered water.
Not only should you be cleaning inside the housing, but you must also wipe the top and the assembly line to prevent the growth of unwanted pollutants.
Timely Filter Replacements
We can’t stress this enough! Timely replacements with standard filter cartridges are crucial for your system’s performance.
The lifetime of a filter cartridge will depend on your water quality and the number of people in your home. Therefore, the time when you need to change your water filter will be different than what it is for anyone else.
If you are lucky, your whole house filter system features a light signal to signify when it needs replacement. If not, you must make a mental note, write it down, or subscribe to programs so that replacements arrive in time.
Lubing O-Rings
Broken or hard O-rings lead to the whole system coming down. So if you want to ensure uninterrupted clean water supply to your house, you must regularly lube O-rings, especially when you replace the filter cartridges.
It also helps to keep a stash of O-rings handy that fit your filter model.
Insulating Outdoor Whole House Filters
If your whole house water filter is set up outdoors, it might be prone to frequent wear and tear from exposure to extreme temperatures. Therefore, it’s wise to insulate the unit to prevent damage from the harsh sun rays or freezing winds.
Use reflective sheets or insulation material to cover the unit. Similarly, you can also use exterior-grade plywood to build a shed around it.
If you have any questions about whole house water filter leaking please don’t hesitate to leave a comment below!
About the Author Gene Fitzgerald
![]()
![]()
![]()
![]()
![]()
![]()
![]()

Information provided on BOS is for educational purposes only. The products and services we review may not be right for your individual circumstances.
We adhere to strict editorial guidelines. Rest assured, the opinions expressed have not been provided, reviewed, or otherwise endorsed by our partners – they are unbiased, independent, and the author’s alone. We fact-check all content for accuracy. It is accurate as of the date posted and to the best of our knowledge.