How to Change a Sediment Water Filter Step by Step
Written by: Alexandra Uta // Last Updated: Aug 28, 2023
This page may contain affiliate links. If you buy a product or service through such a link we earn a commission at no extra cost to you. Learn more.
Is your home equipped with a whole house sediment water filter? Although this type of filtration system can be very effective, like any filtration system, it requires some upkeep to deliver ideal results.
An effective way to ensure your system continues to work properly is to replace your sediment water filter cartridges according to a consistent schedule.
This overview will explain how to do so, how often you should replace your sediment filters, and why this is an important task.
Contents
show
Key Takeaways
The essential steps to changing a whole house sediment water filter are as follows:
- Shut off the water supply.
- Remove pressure from the system.
- Remove the filter housing.
- Remove the filter cartridge.
- Clean the filter housing (optional).
- Lubricate O-rings, ensure they’re seated correctly, and replace them if they’re not in good condition.
- Insert new cartridge and re-install filter housing.
- Slowly turn the water supply back on and open nearby faucets.
- Check for leaks.
How to Change a Sediment Water Filter
What You Need
Gather the following tools and accessories first before changing a sediment filter:
- Replacement cartridge
- Housing wrench
- Bucket
The following items aren’t required, but may be helpful:
- Additional bucket filled with soapy water
- Household bleach
- New O-rings for the sediment filter’s housing, if you think you’ll need to replace them
Follow these steps to remove and replace your sediment filter once you’ve gathered your tools:
Step 1: Closing the Water Supply
Changing a sediment filter always begins with shutting off your water supply. This involves closing:
- The valve at the main water line, or
- The inlet valve immediately before your filter, which you may have if you’ve installed an extra one, or
- A built-in valve, which some units include
Step 2: Draining Faucets
There is likely some remaining water in the system. Drain it by opening all nearby faucets and outlets. You’ll know most of the remaining water in your plumbing system has been drained once the flow rate and water pressure noticeably decrease.
Step 3: Closing Outlet Valve
Close your outlet valve if you have one. Doing so prevents water from draining back into the sediment filter.
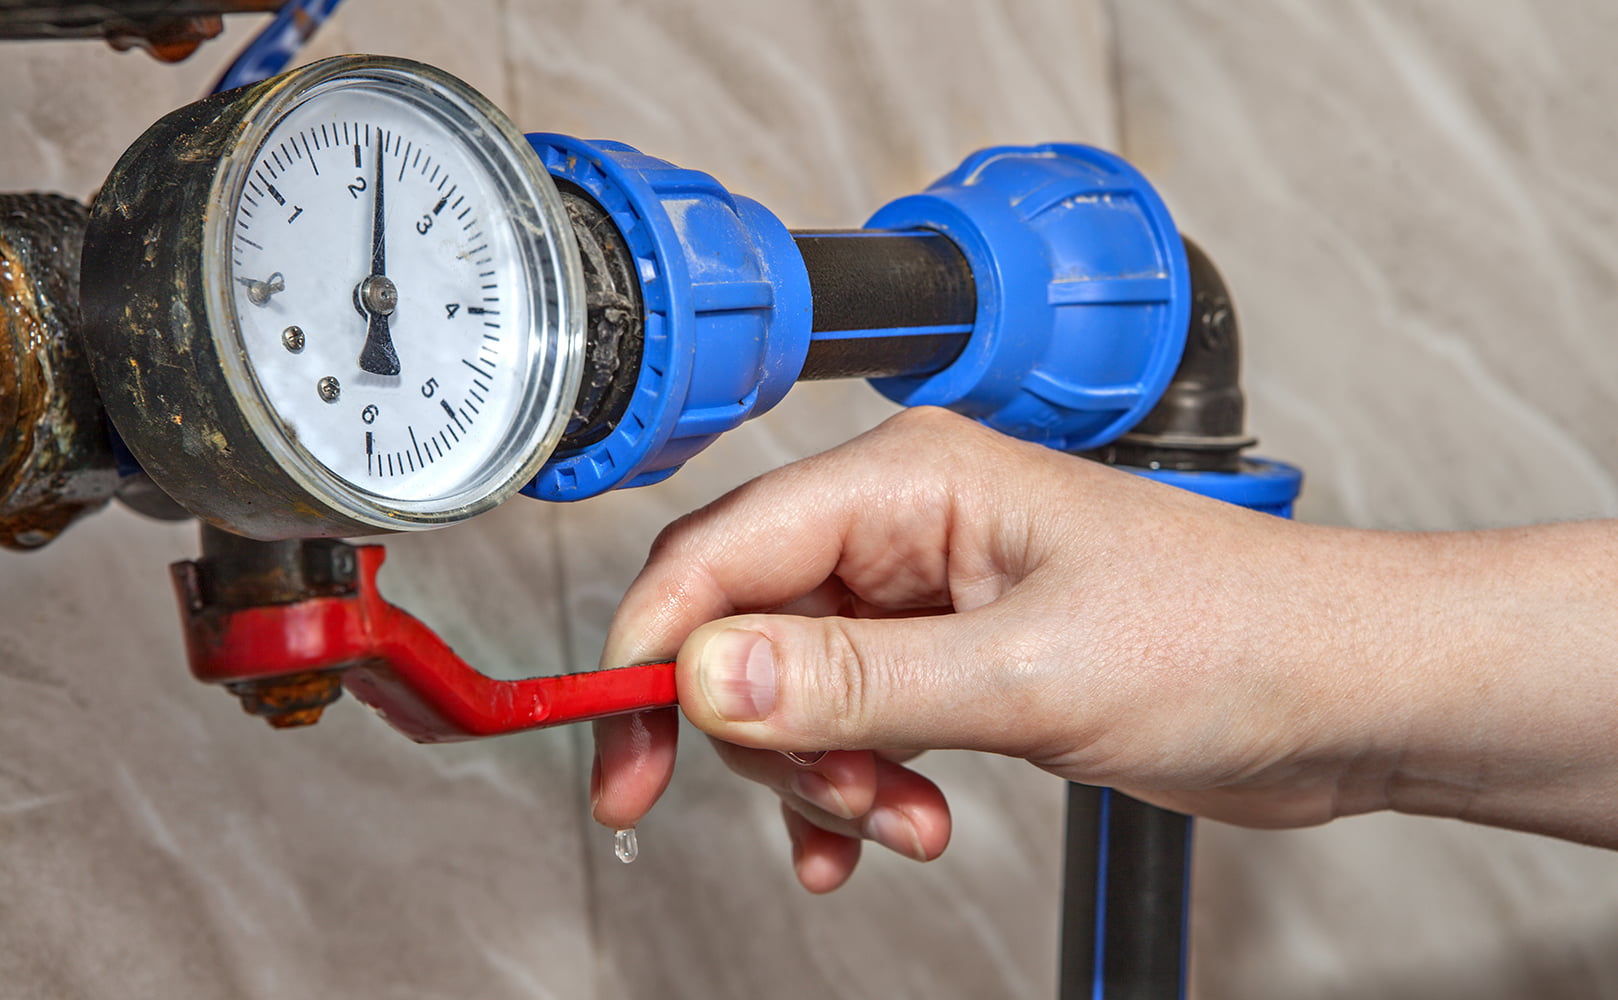
Step 4: Relieving Pressure
Find the pressure relief button on your sediment filters’ housings. It’s typically a red button on the top.
For each housing, press and hold this button for a few seconds. This ensures overpressure won’t be an issue.
Step 5: Unscrewing Housing
Use the housing wrench to unscrew the first housing. Keep an empty bucket nearby to catch any water that might spill out during this step.
Step 6: Removing Cartridge
Remove the old sediment filter cartridge from the housing and set it aside in the empty bucket. You can dispose of it properly once you’ve finished the entire process of changing your sediment filter.
Step 7: Cleaning Housing (Optional)
It’s not uncommon for bacteria and dirt to accumulate on a sediment filter’s housing. You may thus want to clean the inside of all housings with soapy water.
Or, you can clean them with a brush and household bleach. If you do choose to clean the sediment filter’s housings, rinse them thoroughly with plain water afterwards.
Step 8: Lubricating O-Rings
Check the condition of the housing’s O-ring. If it looks to be in poor condition, replace it.
Use food-grade silicone grease to lubricate the housing’s O-ring. Ensure it’s seated level in place.
Step 9: Inserting New Cartridge
Insert a new cartridge into the housing and screw it back on. You shouldn’t need to use any special tools to tighten the housing, as an O-ring will prevent leaks if it’s properly seated.
Step 10: Turning Water Supply On
Begin to slowly turn the water supply back on by opening the valves upstream of your system.
Step 11: Checking for Leaks
Check all areas of the sediment filter system for any signs of leakage. Closely examine the housings you recently screwed back on. Again, if the O-rings are seated well, they should prevent leaks, but it’s best to err on the side of caution and confirm there are no issues.
Step 12: Stopping Leaks
Turn off the water supply right away if you do spot any leaks. Tighten all connections accordingly.
Step 13: Reopening Water Supply
Once you’re certain all connections have been properly tightened, you can fully reopen the water supply. You may also reopen all valves leading away from your unit.
Step 14: Opening Faucets
Open multiple nearby faucets to flush out your new cartridge. The cartridge manufacturer may have also provided instructions for this step. Along with flushing out the cartridge, opening up faucets will remove excess air from the plumbing system.
Step 15: Checking Water Pressure and Flow Rate
Confirm the flow rate and water pressure have returned to normal. If so, you’re all set!
Changing a Sediment Water Filter If You’re on a Well
You might wonder if the process for changing a sediment filter is different depending on if you get your water from a well or city supply. This is an understandable question to have.
Luckily, the process for changing a sediment filter is the same regardless of your water source.

This Is How Often You Should Be Changing Your Sediment Filter
Several factors influence how often you should change a sediment filter. They include:
- The specific type of sediment filter you have
- Your filter’s size and capacity
- Daily water usage
- Water quality, as the presence of lots of impurities in your feed water will affect a sediment filter’s lifespan
Some sediment filters may need to be replaced as frequently as every three months. Others can last up to 12 months or even longer.
Signs indicating it may be time to change your sediment water filter include the following:
- Discolored water
- Unpleasant water taste
- Unpleasant water odor
- Reduced water pressure or drop in flow rate
It’s also wise to examine the condition of an old cartridge when replacing your sediment filter. If the cartridge looks basically new, you can probably continue using it for a little while longer. If the cartridge is very dirty and worn out, you should replace your filter more frequently going forward.
Your sediment filter manual should also provide information regarding how often you need to replace it. If you’ve lost the manual or it doesn’t provide this info, reach out directly to the manufacturer’s customer service department to ask about the typical lifespan of a filter cartridge.
Further Reading:
What Happens If You Don’t Replace?
Don’t delay if you know it’s time to replace your sediment filter. Failing to replace a sediment filter according to a proper schedule can cost you more than you might realize in the long run.
This is because a sediment water filter that isn’t changed as frequently as it should be will stop working as effectively as it otherwise would. This can allow particles and contaminants to pass through.
The presence of these contaminants in your water will reduce the lifespan of appliances like your washing machine, heater, etc. You’ll have to repair and replace them earlier than you might have expected if this happens. A simple way to guard against this is to replace your sediment filters regularly.
Perhaps more importantly, changing your sediment filters can protect your health. This is because contaminants which can negatively influence the lifespan of your water-using appliances can also get into your drinking water if your filters lose their efficiency.
Experts actually suggest replacing sediment filter cartridges a minimum of once a year. If you don’t, mold and bacteria can begin growing inside of them.
None of this is meant to worry you. It’s simply meant to highlight the importance of keeping yourself healthy and your appliances in good shape by replacing your sediment filter cartridges often. As this guide demonstrates, the process of doing so also isn’t very challenging!
If you have any questions about how to change a sediment filter please don’t hesitate to leave a comment below!
About the Author Alexandra Uta
![]()
![]()
![]()

Information provided on BOS is for educational purposes only. The products and services we review may not be right for your individual circumstances.
We adhere to strict editorial guidelines. Rest assured, the opinions expressed have not been provided, reviewed, or otherwise endorsed by our partners – they are unbiased, independent, and the author’s alone. Our licensed experts fact-check all content for accuracy. It is accurate as of the date posted and to the best of our knowledge.