How to Clean a Whole House Water Filter
Written by: Gene Fitzgerald // Last Updated: Sep 20, 2022
This page may contain affiliate links. If you buy a product or service through such a link we earn a commission at no extra cost to you. Learn more.
A whole house water filter is an excellent way to provide your family with clean water anywhere in your home.
One of the great benefits of these systems is that they don’t require much maintenance, but it’s still important to do it right when needed.
If you are unsure how to clean your whole house water filter, you’ve come to the right place.
This guide will take you through cleaning a whole house filter system, including how to clean its housing(s), sanitize the insides, and clean and reuse filter cartridges.
Contents
show
Key Takeaways
These are the steps on how to clean a whole house water filter:
- Shut off the water and release pressure from within the system.
- Remove filter housing(s) and cartridge(s).
- Clean filter housing(s) with warm soapy water and a brush. Rinse afterwards.
- Replace used filter cartridges if need be.
- Reassemble the whole house water filter.
- Open water supply and check for leaks.
How to Clean a Whole House Water Filter
Cleaning a whole house water filter is a lengthy process, but it isn’t particularly complicated.
Before we get started, we need to clarify that this guide is intended for whole house filters that use a cartridge system.
Now, without further ado, here are the steps to clean a cartridge-based whole house water filter:
1. Shutting Off the Water
First on the list is shutting off the water valve to the filter system. Normally, you need to turn the valve handle 90 degrees so that it is perpendicular to the pipe rather than parallel. However, this could be different for you, depending on how the valve was installed and what type.
If your shut-off valve is not located right before the filter, follow the water line to your pressure tank and shut off that one.
If you don’t have a valve but use a water pump, then shut off the power to the pump instead.
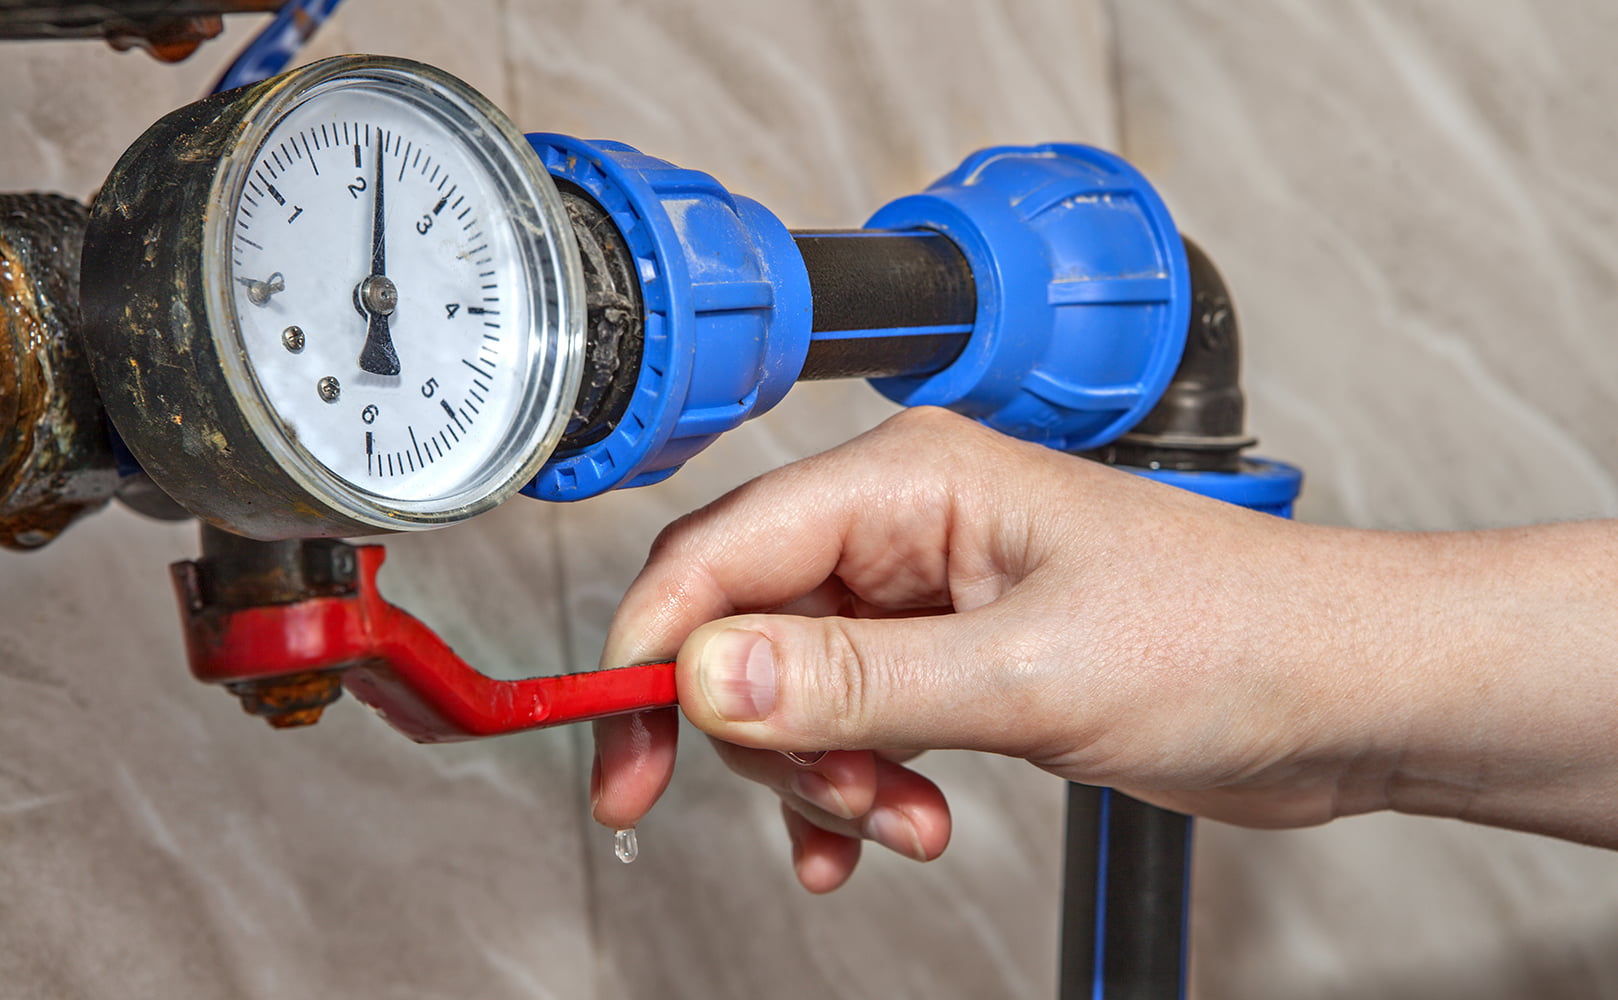
2. Releasing Pressure
The next step is to release the pressure from within the filter system. There are two ways you can do this:
- Your filter may have a small button on top, normally red. Wrap a rag around it and press it to release the pressure. The cloth rag is to prevent the released water from spilling around.
- Open up the faucets around your home to let the water pressure out.
You can combine both methods to make sure all the pressure and as much water as possible is out. Once you’ve released the pressure, close the filter’s exit valve (if it has one).
3. Removing Filter Housing(s) and Cartridge(s)
After the water pressure has been cleared, it’s time to remove the filter’s housing(s) and cartridge(s).
Start by unscrewing the first filter housing. To do this, you will need a filter housing wrench specific to your system.
You should also get an empty bucket and place it underneath before you start. This way, you can catch the water that is likely to spill out.
Place the filter wrench on the housing and turn it to the left to unscrew the casing. If it feels tight, try pressing the button on top one more time to release more pressure.
Once you’ve removed the housing, remove the old cartridge from inside the housing and dump out the water. Make sure the O-ring comes out as well, as you’ll want to clean it and its groove. If you notice the O-ring is in bad condition, this is a good time to change it.
Take this time to examine the housing for debris, sediment, mold, or algae.
4. Cleaning the Filter Housing(s)
You can clean each whole house filter housing with warm soapy water and a brush. Thoroughly wash the inside of the filter housing and its caps, then rinse it. Make sure to clean the O-ring’s seating to help it seal properly.
5. Optional: Sanitizing
If your POE filter’s housing has signs of algae, mold, or otherwise looks dirty, you can prepare a sanitizing solution to clean it further.
Here’s what you need to do:
- In a clean bucket, combine ⅓ teaspoon of unscented household bleach with 1 gallon of fresh water
- Pour 1 cup of the mixture inside the housing of each filter cartridge.
- Connect the housings back into the system but without the cartridges.
- Open the valve to let water into the system.
- Open a faucet in the house, and leave it open until water starts pouring out, then close it.
- Let the solution sit for 30 minutes.
- After the 30 minutes have passed, start the cleaning process again by shutting off the valves and removing the housings.
- Discard the sanitizing solution down the drain.
You can follow this process even if your housing looks clean to ensure it’s properly sanitized.
However, don’t forget to flush any remaining traces of bleach from your home’s plumbing system when you’re done. You can do so by opening various outlets for a few minutes.
Further Reading:
6. Inspecting Used Filter Cartridges
You can either clean or discard your old whole house water filter cartridges at this point, but even if you choose to discard them, you should inspect them first.
If they have high levels of sediment build-up, you might need to replace them more often or add another stage to your filtration process.
6.1 Cleaning and Reusing Sediment Filters
If you have a sediment filter, follow these steps to clean and reuse it:
- Buy a pre-mixed cleaning solution, for example muriatic acid or mix 2 oz of oxalic acid powder with 1 gallon of plain water.
- Place your sediment filter inside its housing and rinse both in the acid solution for 15 to 20 minutes – no scrubbing required.
- Thoroughly rinse both components with clean water.
- Let the filter dry.
You can neutralize the acid with a couple of tablespoons of baking soda before pouring it down the drain.
Note that this doesn’t work for all sediment filter types.

6.2 Cleaning and Reusing Carbon Filters
If you have a carbon filter, follow these steps to clean and reuse it:
- Remove the plastic mesh netting around the filter by cutting twice around the perimeter as close to the top and bottom of the cartridge as possible. Then remove the netting.
- Cut through the paper layer underneath the filter but leave a small strip of paper of about half an inch. This way, it’s easier to roll the paper back up.
- Peel back the outside paper layer.
- Use a garden hose to rinse any dirt from the paper layer and charcoal core.
- Combine one to two spoons of bleach with warm water and scrub both sides of the paper layer with a brush.
- Let the filter soak in the water-bleach mixture for a few minutes.
- Thoroughly rinse everything with clean water.
- Roll up the paper layer tightly.
- Secure the paper layer with a nylon tie at the top and trim off any excess. Add 3 to 4 more nylon ties and repeat.
If your water filter doesn’t have a paper layer, use an iron sponge or a scrub pad to brush the outside.
Note: Cleaning and reusing a carbon filter only makes sense if the filter media core has some filtration capacity left. If not, just throw it away or replace the carbon by hand.
7. Screwing Filter Sump(s) with Cartridge(s) Back on
For each filter stage, put the O-ring back in its seating and place the cartridge inside the filter sump.
Screw filter cartridge and housing onto the system module. Tighten it up as much as you can by hand before using the wrench to tighten it up a little bit more. You don’t want to overdo it as that could cause damage.
8. Opening the Water Supply and Checking for Leaks
Once you have reinstalled all filter housings, it’s time to open up the water supply again.
You should first open the valve that sends water to the filter. When you do so, inspect the unit for leaks, as this could indicate that an O-ring wasn’t properly installed, it’s damaged, or there is another issue.
If there are no leaks whatsoever, open up the valve at the other end of your whole house water filter.
Once you’ve done that, go to one of the faucets in your home and run the water. You’ll notice water coming out in little bursts at first as the system pushes out the air in the pipes.
If you’ve replaced your filters, you might notice some gray water or hazy white color. That’s normal and because the new filters need to be primed. It should clear out after a few gallons.
And that’s it, your whole house water filter is clean again, and you can safely use the water in your home.
Clean Filter Cartridges Only If It Makes Sense
While you can clean and reuse whole house water filter cartridges to an extent, it’s still recommended that you replace them after a certain amount of time.
Furthermore, if you are not saving much money by cleaning the filters instead of replacing them, you may be better off just replacing them in the first place.
There’s no point in cleaning a filter you must throw out anyway. Even if cleaned, old filters lose their effectiveness with time.
If you have any questions about how to clean a whole house water filter please don’t hesitate to leave a comment below!
About the Author Gene Fitzgerald
![]()
![]()
![]()
![]()
![]()
![]()
![]()

Information provided on BOS is for educational purposes only. The products and services we review may not be right for your individual circumstances.
We adhere to strict editorial guidelines. Rest assured, the opinions expressed have not been provided, reviewed, or otherwise endorsed by our partners – they are unbiased, independent, and the author’s alone. Our licensed experts fact-check all content for accuracy. It is accurate as of the date posted and to the best of our knowledge.