How to Increase Water Pressure in a Reverse Osmosis System
Written by: Gene Fitzgerald // Last Updated: May 10, 2023
This page may contain affiliate links. If you buy a product or service through such a link we earn a commission at no extra cost to you. Learn more.
Reverse osmosis systems filter water using high pressure, so not enough pressure or a sudden pressure drop can mean bad news.
Luckily, there are simple fixes for most issues.
In this article, we’ll discuss different ways to increase water pressure in a reverse osmosis system.
Contents
show
Key Takeaways
You can increase water pressure in a reverse osmosis system by:
- Replacing old filters/membranes when due.
- Checking for clogged or kinked tubing.
- Repressurizing the RO tank.
- Increasing water pressure with an electric booster pump or permeate pump.
- Increasing home water pressure.
- Moving the RO storage tank closer to the faucet.
- Adding a second storage tank.
What Is the Ideal Water Pressure for a Reverse Osmosis System?
Reverse osmosis systems work best with a feed water pressure of about 60 psi.
40 psi is the minimum recommended pressure for RO systems; anything lower and the filtration process works too slowly and wastes excessive amounts of water.
How to Increase Water Pressure in an RO System
How to increase water pressure in an RO system?
If there’s a drop in water pressure there might be a problem with one or more system components. Or it might be that feed water pressure is too low in the first place.
Let’s elaborate.
Replacing Old Filters/Membrane
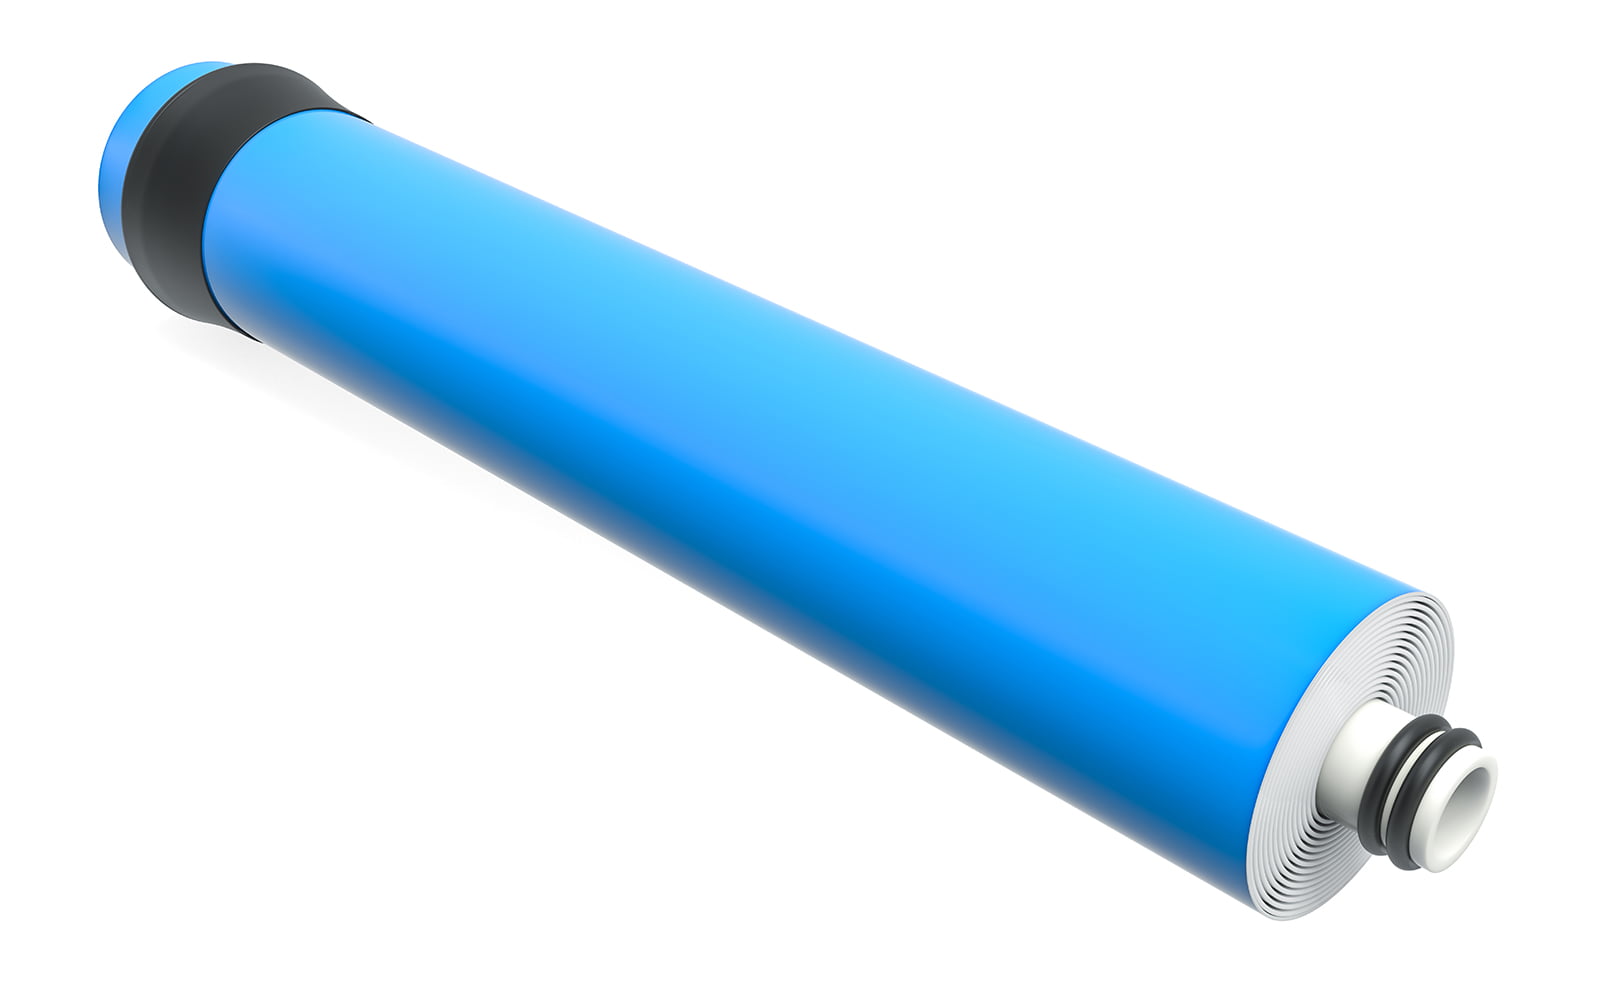
RO components like the membrane and pre/post-filters can get clogged if they’re not replaced on time, leading to reduced pressure. When your filters or membrane are clogged, the flow rate drops, and it takes longer for your RO tank to fill up (which can be very frustrating).
Generally, carbon and sediment pre-filters need to be replaced every 6-12 months, and carbon post-filters should be replaced every 1-2 years. A reverse osmosis membrane can last 2 to 5 years.
Note: Filter replacement dates are not the same with all manufacturers. Check the manual to know exactly when to change your filters. Other factors like your feed water condition also determine how often you should replace filter elements.
Not sure how to replace your filters and RO membrane? Don’t worry. We’ll explain how to replace old filters/membranes in an under sink RO system. You need to:
- Check the product manual; every system is different, so check the manual for your filters’ replacement procedure.
- Wash your hands to avoid contaminating the new filters.
- Turn off the system’s water supply and shut the storage tank valve.
- Drain all remaining water by turning the RO faucet on, and leave it on until it stops dripping completely.
- Place a bowl under the RO system to catch spills. Also, have a towel ready and a bucket to put your old filters in.
After these preparatory steps, you can go on to replace your filters. Under sink RO systems have pre-filters and post-filters. We’ll explain how to replace them both below:
How to replace under sink RO pre-filters:
- Turn the pre-filter housings clockwise. You can use a filter or strap wrench here.
- Scrub the inside of the housings with warm water and dish soap. You could also sanitize the system with sanitizer or unscented bleach. Rinse the housings afterward.
- Install the new pre-filters.
- Check the O-rings to ensure they’re in place – reposition them if they aren’t, and replace them if they’re not in good condition.
- Screw the housings back on, but do not over-tighten it.
How to replace inline carbon post-filters:
- Push and hold the collet against the quick-connect fitting and remove the tubing. Repeat this on the other end.
- Take out the cartridge and install the replacement filter (look at the arrows to know the flow direction).
- Push the tubing back into the fitting and pull back on it a little to secure the connection.
- Turn the water supply back on.
- Open the RO tank valve.
- Open the filtered water and let the system flush for a few minutes.
- Inspect the system for leaks. If there are no leaks, close the faucet and let the tank fill.
- Discard one or two tank fills of water to clear out any discoloration.
How to replace the RO membrane:
- Check the manual and see the instructions for replacing the membrane in your under sink system.
- Wash your hands.
- Shut off the water supply and close the storage tank valve.
- Turn on the RO faucet and let the water drain until it stops completely.
- Remove the water line from the membrane housing cap. Push and hold the collet against the quick-connect fitting, then remove the tubing (in some systems, there’s a plastic clip you need to remove as well).
- Remove the membrane housing cap by turning it clockwise (you can use a filter wrench or strap).
- Take out the old RO membrane (needle-nose pliers can assist you here).
- Clean inside the membrane housing with warm water and dish soap and sanitize with unscented bleach or any other suitable disinfectant if need be.
- Rinse thoroughly.
- Insert the new RO membrane into the housing (let the end with the two O-rings go in first). Remember not to touch the membrane with your bare hands.
- Double-check the position and condition of the O-rings. If they’re not correctly placed, reposition them. If they’re bad, replace them.
- Screw the housing cap back on but do not over-tighten.
- Push the tubing back into the cap fitting to reconnect the membrane. Secure the connection by pulling back on the tubing.
- Turn the water supply on and open the RO tank valve.
- Flush the system for a few minutes and then check for leaks.
- Turn off the faucets and allow the storage tank to fill.
- Discard one or two tank fills of water before use to remove any preservatives in the membrane that may affect your water’s taste and smell.
Checking for Clogged/Kinked Tubing
Your RO system’s water pressure may drop drastically if the tubings are clogged or kinked.
Kinks are easy to spot. But in order to find clogs in the tubing, you’ll have to turn off the water supply to the reverse osmosis system, close the storage tank valve, drain any remaining water, and then disconnect and check the tubing one by one.

Repressurizing the RO Tank
The ideal pressure for the RO storage tank is 6-8 psi. This range varies from model to model, so confirm with the manual what your tank’s pressure should be.
You can measure your storage tank pressure with a pressure gauge (you can only measure pressure when the tank is empty). If your tank’s pressure falls below the recommended range, you must correct it.
To repressurize your RO tank, you’ll need an air compressor or pump, and a pressure gauge that measures low pressure (below 10 psi).
With your materials ready, repressurize your reverse osmosis water storage tank following these steps:
- Close the water supply valve: Turn off the water supply valve to prevent water from getting into your RO system.
- Drain the tank: Turn your faucet on and let the water run until the tank drains completely.
- Disconnect the tank: Disconnect the tank from the RO system and take it outside.
- Drain any remaining water: Open the tank valve and let the water run until it stops completely.
- Connect your pump or air compressor to the tank’s Schrader valve and keep adding pressure until all water has left the tank.
- Now check the pressure: A 6-8 psi reading tells you that your tank’s pressure is on track. You can measure the pressure with a tire or digital pressure gauge. You don’t need to buy a pressure gauge if your system has an inbuilt pressure gauge.
- Increase the pressure: If your tank pressure is below 6 psi, increase the pressure by pumping more air into the valve.
- Reconnect the tank and let it fill. As water flows back into your system, your repressurized storage tank will fill up gradually.
Increasing Home Water Pressure
Low home water pressure affects the overall pressure of your RO system. A simple fix for low home water pressure is to adjust the pressure-reducing valve (you can find it close to your water meter).
Make small adjustments to the regulator by turning the adjustment screw clockwise to increase pressure. Pressure should be increased slowly and steadily to avoid overpressurizing. As you adjust the regulator, measure the water pressure with a pressure gauge to see if the pressure is increasing.
If you have other concerns about your home water pressure or your plumbing system, contact a professional plumber for help.
By the way, between 60 and 70 psi is considered ideal.
Increasing Water Pressure Using an Electric Booster Pump
Adding an electric booster pump to your reverse osmosis system increases water pressure significantly. Higher water pressure means less waste water, more rejected contaminants, and possibly a higher faucet flow rate.
Follow these steps to install an RO booster pump:
- Empty the water tank. This allows the pump to refill the tank and ensures the pressure switch is correctly connected.
- Mount the pump in the mounting bracket. If there’s no mounting bracket, make sure there’s enough room in front of the pump to accommodate the tube that supplies water to the RO system. You can set the pump on the cabinet floor or mount it to the wall in any direction. However, remember that the location of the pump and mount affects how much noise the pump makes.
- Cut the tube that runs between the RO system and tank, then insert the pressure switch.
- Connect electrical wires from the transformer and pump to the pressure switch.
- Turn the water back on. As the water starts to flow from the faucet, inspect the system and ensure there are no leaks.
- Plug in the booster pump. If the pump is running smoothly, more water gushes out of the faucet.
- Turn the storage tank valve on. This allows the RO system to work seamlessly with the booster pump.
Note: If the pressure is boosted too high, the RO system can develop leaks. If this happens, lower the pressure by turning the top adjustment screw on the head of the pump.
Further Reading:
Increasing Water Pressure Using a Permeate Pump
Adding a permeate pump to your RO system boosts efficiency and reduces waste water production by up to 80 to 90%. Permeate pumps work by using some of the RO waste water to power a piston that forces the filtered water into the storage tank.
A major difference between permeate pumps and booster pumps is that permeate pumps do not require electricity to work.
Another difference is that booster pumps are designed to increase pressure when the pressure in the system is too low for the membrane to work with. On the other hand, permeate pumps are simply designed to help reverse osmosis systems save water and make the filtration process more efficient.
Moving the RO Storage Tank Closer to the Faucet
Moving the RO storage tank closer to the faucet increases pressure and boosts the flow rate. If the storage tank is placed too far from the faucet, the water has to move a longer distance through the tubing before it reaches said faucet. This extra distance causes the pressure to drop and the flow rate to slow down.
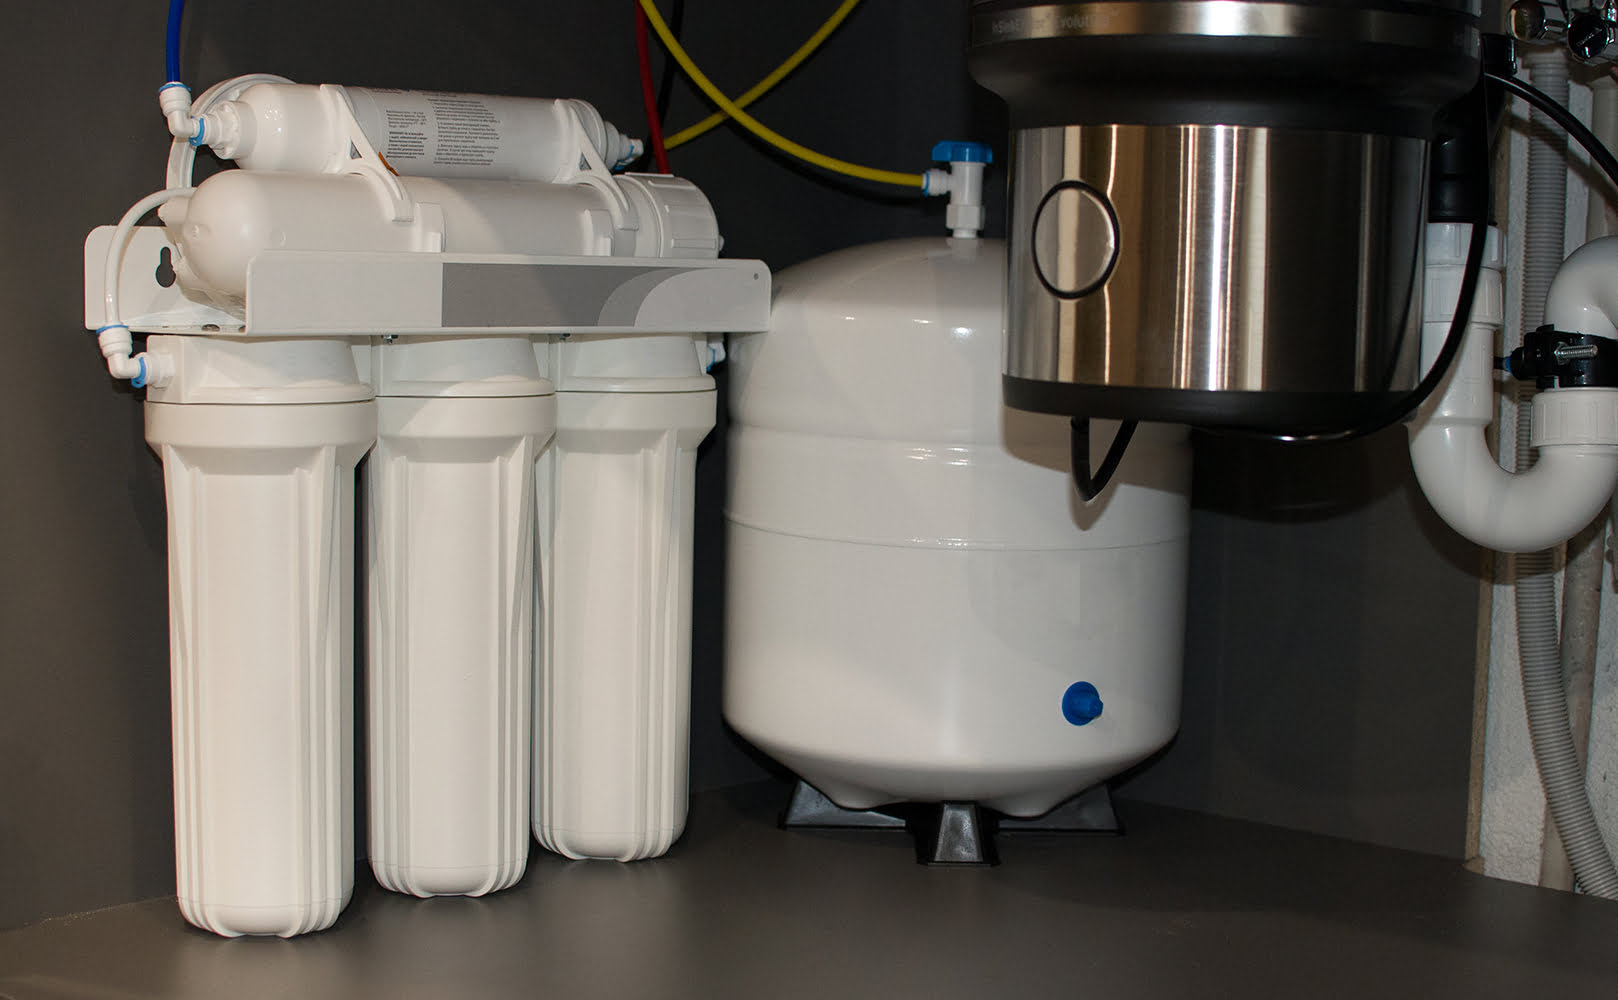
Adding a Second Tank
Two tanks are better than one. Adding a second tank to your reverse osmosis system improves water delivery because the two tanks hold more water than a single tank, and the pressure stays higher for much longer.
This tip is most helpful if you use RO water for your ice machine or refrigerator. With two tanks storing your RO water, water flows to your fridge with enough pressure to guarantee a steady water supply.
Installing a second RO tank is simple as long as you have enough space. To install a second tank, you’ll need a second tube and a T-connector to join the two tanks together. The tanks must be placed parallel to each other.
How to Determine the Water Flow Rate of Your Reverse Osmosis System
RO flow rate is the amount of filtered water a reverse osmosis system produces per time unit. The flow rate tells you how much water to expect from your system and if it’s efficient enough to fulfill your water needs.
For most residential homes, RO systems have a theoretical flow rate of 50-75 gallons per day (GPD). However, this varies based on the size and type of RO membrane, feed water pressure, and water temperature. Flow rates are not static either. They may decrease over time depending on the current state of your system.
Here’s how to determine the water flow rate of your reverse osmosis system:
- Ensure that the incoming water line is turned on, then turn off the ball valve on top of the RO storage tank.
- Open the faucet and let the water run until all the water in the system lines has flown out of the faucet.
- Wait 1-5 minutes after there’s no more water left. By this time, the water is being filtered in real-time and should flow very slowly from the faucet.
- Next, measure how much water is dripping or flowing out of the faucet using a measuring cup (for 60 seconds).
- Take the number of ounces produced by your RO system within 60 seconds and multiply by 1,440 (the number of minutes in a day), then divide whatever you get by 128 (the number of ounces in a gallon). The final result is the amount of water in gallons your RO system produces every 24 hours.
To calculate your hourly flow rate, divide by 24.
So, for example, if your system produces 6 ounces per minute, 6 x 1,440 (minutes in a day) = 8,640 (ounces), divided by 128 (ounces in a gallon) = 67.5 gallons per day.
Hourly flow rate: 67.5 divided by 24 = 2.8 gallons.
If you have any questions about how to increase RO water pressure please don’t hesitate to leave a comment below!
About the Author Gene Fitzgerald
![]()
![]()
![]()
![]()
![]()
![]()
![]()

Information provided on BOS is for educational purposes only. The products and services we review may not be right for your individual circumstances.
We adhere to strict editorial guidelines. Rest assured, the opinions expressed have not been provided, reviewed, or otherwise endorsed by our partners – they are unbiased, independent, and the author’s alone. Our licensed experts fact-check all content for accuracy. It is accurate as of the date posted and to the best of our knowledge.