Review: iSpring RCC7AK 6-Stage Reverse Osmosis System
Written by: Alexandra Uta // Expert Fact-Checking: Buddhini Dolapihilla, MBSS // Last Updated: Dec 28, 2023
This page may contain affiliate links. If you buy a product or service through such a link we earn a commission at no extra cost to you. Learn more.
The iSpring RCC7AK is a 6-stage under sink reverse osmosis system featuring an alkaline post-filter to boost the purified water’s pH level by adding back essential minerals. What’s more, the system is offered at a reasonable price point.
Let’s take a closer look at the iSpring RCC7AK 6-Stage Reverse Osmosis System and see how well it stacks up against the top systems on the market.
Contents
show

iSpring RCC7AK 6-Stage Reverse Osmosis System |
|
| Price: | $$ |
| Filter Stages: | 6 |
| Water Flow: | Not Specified |
| NSF Certifications: | 58 |
| Annual Cost: | ~$114-228 |
|
Overall Rating: 4.0/5.0 ⓘRating based on filtration performance, filter life, price and yearly cost, NSF testing/certification, customer support, product warranty, our testing/experience, user feedback, and other factors.
|
|
iSpring RCC7AK 6-Stage Reverse Osmosis System – All Specs
- Model: RCC7AK
- Annual Maintenance Cost: ~$114-228
- Filter Media/Process: Sediment Filtration, Carbon, RO, Remineralization
- Filter Stages: 6
- Membrane Rating: 75 gpd
- Filtering Capacity: 6 Months to 3 Years
- WxHxD (System): 15.5″x18″x5.125″
- Tank: 11″x14″x11″, 3.2 gal
- Water Temperature: 40-100 °F
- Water Pressure: 40-70 psi
- Water pH: 2-11
- Fitting: 3/8”-1/2″
- NSF Certifications: Standard 58 (TDS)
- Warranty: 1 Year
iSpring RCC7AK – Key Features
The iSpring RCC7AK 6-Stage Reverse Osmosis System is a straightforward under sink unit with 5 standard filter stages and a pH alkaline post-filter to enrich water with beneficial minerals. This also helps to improve the water’s taste. Of course, each of the 6 filter stages has a specific purpose in the filtration process and as a result, will remove different contaminants. Let’s take a look at each one in detail.
- The first filter stage is a multi-layer sediment pre-filter used to eliminate particulates like sand, rust, dirt, and sediment. This helps to preserve the life of the later filter stages by preventing clogging.
- Next, a coconut shell GAC (granulated activated carbon) filter stage removes chlorine, foul taste and odor, turbidity, discoloration, and organic chemicals in general.
- Next, a solid carbon block filter (5 microns) further removes chlorine as well as chloramine and organics.
- This stage is the heart of the system – the RO membrane. The ultra-fine membrane will remove a wide range of contaminants down to just 0.0001 microns. This includes heavy metals, VOCs, salts like nitrites/nitrates, and more.
- Next, a final carbon filter stage is used to ‘polish’ the water’s flavor by removing any residual taste and odor that might have crept into the water while being stored in the tank.
- Finally, the pH alkaline post-filter is used to supplement the filtered water with essential minerals that were stripped away by the RO membrane. This includes potassium, calcium, and magnesium. This stage will also increase water pH by 0.5 to 0.8 points, and help to improve the water’s taste.
All in all, expect for stage 6, this is the typical filter setup for RO systems. And it’s solid. You can expect the majority of contaminants to be removed from your water supply. In fact, we even have a certification against NSF standard 58 for TDS reduction which means guaranteed performance (more on specific contaminants below).
What else? Well, the iSpring RCC7AK is offered at a moderate price point – making it an attractive option for budget-oriented shoppers. Also, a sturdy all-metal brushed nickel faucet comes included with the purchase, which contains no cheap plastic parts. Additionally, a leak-detection valve is included, which will shut off the flow to the system when a leak is detected underneath it.
The entire unit is made from NSF-certified components, while the first pre-filter housing is clear-colored – allowing for easy checking of the filter without separating the housing.
As the system is barebones, it doesn’t include a pressure pump. This means the ratio of wastewater to filtered water is fairly high, at about 3 parts wastewater to 1 part filtered water.
Filter life is 6 months to 3 years. We estimate $114-228 in annual replacement cost which is okay.
iSpring 6-Stage Pros
Perhaps the biggest advantage of the iSpring RCC7AK is its low upfront price.
And as mentioned before, the RCC7AK includes a 6th alkaline post-filter stage. This stage supplements the water with beneficial minerals that are stripped away as a result of the reverse osmosis process. This also improves the water’s taste – as some people find the taste of RO water to be a bit ‘flat’.
System installation is not overly difficult and can be done by most DIYers.
Another plus is the filter cartridges are standard-sized, meaning you can opt for off-brand filter cartridges should you wish. This allows you to save money on filter replacements or target a specific contaminant.
Last but not least, there’s a 1-year limited manufacturer warranty plus a 1-year money back guarantee for peace of mind.
What Contaminants Are Being Removed?
iSpring states that the RCC7AK will remove arsenic, fluoride, vinyl chloride, chlorine (99%), lead (up to 98%), calcium, asbestos, sodium, copper (97%), and more.
The iSpring RCC7AK – learn more on Amazon.com
Installation
When it comes to installation, the system is no more difficult to install than other under sink reverse osmosis units. That said, the carbon filters, membrane, and storage tank do require flushing before use.
The system comes with color-coded tubing connections for easier installation. Additionally, the feed water adapter is included with the purchase.
iSpring provides detailed installation instructions both written and in video form.
The system can be installed using basic tools you likely already have lying around. That said, make sure you have the following before starting:
- Plumber’s Tape
- Adjustable wrench, pliers, or 5/8” and 9/16” open-ended wrenches
- Phillips head screwdriver
- Sharp utility knife
- Rags
- Flash Light
- Variable speed drill with ¼” bit for the drain pipe hole and ½” diamond bit for the countertop hole
Everything else required for installation including a housing wrench, faucet bracket, and faucet installation kit are part of the package.
To install, follow these steps:
Please consider these instructions as a general guideline. Always make sure to check and follow your user manual before getting started.
- The first installation step is installing the feed water adapter to your cold-water supply.
- Shut off the cold water supply underneath your sink and open the faucet to release pressure and remove trapped water. Use a towel to clean any spills.
- Disconnect the faucet line and attach the feed water adapter to the cold water supply. Make sure the O-ring is positioned correctly to prevent leaks.
- Now, reconnect the kitchen supply line to the feed water adapter’s male end. Ensure the feed water adapter is set to ‘OFF’ while the CWSV is set to ‘ON’.
- Lastly, connect one end of the red-colored tubing to the feed water adapter.
- This step involves installing the RO faucet on your countertop. If you have an existing ½” hole in your countertop or sink for a soap dispenser or water jet, then you can repurpose this for the faucet. Otherwise, you’ll need to either drill a new hole or use the included faucet bracket to mount your RO faucet in place. To drill a hole in your sink or countertop:
- Use a hole punch to start your hole when drilling into steel.
- If drilling in steel use a titanium drill bit, if drilling in ceramic use a diamond core drill bit.
- Set drill speed to low when drilling, and use caution especially when starting the hole. Use coolant to keep the bit from overheating: oil for steel and water for granite.
- Once you break through the surface, spin the drill to evenly apply pressure. Be patient, as it can take up to 40 minutes to drill through an inch of porcelain in some cases.
- After completing the hole, wipe the area clean and dry. Now, slide the front plate onto the faucet stem and then the black rubber washer afterward. Hand tighten.
- Attach the quick-connect fitting to the faucet base, and then attach the blue-colored to the fitting and secure.
- This step involves installing the drain saddle to the drain pipe under your sink.
- Select a location to install your drain saddle. The location should be before the P-trap to avoid microbial contamination in your system.
- Use your cordless drill to make a ¼” hole in the drain pipe and then apply the black adhesive around it.
- Use a sharp knife to cut the black colored tubing at a 45° angle and then insert the tubing into the hole you just drilled. Then install the drain saddle itself and tighten the hex nuts ensuring the tubing remains in place. Then install the locking clip on the tubing end.
- Now we will need to install the three vertical-facing pre-filter stages into their respective housings.
- First, check to make sure the O-rings are positioned correctly inside their respective grooves. You can apply food-grade silicone to ensure they stay watertight if desired.
- Before removing the plastic shrink wrap from the exterior of the cartridge make sure to note the directional arrow.
- As you place the filter cartridges into their housings make sure the groove in the housing bottom lines up with the filter hole.
- Now, screw the filter housings onto their caps. Rotate counterclockwise until hand tight. Then, use the included filter wrench to tighten a further ¼ to ½ turn being careful not to overtighten as this can cause difficulty when replacing cartridges.
- Now it’s time to install the storage tank’s shut-off valve. Apply ten to fifteen wraps of Teflon plumber’s tape in a clockwise direction. Connect the shut-off valve to the top of the tank and hand tighten. Then, attach the yellow-colored tubing to the quick-fit fastener.
- At this point, you’ll need to install the RO membrane itself.
- First, detach the tubing from the quick-fit connector on the membrane housing cap.
- Rotate counterclockwise to loosen the membrane cap. Then slide the membrane out and remove the plastic packaging being careful not to handle the membrane itself with bare hands.
- Slide the end with two rings into the housing first until the entire membrane is enclosed.
- Check that the O-ring is properly positioned and then hand tighten the end cap. Then, use the housing wrench to tighten a further ½ to a ¼ turn.
- At this point, you’ll need to make all of the necessary color-coded tubing connections. Consult the manual for precise illustrations as well as pictures.
- This step involves installing the leak stop valve beneath the system. The valve will shut off the system anytime a leak is detected.
- Cut the tubing end square and connect it to the leak stop valve. Make both tubing connections noting the ‘IN’ and ‘OUT’ on the leak stop valve.
- Position the valve in your desired place and then tape it in place. Note that once the valve is tripped, the pulp inside will need to be replaced before it can be reused.
- At this point, you can mount the system against the side of your under sink cabinet should you wish. Note that this is completely optional, and not needed for proper operation.
- The system is now installed, and all that remains is preparing it for use by flushing the filters, membrane, and storage tank.
- First, take a look at the tubing and see if you can spot any kinks. Fix these if found. Then, rotate the tank valve to the ‘OFF’ position.
- Remove the tubing connection from the RO membrane inlet and place it in a bucket. Turn on both the cold-water supply valve and the feed water adapter. Flush the first three pre-filters until the water runs completely clear.
- Turn the feed water valve off and then reconnect the tubing to the RO membrane cap.
- Now turn the RO faucet as well as the feed water valve. Allow the water to run while checking the system for leaks. Leaks are typically caused by a loose quick-connect fitting, a loose or cross-threaded housing cap, or a damaged or misplaced O-ring.
- Allow the RO faucet to run for 15 minutes to flush the system. You’ll notice small carbon particles at first – this is normal and part of the flushing process.
- Now, turn the faucet off and open the tank valve. Allow the tank to fill, which can take an hour or two. When the tank is filled, open the faucet and empty the entire tank. This water should not be used for drinking.
- Now allow the tank to fill up again, and you’re ready to start using your new system.
Video
The Package (Parts)
- RO Machine Head
- RO Membrane
- 3 Pre-Filter Housings and Cartridges
- pH Alkaline Inline Post-Filter
- Storage Tank
- Tank Stand
- RO Faucet w/ Installation Kit
- Feed Water Adapter (⅜” and ½”)
- 4-Color Tubing Set
- Drain Saddle
- Tank Valve
- ASO Valve
- Housing Wrenches
- Teflon Tape
- Spare O-Rings and Fittings
- Leak Detector Valve
Maintenance
The iSpring RCC7AK RO system is fairly typical when it comes to maintenance. It requires changing the filters and RO membrane on time as well as periodic cleaning and sanitizing of the storage tank.
The pre and post-filters will last between 6 and 12 months, while the RO membrane lasts between 2 and 3 years depending on your water quality as well as your usage level. One advantage is the clear-colored sediment filter housing. This allows you to check the filter’s status at a glance without detaching anything.
Maintenance costs are approximately $114 to $228 per year. Again, this will depend on your usage level and water quality. This is about average for a reverse osmosis system like this. It’s also worth mentioning that because the filters are standard-sized, you can go with off-brand filter cartridges if you want to save money.
Let’s take a look at the pre-filter-changing process in detail:
- First, turn off the tank valve as well as the feed water valve.
- Open the faucet to release pressure and remove any water left in the lines.
- Use the filter wrench to loosen the filter housing by turning it clockwise.
- Slide out the old cartridge and dispose of it.
- Slide the new filter into the housing ensuring it’s facing the correct direction and the O-rings are positioned properly.
- Mount the housing back to the unit head and turn clockwise until hand tight. Then give it a further ¼ to ½ turn with the filter wrench. Once again, be careful not to overtighten.
- Disconnect the red-colored tubing from the pre-filter outlet as well as the black-colored tubing from the flow restrictor. Connect the tubing running from the drain saddle to the pre-filter outlet.
- Open the feed water valve and flush the pre-filters for 5 minutes. Be sure to check the tubing connectors for leaks.
- Now close the feed water valve and reconnect the red and black tubing to their original quick-connect fittings.
The process for replacing the carbon post-filter is similar and also requires flushing for 5 minutes. Replacing the RO membrane also follows a similar procedure, but requires flushing for 15 minutes.
Manual
Here is a link to the official manual:
https://www.123filter.com/ac/index.php?rt=account/download/startdownload&download_id=90
NSF and Other Certifications
The iSpring RCC7AK features certification for NSF Standard 58. This standard pertains to the performance of point-of-use reverse osmosis water filters. In this case, certification only applies to the reduction of TDS (total dissolved solids).
Earlier Product Versions
The iSpring RCC7AK has no earlier product versions as far as we are aware.
iSpring RCC7AK 6-Stage RO System Cons
The iSpring RCC7AK’s most obvious drawback is its lack of contaminant reduction rates verified by NSF-standardized testing. While the model is certified to NSF Standard 58 – which is good – this only applies to the reduction of TDS. We would prefer to see more extensive testing on other contaminants and additional NSF standards. The only rates we have are chlorine (99%), lead (up to 98%), and copper (97%).
Side note: While iSpring provides a list of additional contaminant rejection rates on their website, this list appears to be generic.
Some users complained about recurring leaks – some even after having paid a certified plumber to complete the installation. Other customers had issues with faulty parts including the feed water valve, housings, and quick-fit connectors. On the plus side, most of these customers seem to be very satisfied with how quickly the manufacturer responded and solved their issues, which is a definite credit to the company.
It is also important to note that, this being one of the older-style RO systems, it will clutter your cabinet with all the different filter stages and tubing etc. And you should expect a pure to drain ratio of at least 1:3. This is because the iSpring RCC7AK doesn’t use an internal pressure pump.
iSpring RCC7AK Review: Our Verdict + Best for
Overall, the iSpring RCC7AK can certainly make a solid option when you’re on a tight budget and looking for a standard under sink reverse osmosis water filter system. That said, the real issue with it is its lackluster testing and solitary NSF certification. Additionally, as the system doesn’t use a pressure pump, its wastewater-to-filtered water ratio of about 3:1 means you’re going to be generating a lot of wastewater. If you’re fine with the above drawbacks, then the iSpring RCC7AK can certainly get the job done.
Our Rating in Detail:
- Filtration Performance: 4.0/5.0
- Filter Capacity (Life): 5.0/5.0
- Purchase Price: 5.0/5.0
- Annual Cost: 4.0/5.0
- Overall: 4.0/5.0
Comparison to Other Reverse Osmosis Systems
Let’s take a look at how well the iSpring RCC7AK stacks up against some of the top point-of-use RO water filters on the market.

Waterdrop G3 |
|
| Price: | $$$ |
| Filter Stages: | 4 |
| Flow Rate: | 0.42 gpm |
| NSF: | 58, 372 |
| Annually: | ~$145 |
|
Overall Rating: 4.0/5.0 ⓘRating based on filtration performance, filter life, price and yearly cost, NSF testing/certification, customer support, product warranty, our testing/experience, user feedback, and other factors.
Get 10% Off! Use Code: |
|
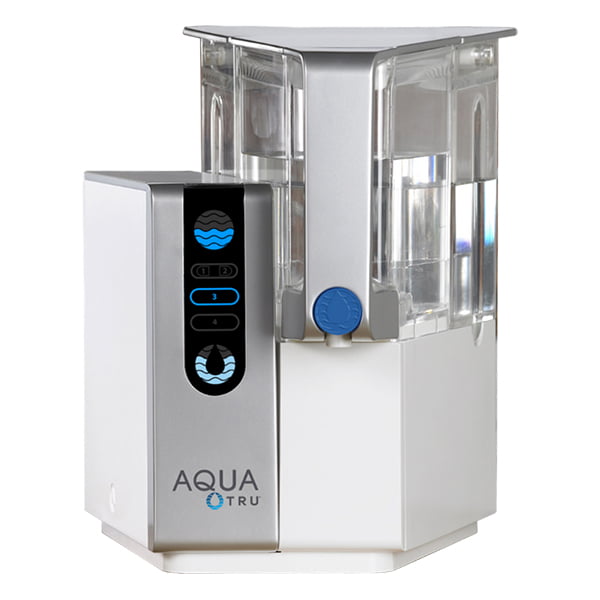
AquaTru |
|
| Price: | $$$ |
| Filter Stages: | 4 |
| Water: | 1 Gallon in 10-15 Minutes |
| NSF: | 42, 53, 58, 401, P473 |
| Annually: | ~$100-120 |
|
Overall Rating: 4.5/5.0 ⓘRating based on filtration performance, filter life, price and yearly cost, NSF testing/certification, customer support, product warranty, our testing/experience, user feedback, and other factors.
Get 15% Off! Use Code: |
|
|
iSpring RCC7AK |
|
| Price: | $$ |
| Filter Stages: | 6 |
| Flow Rate: | Not Specified |
| NSF: | 58 |
| Annually: | ~$114-228 |
|
Overall Rating: 4.0/5.0 ⓘRating based on filtration performance, filter life, price and yearly cost, NSF testing/certification, customer support, product warranty, our testing/experience, user feedback, and other factors.
|
|
First, the Waterdrop G3 is another under-the-sink system, but it uses a tankless design that filters water on demand rather than storing it inside a large tank. To accomplish this design, the Waterdrop G3 uses an internal pump to increase feed water pressure. As a result, it sports an impressive 0.42 gallon per minute flow rate. This translates into filling a standard cup in about 8 seconds – which is unusually fast for an RO system and better than the tanked iSpring. Another positive of the pressure pump is significantly decreased wastewater generation of just 33% of input water.
The G3 sports four filter stages backed by extensive testing and certification. This includes NSF Standards 42, 53, 401, and 58 for the removal of chlorine (99%), VOCs (up to 99%), nitrate (98%), lead (99%), arsenic (99%), fluoride (99%), chromium 6 (99%), and PFOA/PFOS (99%) and many more.
Another plus is the system’s smart faucet design. This faucet lets you know when it is time to change filters with LEDs as well as sound notifications. It also displays the current TDS level which is an easy way to evaluate how well the system is filtering. A similar LED display can be found on the RO system itself. Additionally, changing filters is exceptionally easy and tool-free. Simply rotate, remove, and replace – you don’t even need to shut off the feed water.
Waterdrop offers a money-back satisfaction guarantee as well as a 1-year warranty which only applies when the system is installed on municipal water. Furthermore, it features a BPA-free design as well as being easy to install.
When it comes to downsides, the G3 costs significantly more than the iSpring RCC7AK, and some users had issues with the system being noisy. It’s worth noting that the annual filter replacement costs are similar to the iSpring’s.
Next up in our comparison is the AquaTru countertop RO system featuring BPS and BPA-free construction. As the unit sits on your countertop rather than under your sink, it is essentially installation-free and can be ready to use in just 10 minutes. The design is very easy to use, and filtration is fast.
The AquaTru features an impressive 5 NSF certifications for Standards 42, 53, 401, 58, and P473. It’s independently tested and certified to remove close to 80 contaminants including the following: VOCs (95% to more than 99%), BPA (99%), TDS (87.1%), chlorine (96.6%), chromium 6 (97.2%), cysts (99.99%9, fluoride (93.5%), lead (99.1%), radium 226/228 (96.4%), trace pharmaceuticals and pesticides (86.7%-96.6%), and PFOA/PFOS (97.5%).
The system also spots an impressive 80% wastewater recovery rate, meaning only 20% of the input water is wasted. This is even better than the already impressive G3 and significantly better than the iSpring.
When it comes to drawbacks, the AquaTru had a small proportion of users reporting leaky units as well as units that stopped working after several months. In our personal experience, these were non-issues. Additionally, the system retails for significantly more than the iSpring, although annual maintenance costs are similar at about $100 to $120 when you don’t include the alkaline filter.
All in all, the AquaTru is our number one pick due to its ideal mix of cost, easy installation, filtration speed, wastewater reduction, cheap maintenance, and impressive NSF testing and certifications. In a close second would be the Waterdrop G3 with its tankless design, fast filtration, ease of installation, and relatively low wastewater generation. Last up is the iSpring RCC7AK, although it’s worth mentioning that the system costs significantly less than the above two – making it a decent value. Keep in mind if you opt for the iSpring your wastewater generation will be high and installation will be more complex. You’ll also be forfeiting most of the NSF testing and certifications.
More iSpring Reviews:
This completes our review of the iSpring RCC7AK 6-Stage Reverse Osmosis System. If you have any questions please don’t hesitate to leave a comment below!
About the Author Alexandra Uta
![]()
![]()
![]()

Information provided on BOS is for educational purposes only. The products and services we review may not be right for your individual circumstances.
We adhere to strict editorial guidelines. Rest assured, the opinions expressed have not been provided, reviewed, or otherwise endorsed by our partners – they are unbiased, independent, and the author’s alone. Our licensed experts fact-check all content for accuracy. It is accurate as of the date posted and to the best of our knowledge.