No Water After Changing RO Filters? Here’s How to Fix It!
Written by: Alexandra Uta // Last Updated: Jun 29, 2023
This page may contain affiliate links. If you buy a product or service through such a link we earn a commission at no extra cost to you. Learn more.
Regularly replacing your RO filters and membrane is key to maintaining the effectiveness of the system. This is why it can be so frustrating to run into problems with water flow after performing scheduled filter changes.
There are several possible causes for water not flowing This means you’ll need to perform a little troubleshooting to find and solve the issue.
Let’s look at all the potential reasons this may be happening, and what you can do to get your RO system working again!
Contents
show
Key Takeaways
There are several possible causes for no water flowing from your RO system after changing filters. These include
- not waiting for the tank to fill,
- an airlock in the system,
- a closed feed or tank valve,
- a triggered leak detector,
- a kink or bend in the tubing,
- a filter element installed the wrong way,
- or a faulty filter element.
The solution to these issues varies depending on the problem in question. Many of these issues can be quickly solved by turning a valve or swapping a filter, but some require a more hands-on solution.
Reasons Why You Have No Water After Changing RO Filters + Easy Fixes
So, what are the reasons for having no water after changing RO filters? And how can you fix them?
1. Not Enough Time Has Passed
The simplest reason your reverse osmosis system is not producing water after changing filters is that you haven’t waited long enough. RO systems are notoriously slow at filtering water – which is why they incorporate storage tanks to keep a reserve of filtered water on hand.
If you try to run the system before the tank has had an opportunity to fill, the water will come out of the faucet in a slow trickle. This is normal, and not a cause for concern.
How Long Does It Take to Fill a Reverse Osmosis Tank?
A typical under-sink RO system will take between 2 and 4 hours to fill its a 4-gallon storage tank. The exact speed at which the tank fills will depend on your system pressure, the condition of the filters and membrane, temperature, and the system in question.
You’ll need to wait for the tank to fill – at least partially – until you can start using the system to dispense water.
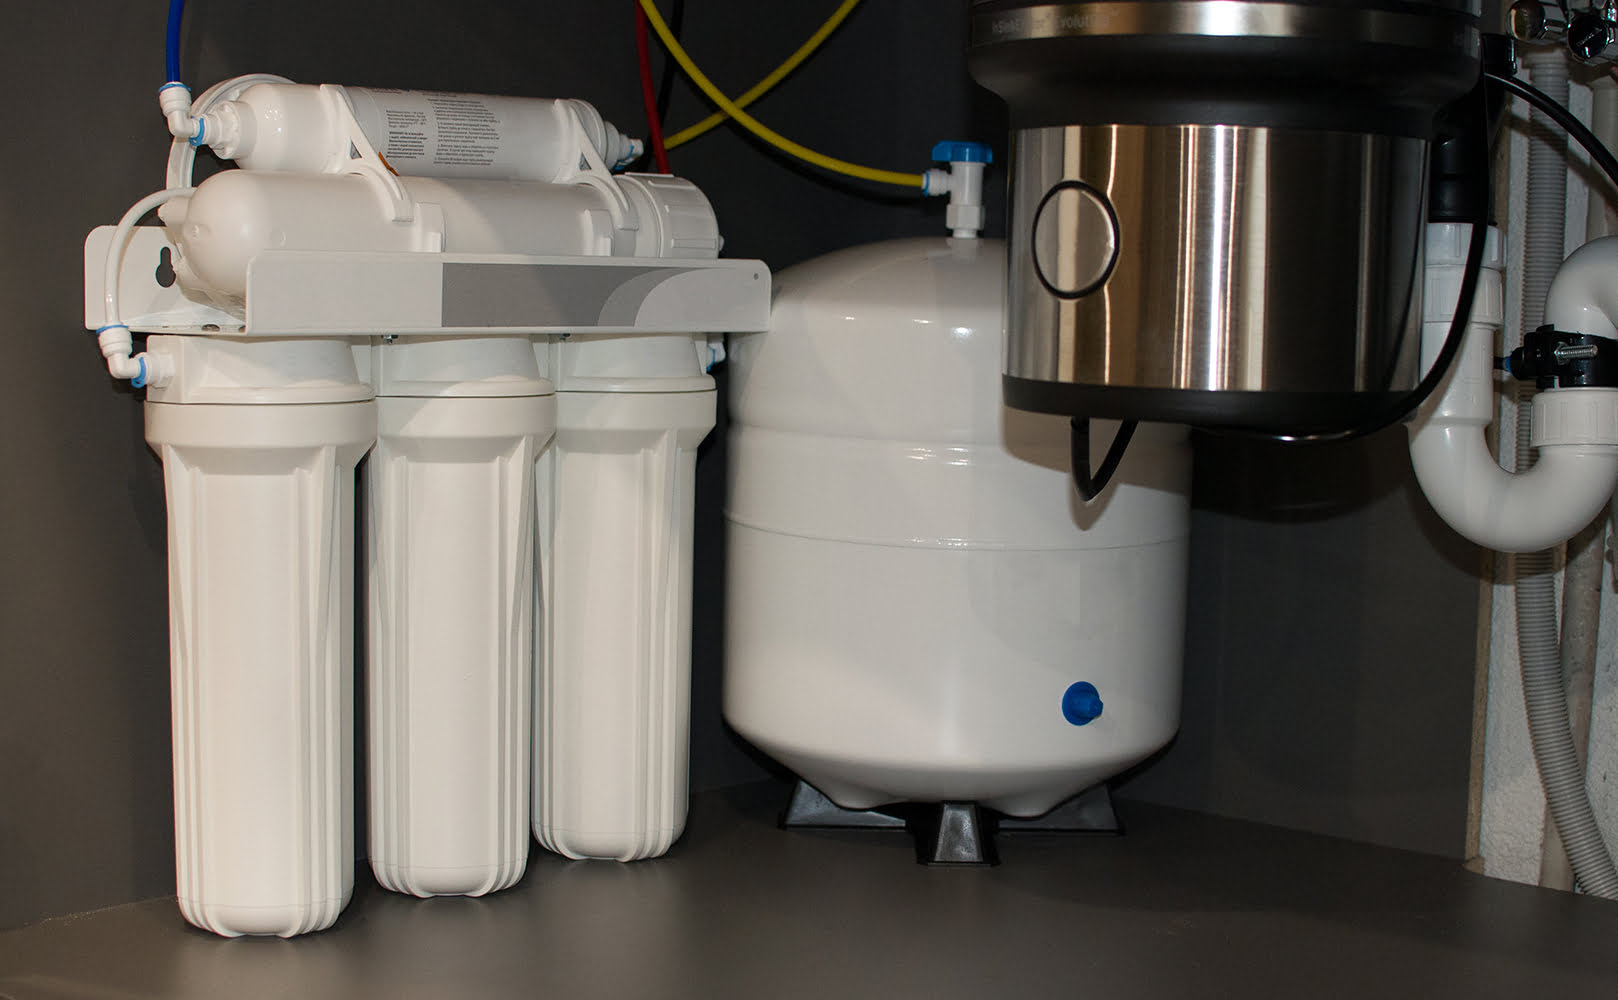
2. Air Trapped in the System
This is another issue that can pop up after changing filters. Essentially, the air gets trapped somewhere in the system, leading to a blockage known as an ‘airlock’.
If you think an airlock is the source of your problems, you’ll need to relieve the blockage. This can be done by closing the tank valve on top of the storage tank, opening the RO faucet, and then letting the water flow for a few minutes. Try tilting while you do this!
If that doesn’t work, you may need to partially disassemble the system. Turn off the feed water valve, and disconnect the tubing from the location of the suspected airlock.
3. Feed or Storage Tank Valve Shut Off
As RO systems have so many components, it’s easy to forget to turn the feed water or tank valve back on. When changing the filter(s) you’ll need to shut off the feed valve and possibly the tank valve.
Forgetting to turn these valves back on is easy to do, and will prevent water from flowing.
To solve this issue, turn the feed water or tank valve back to the ‘open’ position.
4. A Closed Leak Detector
Some RO systems have a built-in leak detector designed to shut off the system if a leak is detected.
This leak detector can sometimes trigger even if no significant leak is present. Spilling a little water during the filter changing process can trigger this valve, which will prevent any water from coming out of the faucet.
To fix this issue, you’ll need to locate it and replace the small absorbent pad inside it. The valve triggers when water contacts this tab, so you must insert a fresh tab into the leak detector to reset it.
5. You Installed a Bad Filter Element
This one is a bit less common than the other issues listed, but occasionally you’ll get a faulty or damaged filter element.
In this case, first test the troubleshooting steps outlined in this article. If that doesn’t solve your issue, remove the filter element in question, and run the system with the filter removed. If the system works normally, there is a high likelihood the filter element is faulty.
To solve this problem, you’ll need to purchase and install a new filter element to replace the faulty one.
6. You Installed a Filter or the RO Membrane Facing the Wrong Way
Most RO filters are designed to be installed facing a specific direction. If you install the filter backward, it will not work as intended and may block the water flow.
If you suspect this may be your issue, shut off the feed water valve, open the RO faucet, and remove the filter in question from its housing. Filters and membranes usually have directional arrows on them, so make sure the filter is installed with the directional arrows facing the correct way.

7. A Kink in the Tubing
A kink or bend in the tubing can lead to a blockage. This can prevent the system from functioning and stop water from flowing through the RO faucet.
Kinked or bent tubing typically occurs when the tubing section is longer than necessary. Excessively long tubing is prone to kinking, so you’ll want to ensure all the system’s tubing connections are the proper length.
If you locate a kink or bend that is blocking the flow, remove that section, and either cut it down to the right length or replace it with a new tubing segment.
Further Reading:
How Does a Reverse Osmosis System Work?
Reverse osmosis systems use water pressure to force-feed water through several filter stages, most importantly the RO membranes. The membrane is so fine that it removes heavy metals, microbes, salts, and even radioactive elements among other things.
Reverse osmosis works differently than other water filtration methods in that nothing is captured by the RO membrane. Instead, the membrane separates the water into two streams – one is contaminant-filled wastewater sent down the drain, while the other is filtered water sent on to the next filter stage.
Water pressure plays a key role in RO systems. As reverse osmosis pushes feed water through the membrane, it requires a certain level of pressure to operate correctly. If the pressure is too low, or there’s no pressure, the membrane will not work.
Reverse osmosis systems also include several pre and post-filters designed to remove specific contaminants that the membrane isn’t effective at removing or could damage it. Specifically, activated carbon and sediment pre-filters are used to remove chlorine/chloramine and sediment.
If you have any thoughts about the question, why is there no water after changing RO filters, please don’t hesitate to leave a comment below!
About the Author Alexandra Uta
![]()
![]()
![]()

Information provided on BOS is for educational purposes only. The products and services we review may not be right for your individual circumstances.
We adhere to strict editorial guidelines. Rest assured, the opinions expressed have not been provided, reviewed, or otherwise endorsed by our partners – they are unbiased, independent, and the author’s alone. Our licensed experts fact-check all content for accuracy. It is accurate as of the date posted and to the best of our knowledge.