RO Tank Maintenance – a Guide from A to Z
Written by: Gene Fitzgerald // Last Updated: Mar 14, 2023
This page may contain affiliate links. If you buy a product or service through such a link we earn a commission at no extra cost to you. Learn more.
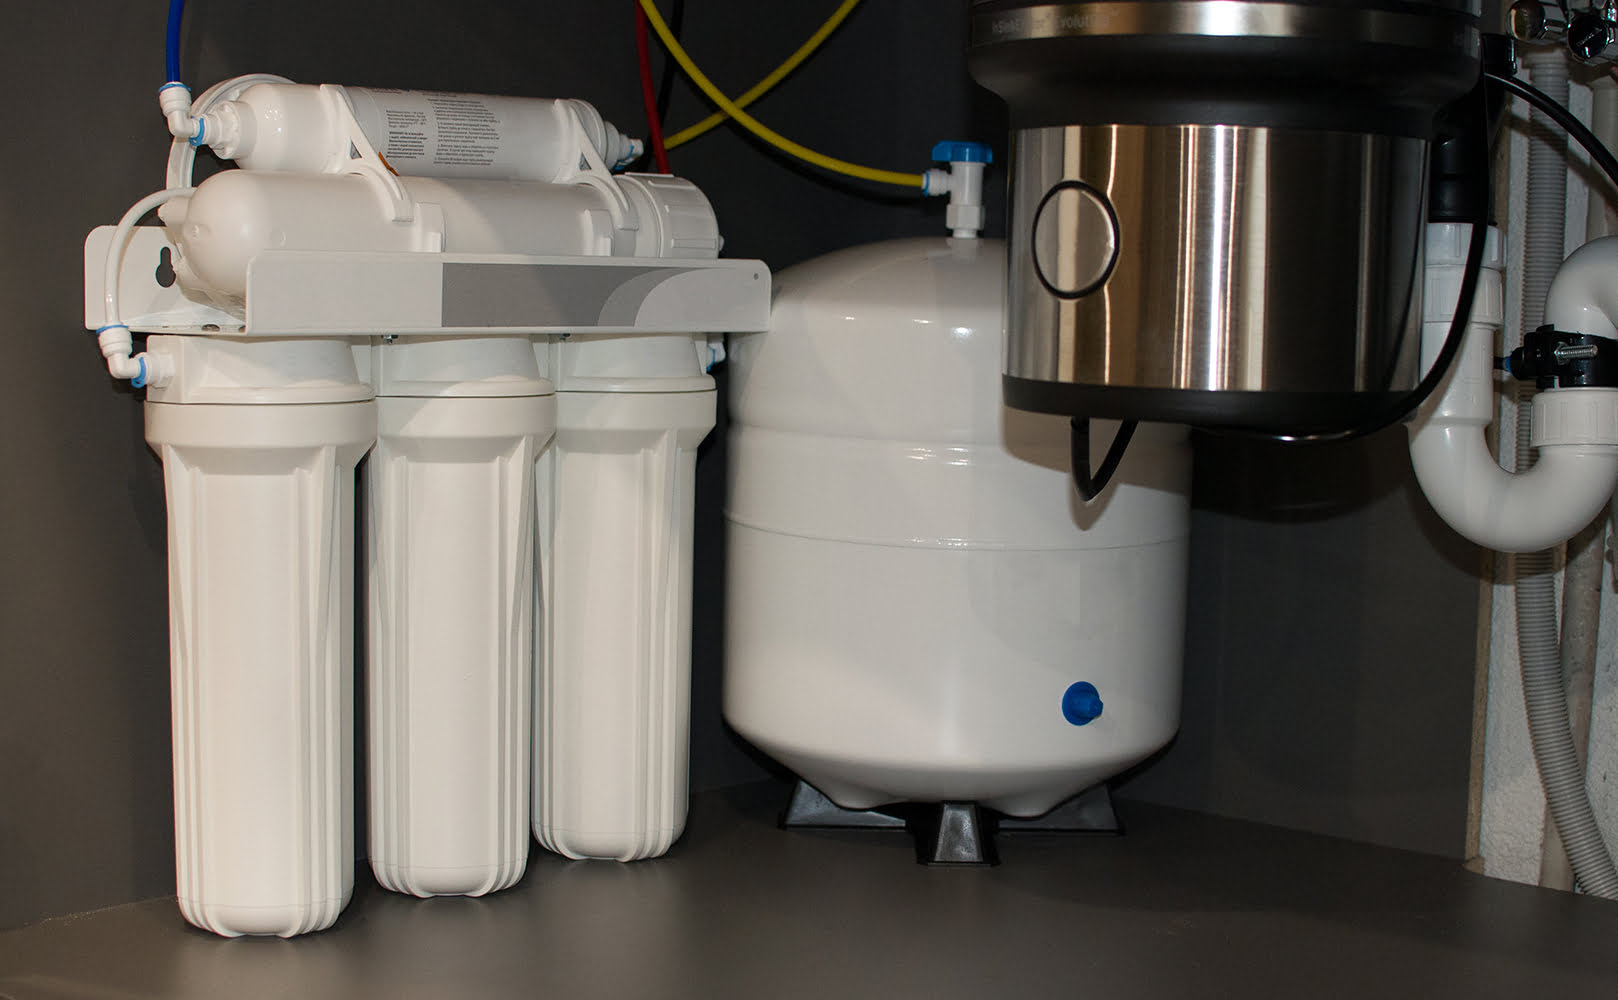
Reverse osmosis tanks are one of the most important components in any home RO system, so taking care of them is a must if you want to get the most out of your water filter.
These storage tanks are fairly simple when taken in the context of other RO components, but regular maintenance is still necessary to keep them clean and working properly.
Let’s take a detailed look at all aspects of RO tank maintenance, including cleaning/sanitizing, regular usage, and checking pressure/repressurizing as needed.
Contents
show
Key Takeaways
- RO tanks are an important component of any reverse osmosis system, so completing regular maintenance is vital to keep everything clean and working properly.
- There are three main aspects of RO tank maintenance: Cleaning and sanitizing, regular usage, and checking pressure/repressurizing if needed.
- Cleaning/sanitizing involves adding a small amount of cleaning chemical to the tank, allowing it to soak, and then flushing it out of the system. Regular use keeps the rubber bladder healthy and helps prevent biofilm accumulation. Checking pressure involves completely draining the tank and then using a pressure gauge to check the internal pressure. If it measures below 6 to 8 psi, the tank must be repressurized using a pump or compressor.
Important Aspects of RO Tank Maintenance
The main aspects of keeping your RO tank in working order are
- cleaning/sanitizing,
- regular usage,
- checking tank pressure,
- and repressurizing if needed.
Storage tanks are particularly prone to bacterial growth and biofilm accumulation, so they must be cleaned and sanitized periodically to eliminate potentially harmful microbial contamination. The cleaning and sanitizing process can be done as part of cleaning and sanitizing the entire system, or it can be done separately if you wish.
Regularly using the tank is important to keep the bladder working properly as well as help prevent biofilm accumulation. If you are using your RO system regularly, then this shouldn’t be an issue, however, if you only use it occasionally, then this is an important step to keep in mind.
Lastly, checking RO tank pressure and repressurizing it should it fall below the optimal range is key. RO tanks have a fairly narrow pressure range in which they work optimally, and if the pressure goes too low the system will operate slower than normal.
Sanitizing Your RO Tank
Cleaning and sanitizing an RO storage tank essentially means adding a small amount of cleaning chemical directly to the tank, allowing the tank to fill and soak, and flushing out the entire tank multiple times until any trace of the cleaning solution is gone.
As mentioned previously, this can be completed as part of cleaning/sanitizing the entire reverse osmosis system, but if you suspect your tank may have biofilm accumulation or it has a foul smell/taste then cleaning it separately makes sense.
To sanitize your RO tank:
- Turn off the feed water valve supplying water to the entire system.
- Open the RO faucet and drain any water remaining in the system and tank.
- Close the tank valve on top of the storage tank and then disconnect the tubing connection attached to the tank valve from the rest of the system.
- Using an eyedropper or small funnel add half a teaspoon of bleach (or another cleaner) to the tubing.
- Reconnect the section of tubing you removed and open the tank valve.
- Turn on the feed valve you closed in step 1.
- Allow the tank to fill complexly. This will take up to several hours.
- When the tank is full – you can lift it to check – allow your cleaning solution to soak for between 30 minutes and 2 hours.
- Lastly, open the RO faucet and allow the tank to drain completely. Then allow it to refill a second time and drain it once more. At this point the tank should be clean and free of any traces of cleaning chemicals, but if you still detect an odor repeat the process a third time.
Be aware that completing the above process with the post-filter still attached will damage it and it will need to be replaced. If you can bypass the post-filter and drain directly through the RO faucet, then do so.
Why Clean a Reverse Osmosis Tank
RO tanks are prone to the accumulation of biofilm, which is slime-containing bacteria and other harmful microbes. You want to avoid drinking this stuff, especially after shelling out significant money on an RO system.
How Often to Sanitize
Generally, RO tanks should be cleaned and sanitized every 6 to 12 months. This is the same interval that the RO system should be cleaned/sanitized so completing them at the same time is the norm.
A good way to remember to clean your tank is to complete the process every time you change the pre-filters, which also need to be changed every 6 to 12 months.
The exact interval that your system needs to be cleaned can differ somewhat depending on the specific model, so be sure to consult your product manual for specifics. Also, if your feed water is of particularly poor quality, then your tank (and system) will need to be cleaned more frequently.
Using Your Tank on a Regular Basis
While it might not be the first thing you think of when you consider RO tank maintenance, regularly using the system is important for tank longevity. This means filling and emptying the tank on a regular basis to keep the bladder in good shape.
Regular use of the tank stretches the bladder out which works like “exercise” to keep the bladder flexible and in good shape. It also helps prevent biofilm from accumulating in the tank.
Draining the Tank and Checking Pressure
Draining a reverse osmosis tank completely is needed for checking the internal pressure.
Generally, you only need to check the pressure if you encounter any signs that the tank might be low. The most obvious sign you’ll notice is the water coming out of your RO faucet is flowing slower than normal.
RO storage tanks generally need to be kept between 6 and 8 psi to function correctly. In order to check the pressure though, you are to drain the tank fully and then use a pressure gauge on the tank’s pressure valve.
To drain the tank:
- First, shut off the feed water valve to the RO system.
- Open the filtered water dispenser as long as water flows.
- Close the storage tank valve.
- Disconnect the storage tank from the rest of the system and take it somewhere where it can drain without making a mess.
- Open the tank valve and allow the water inside to drain out. It should start shooting out initially and then slow down to a trickle over time.
- When the water stops flowing, there is still some left in the tank than needs removing. This could be done by attaching a bicycle pump or air compressor to the pressure gauge and pumping out whatever is left.
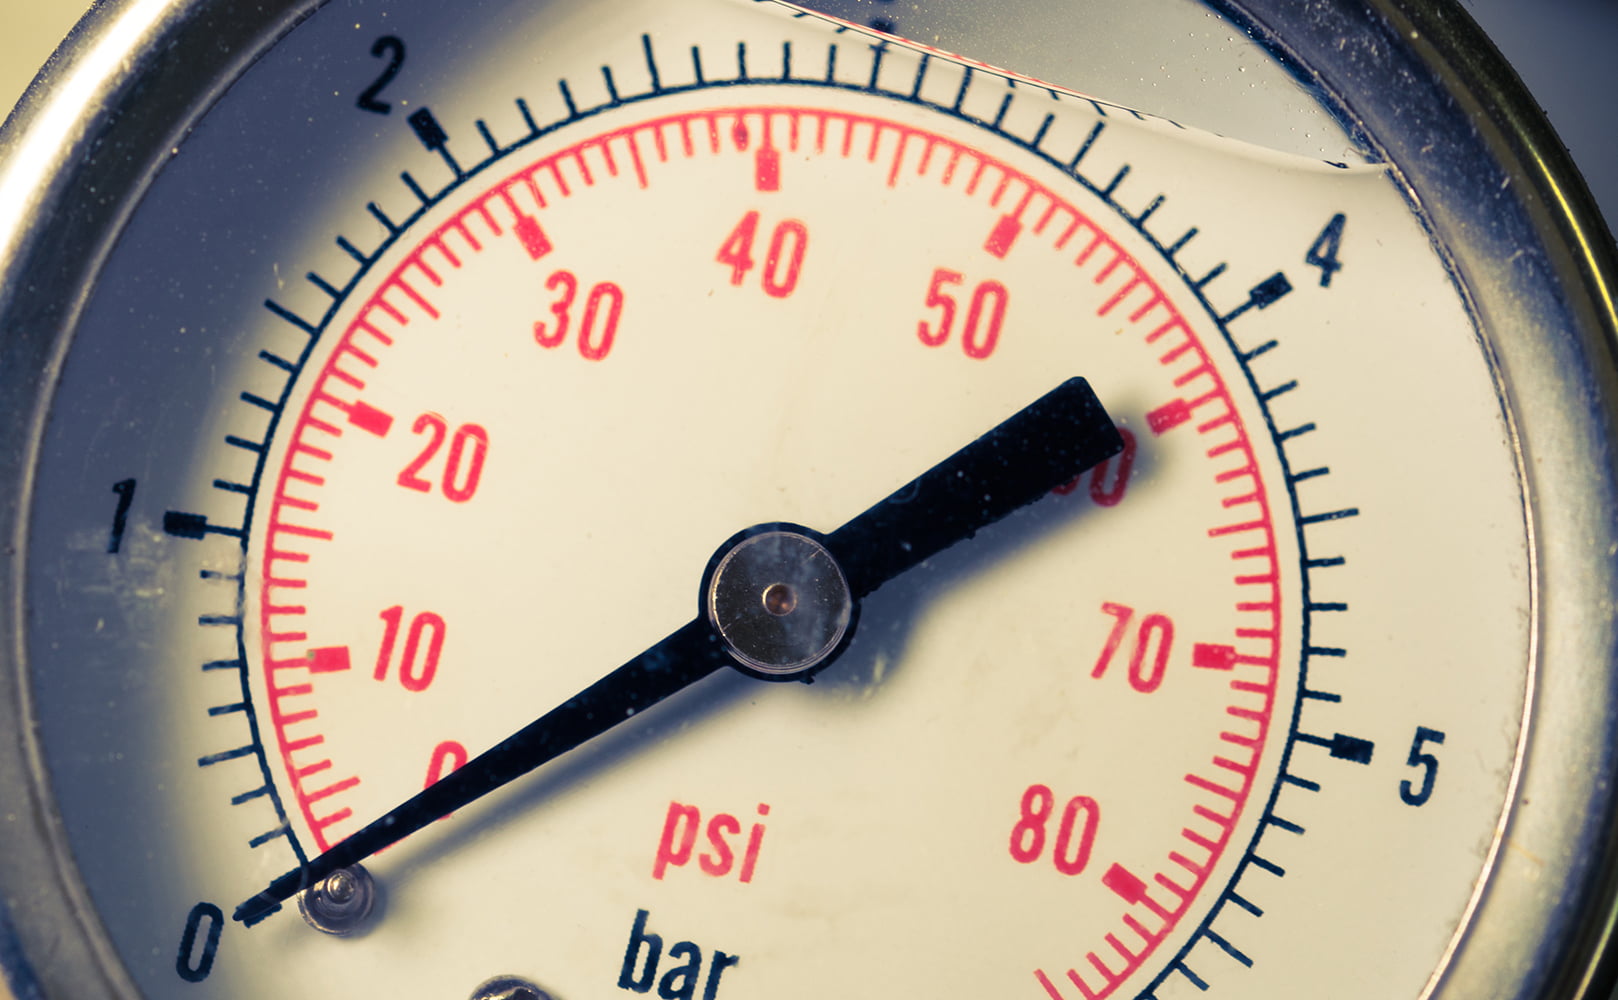
At this point the tank is empty and you can check the pressure using a pressure gauge on the valve. If the pressure is below 6 psi, then use the pump or air compressor to repressurize it to around 7 psi. Complete this process slowly and carefully to avoid damaging the rubber bladder.
Further Reading:
How Does a Reverse Osmosis Pressure Tank Work?
Reverse osmosis storage tanks are based on hydropneumatic pressure. This pressure is what enables the system to work without the need for a pump or electric motor.
RO tanks contain both an air chamber and a water chamber separated by a rubber bladder. As water enters the tank, the water chamber fills, which compresses the air in the chamber, increasing the pressure in the tank.
The pressure in the tank forces water when the faucet is opened. This is also why the RO faucet flow slows down significantly when the pressure inside the tank drops below the ideal range.
Another important function of the tank pressure is controlling the ASO (automatic shutoff valve). As water enters the tank the internal pressure increases until it reaches about 2/3 of the feed water pressure, at which point the ASO triggers and shuts off the system so it stops processing water. The ASO is key for efficient system function, as otherwise the system would continuously filter water and dump it down the drain.
If you have any questions about reverse osmosis tank maintenance please don’t hesitate to leave a comment below!
About the Author Gene Fitzgerald
![]()
![]()
![]()
![]()
![]()
![]()
![]()

Information provided on BOS is for educational purposes only. The products and services we review may not be right for your individual circumstances.
We adhere to strict editorial guidelines. Rest assured, the opinions expressed have not been provided, reviewed, or otherwise endorsed by our partners – they are unbiased, independent, and the author’s alone. Our licensed experts fact-check all content for accuracy. It is accurate as of the date posted and to the best of our knowledge.