Whole House Reverse Osmosis System Diagram | BOS
Written by: Alexandra Uta // Last Updated: Aug 15, 2023
This page may contain affiliate links. If you buy a product or service through such a link we earn a commission at no extra cost to you. Learn more.
Looking at a whole house reverse osmosis system can be pretty daunting, and there are so many components that are important to understand.
We have created a cheat sheet to help you make sense of your whole house reverse osmosis system and hopefully make it a little less intimidating!
Let me introduce our whole house reverse osmosis system diagram!
Contents
show
Whole House Reverse Osmosis System Diagram
Our whole house reverse osmosis system diagram should help you understand the function of all the components and how they work together to bring clean and pure RO water to your entire household.
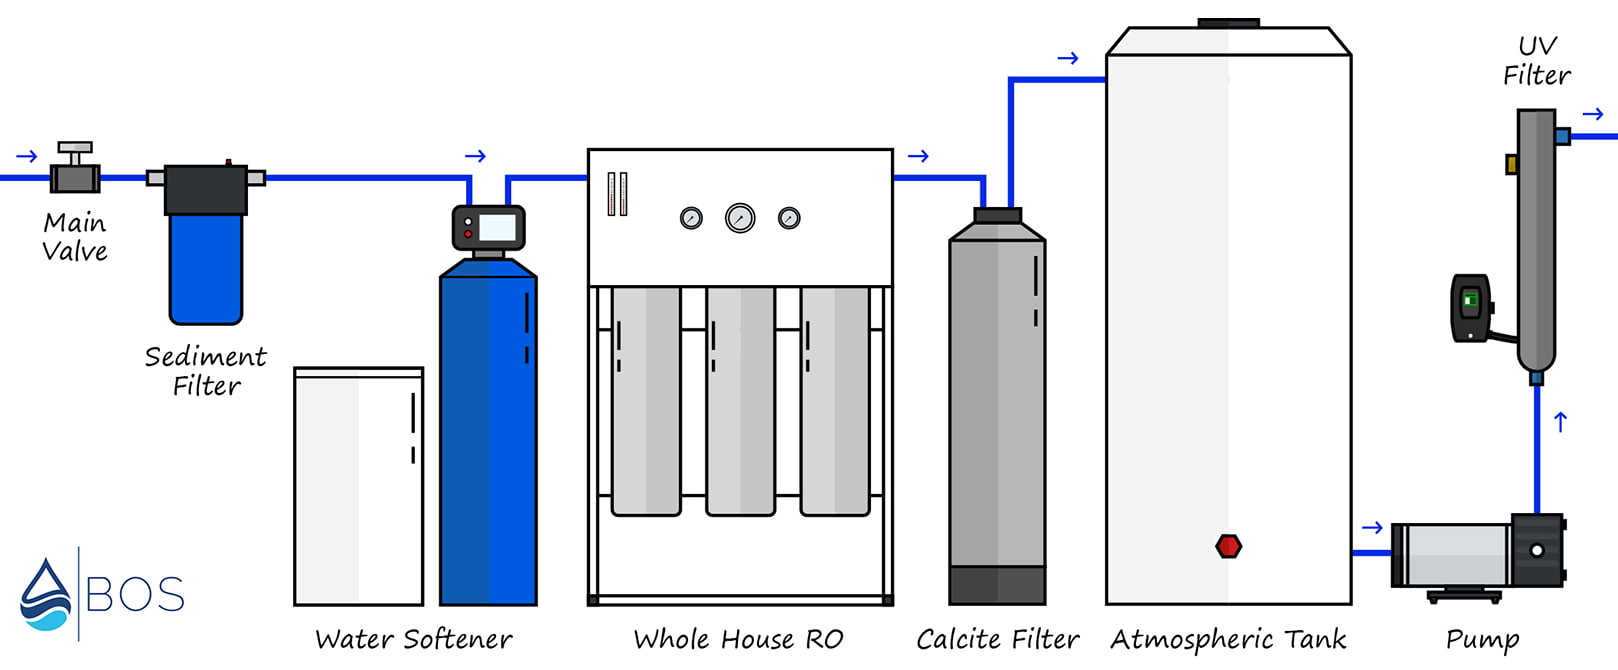
Whole House Reverse Osmosis System Components and How They Work
A whole house reverse osmosis system differs from a point-of-use system as it begins the filtration process at the entry point of your entire home’s water supply. This means you are not restricted to RO water coming from just one faucet but from all of them, including your shower and washing machine.
A whole house RO system works by sending your feed water through various filters, including the semipermeable reverse osmosis membrane. This membrane is the primary filter component and removes the most contaminants from your water, allowing almost only small H2O molecules through, not larger particles.
Whole house RO usually has several other stages: Pre and post-filtration. Your system may differ slightly depending on which pre and post-filters you have, as your feed water may need different things depending on which contaminants it contains.
The general setup would be one or more pre-filters, including a sediment filter and possibly a chlorine filter, the RO membrane, then post-treatment to remineralize the water and balance the pH or a UV purifying step to kill any potential pathogens in the water. If you have hard water, you should also consider having a water softener installed before the RO.
Feed Water Valve
The feed water valve is the component that connects your whole house RO system to the household plumbing and through which your source water passes through to access said system.
Sediment Pre-Filter
Sediment pre-filtration is the first step, and this will remove any debris and particles, ensuring that they do not get to your RO membrane and clog or damage it.
Water Softener
A water softener will remove hard water minerals. These minerals can increase the burden of the RO membrane and lead to it needing more frequent replacements.
RO Membrane(s)
This is the primary filtration component of the reverse osmosis system. It is located in a long tube, called pressure vessels, and all filtered water will pass through this after the pre-filtration steps. For households with a high water output, there may be more than one membrane used in parallel.
Recirculation Valve
This helps with wastewater reduction. Some of the wastewater that leaves the RO membrane is recirculated back for another round of purification.
Wastewater Vale
The wastewater valve channels the wastewater (brine) for disposal. It makes sure that not too much water goes down the drain.
pH Neutralizer
The pH neutralizer is a post-filtration step, usually a calcite filter, that adds calcium carbonate back into the water to balance the pH. This is important to avoid corrosion of your pipes and plumbing, as RO water tends to be on the acidic side.
Further Reading:
RO Storage Tank
After the water has passed through the whole house RO filter system, it will move to the storage tank. These must be large enough to supply the entire home with enough water. They can be slow to fill, and once the water reaches a certain level, a switch will trigger, and it will stop the system filtering any more water so that it doesn’t overflow. It will flick back on once you start to use the water in the storage tank.
Pressure Pump
A delivery pump will be activated to pressurize the water to move to your household plumbing. There may be multiple pumps throughout your system.
UV Water Purifier
This is used for the disinfection of the RO water. It is possible that RO tank water could become contaminated with bacteria as it sits, so this ensures those pathogens are neutralized right before your RO water is used.
Electronic Control Panel
This controls the system from a centralized location and allows you to regulate incoming water pressure and set the level at which the tank should trigger the system off switch. Depending on your system, there may be various other controls on your panel.
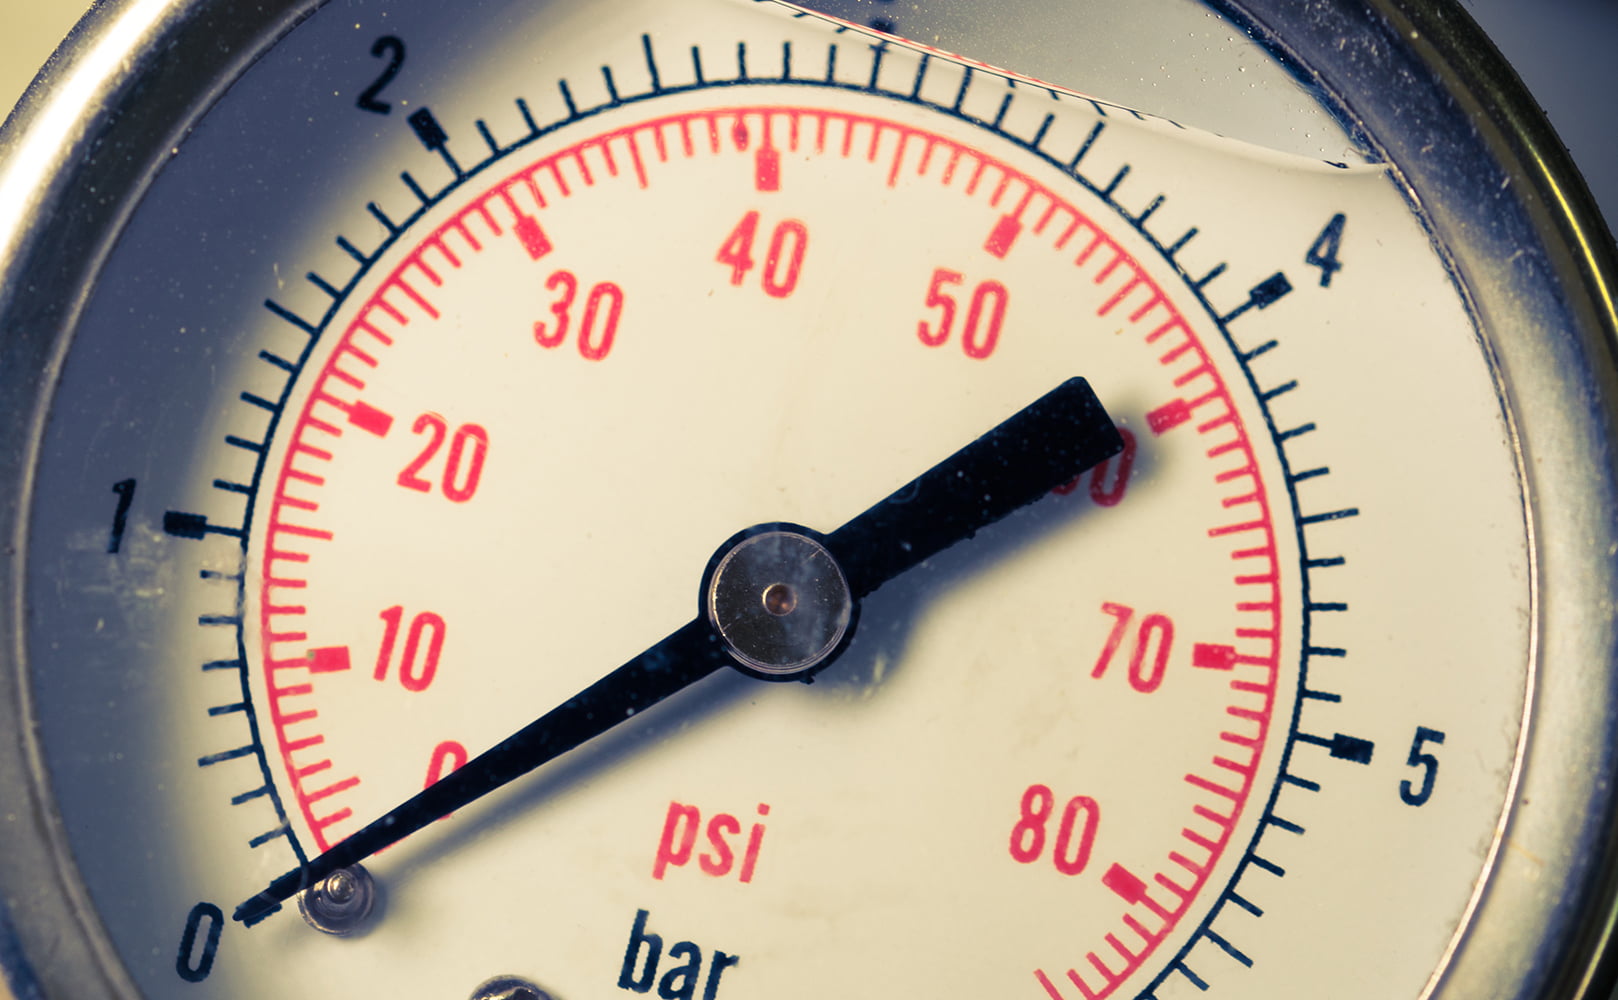
Pressure Gauges
These allow monitoring of the pressure level in various areas of your system.
Flow Meters
Flow meters monitor your water flow rate. This is important for the system to function optimally.
Low Pressure Switch
The low pressure switch shuts off the system if there’s low feed water pressure.
If you have any questions about our whole house reverse osmosis system diagram please don’t hesitate to leave a comment below!
About the Author Alexandra Uta
![]()
![]()
![]()

Information provided on BOS is for educational purposes only. The products and services we review may not be right for your individual circumstances.
We adhere to strict editorial guidelines. Rest assured, the opinions expressed have not been provided, reviewed, or otherwise endorsed by our partners – they are unbiased, independent, and the author’s alone. Our licensed experts fact-check all content for accuracy. It is accurate as of the date posted and to the best of our knowledge.